![]()
CGM webSCAN is designed to help you quickly scan and save patient Drivers Licenses and Insurance Carrier cards to eliminate manual data entry. With special recognition software, CGM webSCAN extracts biographical information from the cards, allowing seamless import for the auto-population of the relevant fields on patient accounts.
The first step to start using CGM webSCAN is to contact your Account Manager to start the activation process and complete the CGM webSCAN Client Setup Packet. After CGM webSCAN has been activated, follow the CGM webSCAN Workstation Installation Instructions provided by your Account Manager and then you can start using CGM webSCAN.
Available Card Types
You can scan Drivers Licenses and Insurance Carrier cards using CGM webSCAN. The steps required for scanning are the same for both types of cards. You can scan the cards from within Patient Registration or Change Patient Data.
You can scan Drivers Licenses from the Patient Name and Address screen or the Guarantor screen and insurance cards from the Primary or Secondary Insurance screens or from within the Insurance Action Column function.
How to Scan a Card
The following example is for scanning a patient's drivers license but the steps are the same for scanning insurance cards.
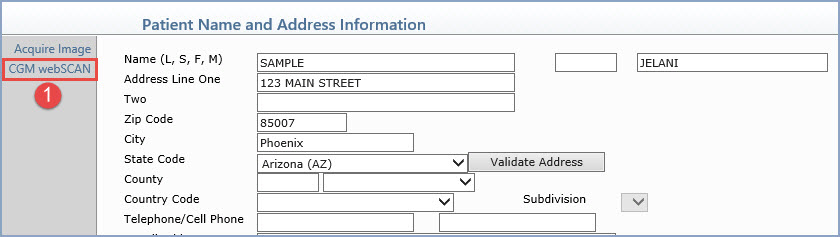
1. After you have accessed Patient Registration or the Patient Name and Address screen in Change Patient Data, click CGM webSCAN in the Action Column.
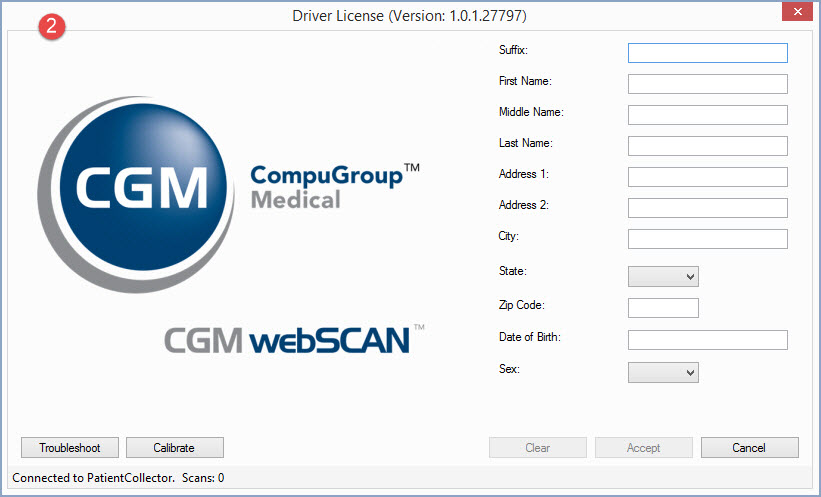
2. After the CGM webSCAN window displays, insert the drivers license into the scanner.
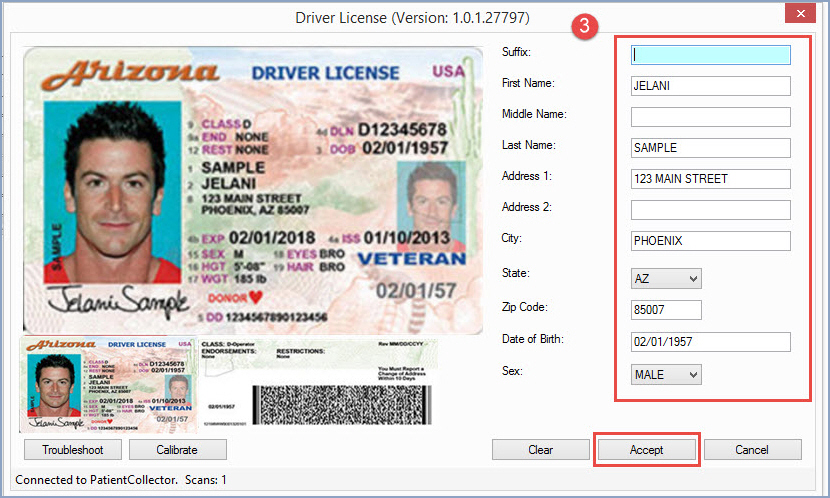
3. When scanning is complete, the images will display and the information will be extracted to auto-populate the data fields. Confirm the data is current and click Accept.
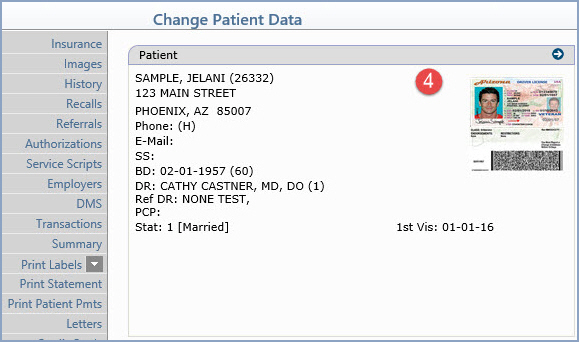
4. The images will not display on the Patient Name and Address screen until you click Save and the Patient Summary screen re-displays; then you will see the images in the Patient Name and Address box.
Copyright and Trademark Notice. Copyright © 2019 CompuGroup Medical, Inc. CGM®, CompuGroup Medical® and the CGM logo are registered trademarks and CGM webPRACTICE™ and CGM webTOOLS™ are trademarks of CompuGroup Medical AG in the United States and/or other countries. Any rights not expressly granted herein are reserved.
