| Prompt | Response | Req | Len |
|---|---|---|---|
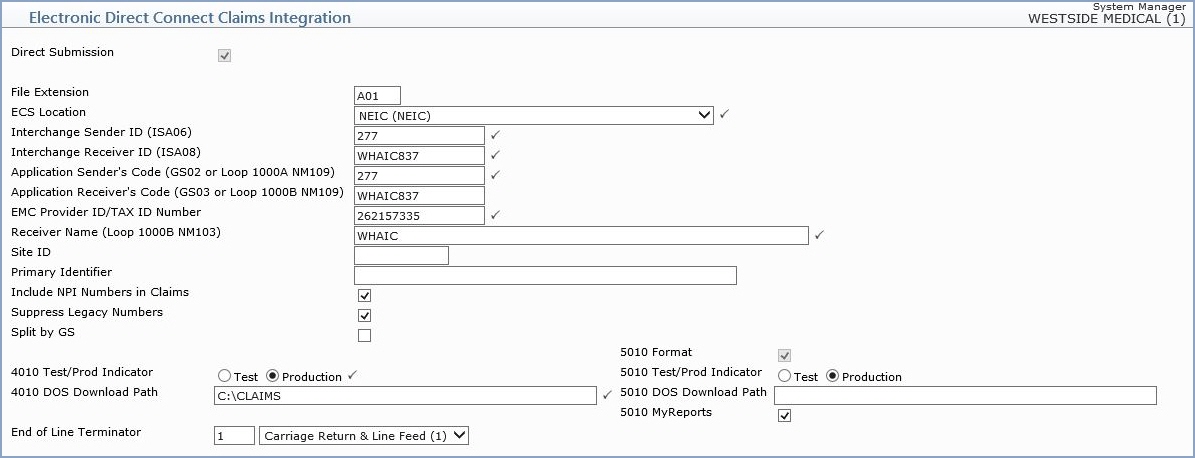
| Direct Submission | If you are sending these claims directly to the payer rather than via the eMEDIX, select this check box. | 1 | |
| File Extension | Type the File Extension, which is generally a letter followed by the database number. | 3 | |
| ECS Location | Select the location code that this type of claim is sent to from the Location Code list. |  |
4 |
| Interchange Sender ID (ISA06) | Type the Interchange Sender ID number. | |
15 |
| Interchange Receiver ID (ISA08) | Type the Interchange Receiver ID Number. | |
15 |
| Application Sender's Code (GS02 or Loop 1000A NM109) | Type the Application Sender's code. | |
15 |
| Application Receiver's Code (GS03 or Loop 1000B NM109) | Type the Application Receiver's code. | 15 | |
| EMC Provider ID/TAX ID Number | Type the unique number assigned to the provider for Electronic Medical Claims (EMC) identification purposes. | |
15 |
| Receiver Name (Loop 1000B NM103) | Type the name of the entity (insurance carrier/administrator) who will receive these claims files. | |
60 |
| Site ID | Type the Site ID. | 10 | |
| Primary Identifier | If filled in, this will be sent in Loop 1000B, Segment NM109 of the 5010 electronic claim file which is populated by the Receiver Code. | 80 | |
| Include NPI Numbers in Claims | If you want the NPI numbers from your tables to be included in the electronic claims, select this check box. | 1 | |
| Suppress Legacy Numbers | If you want to suppress all legacy numbers from being included in the electronic claims, select this check box. | 1 | |
| Split by GS | Enter 'Y' to generate separate file per submitter (for direct sends only). | 1 | |
| 4010 Test/Prod Indicator | Select the appropriate option to indicate whether the submission of claims is in the Test phase or is in Production. | |
4 |
| 4010 DOS Download Path | Type the DOS path that the claims files will be downloaded to. | |
50 |
| End of Line Terminator | Select the end-of-line terminator to be used in the generated claim file (for example, Carriage Return & Line Feed). | 1 | |
| 5010 Format | If claims are to be sent in 5010 format, select this check box. | 1 | |
| 5010 Test/Prod Indicator | Select the appropriate option to indicate whether the submission of claims is in the Test phase or is in Production. | 1 | |
| 5010 DOS Download Path | Self-Hosted Clients Only - To download your 5010 claims to a folder on your server, type the full path to the server location to output your claims to—for example, C:\FolderName. |
50 | |
| 5010 MyReports | If you want the 5010 claims report sent
to MyReports, select this check box.
Hosted Clients - This is the required method to use. |
1 |
Copyright and Trademark Notice. Copyright © 2019 CompuGroup Medical, Inc. CGM®, CompuGroup Medical® and the CGM logo are registered trademarks and CGM webPRACTICE™ and CGM webTOOLS™ are trademarks of CompuGroup Medical AG in the United States and/or other countries. Any rights not expressly granted herein are reserved.