![]()
| Prompt | Response | Req | Len |
|---|---|---|---|
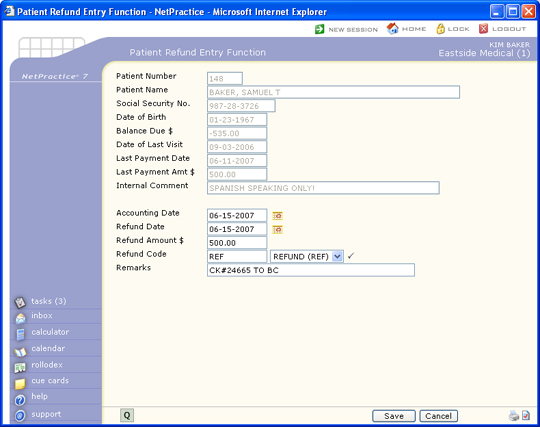
| Social Security No. | 12 | ||
| Date of Birth | 10 | ||
| Balance Due $ | 10 | ||
| Date of Last Visit | 10 | ||
| Last Payment Date | 10 | ||
| Last Payment Amt $ | 10 | ||
| Internal Comment | 45 | ||
| Accounting Date | 10 | ||
| Refund Date | 10 | ||
| Refund Amount $ | Enter the Amount of the Credit or 'Q' to Quit | 10 | |
| Refund Code | Enter a Refund Code from the Adjustment Code Table or HELP for a List |  |
10 |
| Remarks | Enter An Optional Comment | 40 |
Copyright and Trademark Notice. Copyright © 2019 CompuGroup Medical, Inc. CGM®, CompuGroup Medical® and the CGM logo are registered trademarks and CGM webPRACTICE™ and CGM webTOOLS™ are trademarks of CompuGroup Medical AG in the United States and/or other countries. Any rights not expressly granted herein are reserved.
