DYMO Label Setup Process
If you use DYMO Label Printers, you can create your label design in the
DYMO software and import the label into CGM webPRACTICE for precise control
and ease of printing.
NOTE: You must be using version 8.0 of the DYMO software to
create and import your labels. CGM US does not support DYMO software and
the screen shots provided in this section may look different from yours
depending on which version of the software you are using.
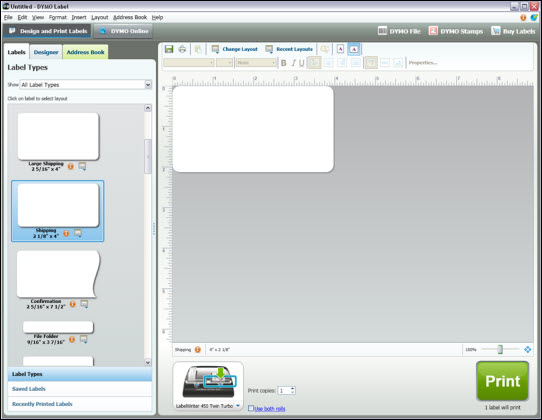
Step 1: Label Selection
From within the DYMO software (version 8.0), in the Design and Print
Labels function, click the Labels tab. Select All Label
Types in the Show field and click the label you want to design.
The label displays in the right layout pane.
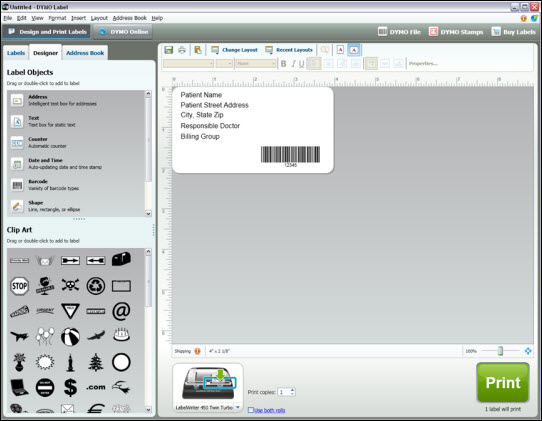
Step 2: Label Design
After you have selected the label, click the Designer tab. Select
the label objects - only the Address, Text, Barcode,
Shape and Image objects are supported. You can also select
Clip Art to include on the label.
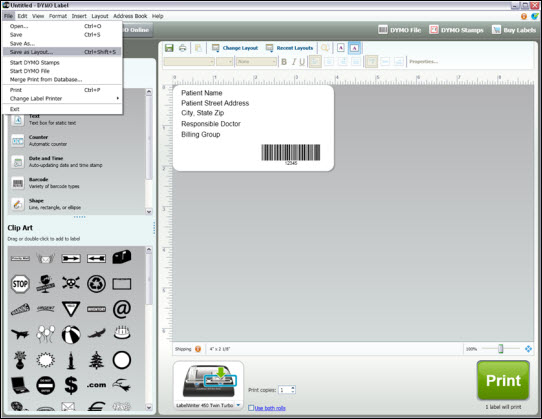
Step 3: Save as Layout
After you have finished designing your label, click File and select
Save as Layout. Save the label on your computer so you can easily
find it when you are ready to import it.
For information on how to import and print your labels, see Maintain
DYMO Labels.
