![]()
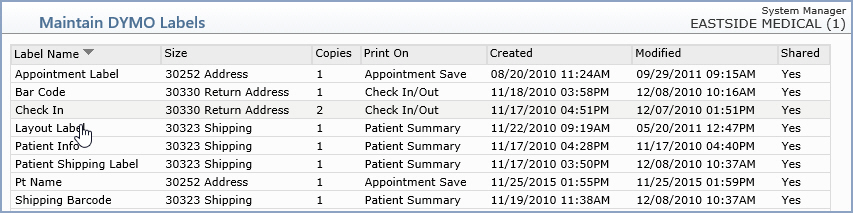
| Prompt | Response | Req | Len |
|---|---|---|---|
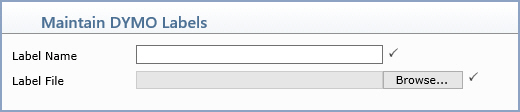
| Label Name | Type a name for this label. |
|
|
| Label File | Click Browse to navigate to the folder on your computer that contains the label you created in the DYMO software. The selected file path/name appears in the field. |
|
| Prompt | Response | Req | Len |
|---|---|---|---|
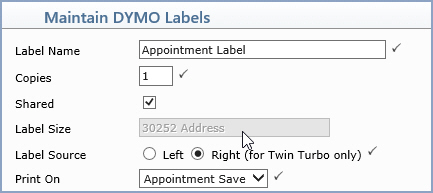
| Label Name | Displays the label name that you entered when you imported the label. You can edit this field as needed. |  |
|
| Copies | Type the number of copies of the label to be printed. |
|
|
| Shared | If you want to share this label among every Database, select this check box. | ||
| Label Size | Displays the label size and type selected in the DYMO software. | ||
| Label Source | If you are using a DYMO Twin Turbo label printer, select which side of the printer that you want this label to print from. Otherwise, the Left option button will be selected. |
|
|
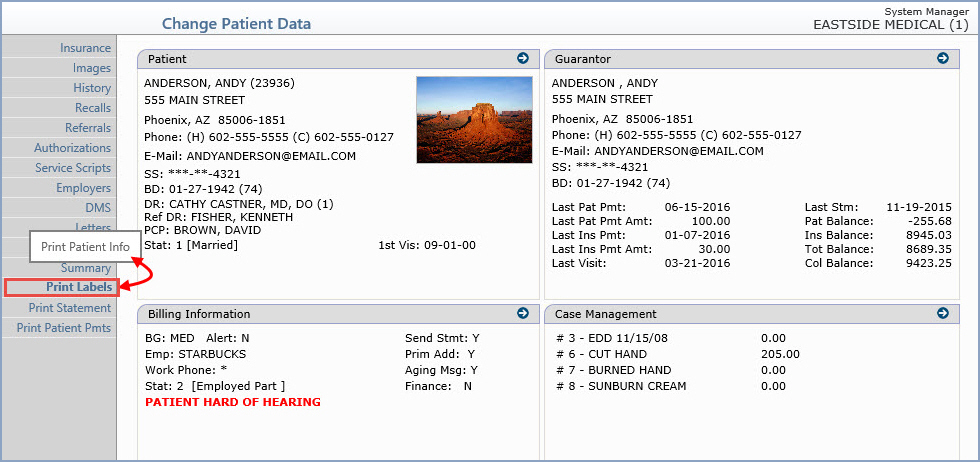
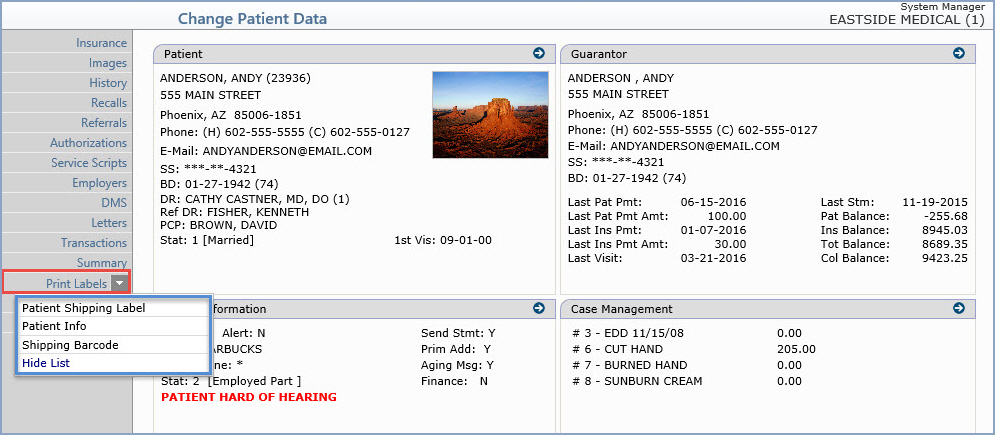
| Print On | Select the function you want to be able
to print the label from. A Print
Labels Action Column button will appear as listed below:
|
|
Copyright and Trademark Notice. Copyright © 2019 CompuGroup Medical, Inc. CGM®, CompuGroup Medical® and the CGM logo are registered trademarks and CGM webPRACTICE™ and CGM webTOOLS™ are trademarks of CompuGroup Medical AG in the United States and/or other countries. Any rights not expressly granted herein are reserved.
