Maintain Roll Up Groups
With the Maintain Roll Up Groups function, you can select the
Doctor, Insurance Carrier, and Location codes that will determine which
procedures are required to be rolled up. Select the Roll Up Group Code
you want from the Roll Up Group Code list.

Group Code Summary Screen
If there are any previously stored codes for the selected group, the
Group Code Summary screen lists them. The Insurance Code
and Carrier Name display in the first two columns. The Doctor
Code and Doctor Name display in the third and fourth columns,
and the Location Code and Location Name display in the
last two columns.

You can edit, delete, or review the Doctor, Insurance Carrier, and Location
codes for the Roll Up Group Code using the functions provided in the
Action Column. These functions do not have to be accessed in any particular
order.
Action Column Functions
Maintain Doctors – Opens a screen listing the Doctor codes
currently in the Roll Up Group. From this screen you can add or remove
Doctor codes for the group.
Maintain Carriers – Opens a screen listing the Insurance
Carrier codes currently in the Roll Up Group. From this screen you can
add or remove Carrier codes for the group.
Maintain Locations – Opens a screen listing the Location
codes currently in the Roll Up Group. From this screen you can add or
remove Location codes for the group.
Since the same general process is used for maintaining Doctors, Carriers,
and Locations, only one example is provided below to demonstrate the
Action Column functions on each of these screens.
Maintain Doctors Screen
After clicking Maintain Doctors, the screen refreshes and lists
any previously stored codes for the group. You can add or remove codes
using the functions in the Action Column.

Maintain Doctors Action Column Functions
Add Doctor – Click to add a single Doctor code to the group.
Add All Doctors – Click to add all Doctor codes from your
database to the group.
Remove All Doctors – Click to remove all Doctor codes from
the group.
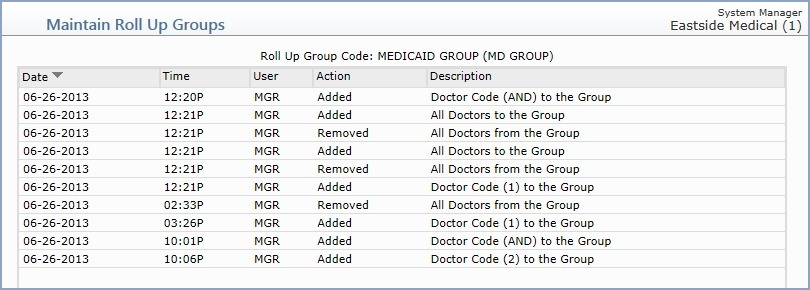
History – Click to display an audit trail showing the date
and time codes were added or removed, the user who performed the action,
and a description of which codes were added or removed.
After you have saved the necessary codes, click Cancel to return
to the Group Code Summary screen.
Saving the Group
After you have selected and stored all of the required Doctor, Carrier,
and Location codes for your practice on the Group Code Summary
screen, click Proceed.
NOTE: After completing this function, you must complete the Medicaid
Roll Up Integration or Medicare Roll Up Integration settings
(or both) depending on your practice's needs.
Related Topics