


Charge Import Utility

The Charge Import Utility is an optional add-on function that may be purchased. It is used to upload and process data files containing patient and procedure information and import the data into the Unposted Procedures function. The data files must adhere to the File Specifications provided.

Pre-requisites
Overview
The following outlines the process to upload and import files:
Copy Data Files to the Workstation
Copy the comma-separated data file(s) to the folder on the workstation. For example, C:\ImportCharges. Each filename should be unique and must adhere to the File Specifications provided.

The Charge Import Utility function is located on the Transactions menu. Upon accessing the function, a listing of any files that have already been uploaded but not yet imported displays. The Filename, Data Source, and Date Created are listed for each file.


Set a Default Data Source
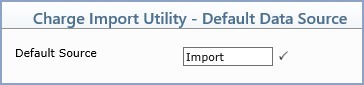
The Data Source is used in Unposted Procedures to identify the original source of the procedures. It is automatically set to File, but you can change it by clicking the Default Source Action Column button to enter a new Default Source to be stored for all future files. You also have the option to change the data source for individual files prior to importing them, if needed.


Upload Files
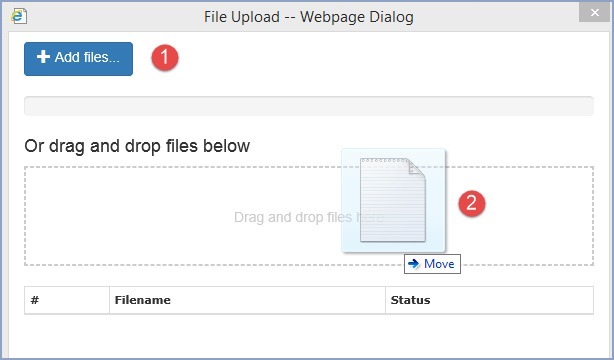
Click the Upload Files Action Column button to upload the data file(s). When the File Upload dialog box displays, you have two options:
  1. Click Add files, navigate to the folder where the file(s) is stored, select the file(s) you want, and click Open.
  2. Open Windows Explorer, navigate to the folder where the file(s) is stored, select the file(s) you want, then drag and drop the selected file(s) onto the File Upload dialog box.


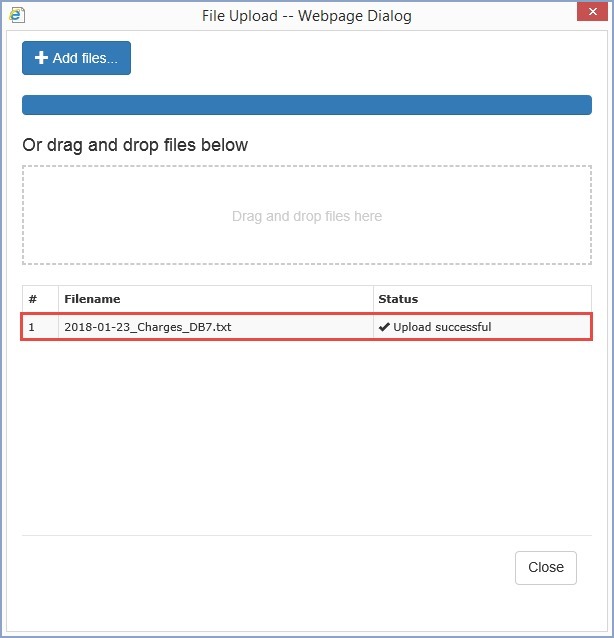
Check the file upload Status in the bottom portion of the File Upload dialog box to confirm the file(s) successfully uploaded. Click Close to return to the Charge Import Utility screen.


Check File Integrity
The data integrity of each file must be checked to ensure it adheres to the defined File Specifications after you have uploaded it. Click in the File row to select the file you want to process. The data in the file is checked and the results display, including the Status of the file, Data Source, and the number of Records included in the file.


There are three different Status settings possible:
Resolve any Errors or Warnings
When a file contains errors, you must delete the file, correct the errors, and upload the corrected file. When a file contains warnings, you have the option to delete the file and correct the data prior to importing the charges, or you can proceed with importing and correct the data prior to posting the charges to the patient's account.

After you select a file and the data integrity has been checked, detailed information for the errors or warnings is provided to assist you in correcting the data. The Record and Field numbers are listed in addition to the Value contained in the Field. An Error or Warning message identifies the problem with the data. For easy reference when you are correcting the errors, you can print the detailed information using the Print Action Column button.


NOTE: The Import Charges Action Column button is not available until the file no longer contains errors.

Import File(s)
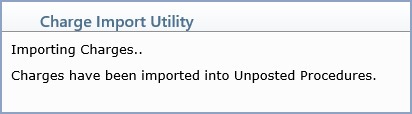
If the file Status is Clean, you can proceed with importing the charges. If the file Status is Import with Warnings, you can still import it and correct the data prior to posting the procedures, or you can Delete the file, correct the data errors within the data file, and then Upload the corrected file. To import a file, click the Import Charges Action Column button. After the charges have been imported, the following displays:


You can access Unposted Procedures to view and post the imported charges. The Source displays the value you entered when you set the Default Source.


History
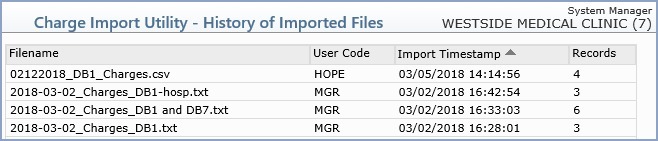
After a file has been imported, basic file information is stored and can be accessed using the History Action Column button. Upon accessing the History function, a listing of every file that has been imported displays. The Filename, User Code, Import Timestamp, and the number of Records imported are listed for each file.


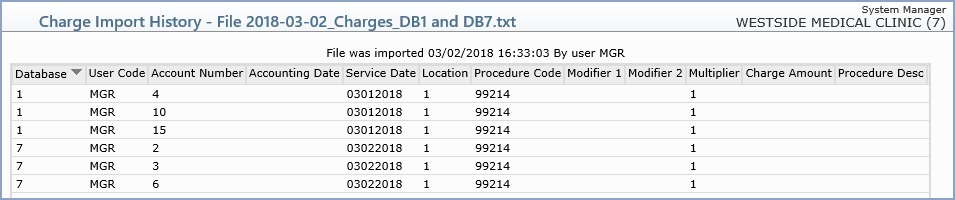
You can view the individual Records contained in each file and the values stored in each field by clicking anywhere in the File row to select the file. Each Record contained in the file displays, and every field contained in the File Specifications is listed for each record. The fields are listed in the same order as they appear in the File Specifications, starting from the left side of the screen. When you are done reviewing the data, click Proceed to return to the History screen.


File Specifications
Each data file must be a comma-separated file (.csv or .txt) with no column or row headings, with commas present between each piece of data (including for empty columns), and must conform to the field layout below. The file can contain records for multiple databases.

Field Description Required Notes
A Database   If not specified, the Database the User is logged in to when Uploading the file will be inserted. Records for multiple Databases can be included in a single file.
B User Code   If not specified, inserts the User Code for the current User performing the Upload.
C Patient Account # Y Must be a registered Patient Account Number within CGM webPRACTICE.
D Accounting Date   Reserved field — leave blank. The current date will be inserted.
E Service Date Y MM-DD-YYYY or MMDDYYYY or MM/DD/YYYY. If the date provided is more than 90 days old, a warning will be provided after the file integrity has been checked.
F Location   See note (a).
G Procedure Code Y See note (a).
H Modifiers 1 & 2   #### (two to four numeric characters only).
I Modifiers 3 & 4   #### (two to four numeric characters only).
J Multiplier   # (one numeric character only).
K Charge Amount   See note (b).
L Procedure Description   If not specified, inserts the Short Description from the Procedure Code Table.
M Performing Doctor Y See note (a).
N Referring Doctor   See note (a).
O Insurance Doctor   See note (a).
P ICD-10 Code 1 Y See note (a).
Q ICD-10 Code 2    
R ICD-10 Code 3    
S ICD-10 Code 4    
T ICD-10 Code 5    
U ICD-10 Code 6    
V ICD-10 Code 7    
W ICD-10 Code 8    
X Date of Onset   MM-DD-YYYY or MMDDYYYY or MM/DD/YYYY.
Y Superbill Number   If included and it is not a defined superbill number in CGM webPRACTICE, a warning will be provided after the file integrity has been checked.
Z Accept Assignment   Y, N, or leave blank. If left blank, the value will be set based on the current Accept Assignment Protocols in CGM webPRACTICE.
AA Department Code    

Notes