Viewing and Selecting Transactions or Encounters
Upon accessing the Edit an Encounter
function, you must first select the patient account that contains the
transaction(s) you want to edit. If you try to access a patient's account
and it is already in use, CGM webPRACTICE displays the message Patient
file in use...Try again later. This prevents workstations from locking
up while they wait for the patient's account to become available.
After selecting the patient account, the patient's transaction history
displays. For details on the information provided on the Encounter View
screen and the Action Column Buttons, see the Change
Patient Data function.
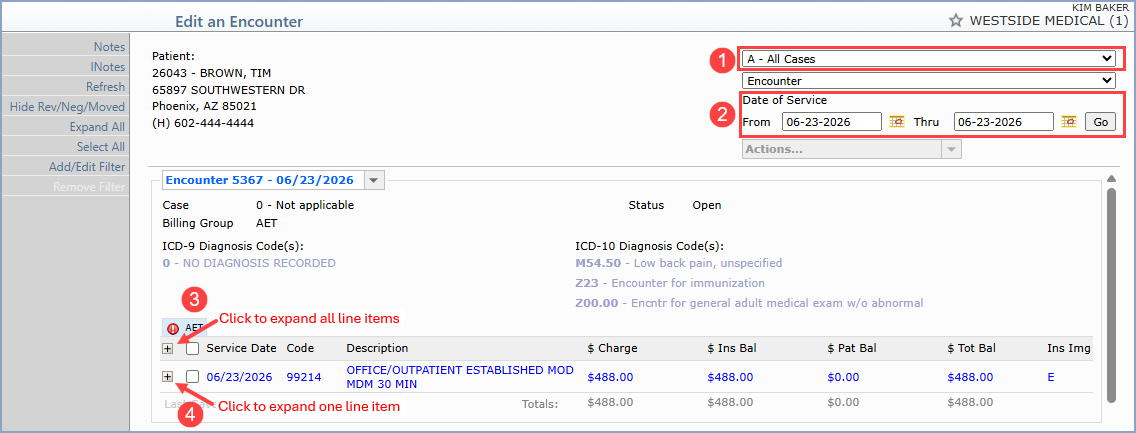
- If you only want to edit transactions for a particular case, select
the case you want from the Case list and the screen refreshes to show
only the transactions for that case.
- To limit the quantity of transactions displayed to a specific date-of-service
range, type the From and Thru dates and click Go.
- To expand all line items within the encounter at once, click the
plus sign at the top of the column.
- To expand a line item to review the view procedure details, such
as the diagnosis codes attached to it and any payments and adjustments
applied, click the + sign to the left of the line item.
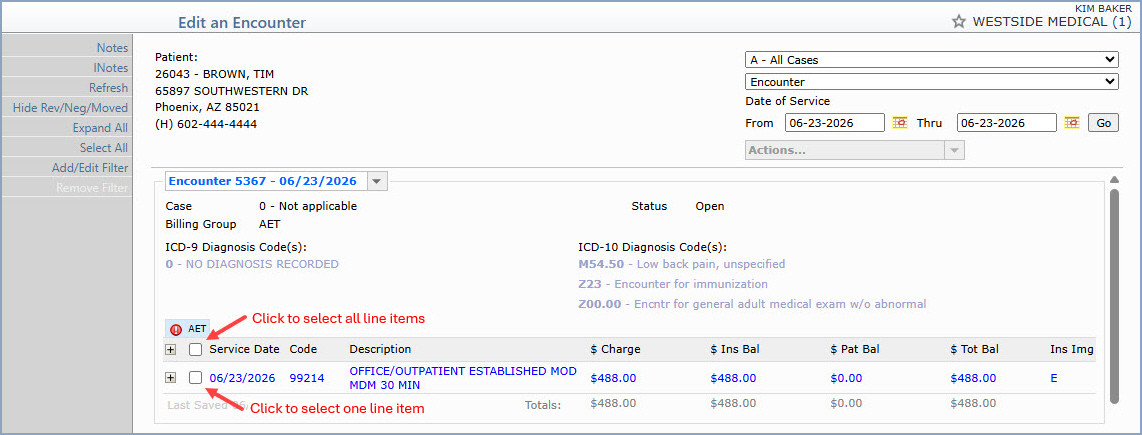
There are multiple options available for selecting and editing transactions.
Check boxes to the left of the Service Date column header and to
the left of each charge line item let you select an individual line item,
multiple line items, all line items, or whole encounters.
- You can edit a single transaction by clicking anywhere in the row
containing the transaction information. Using this method provides
the Move encounter action.
- You can edit a single encounter by clicking on the encounter name
in the encounter actions field and then select the transaction(s)
you want to edit and click the Encounter Actions drop-down list. Using
this method provides the Move
encounter action.
- You can select all the line items in an encounter and click the
Encounter Actions drop-down list. Using this method provides the Clone encounter action.
- You can select multiple transactions from multiple encounters to
file, refile, or edit them at one time using the Actions drop-down
list. To select items that span multiple pages of the patient's transaction
history, select the items on the current page and then paginate to
the next page to select additional items.