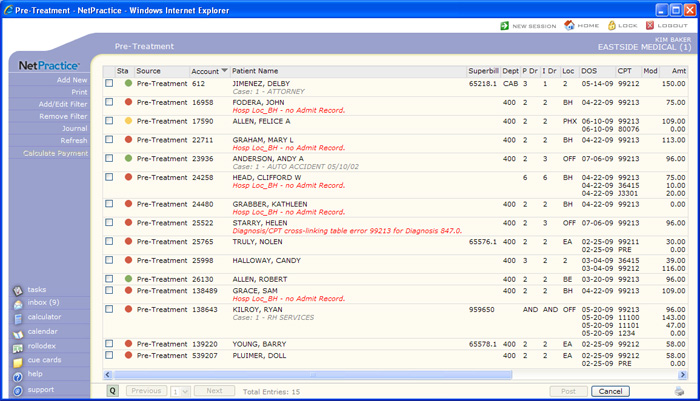
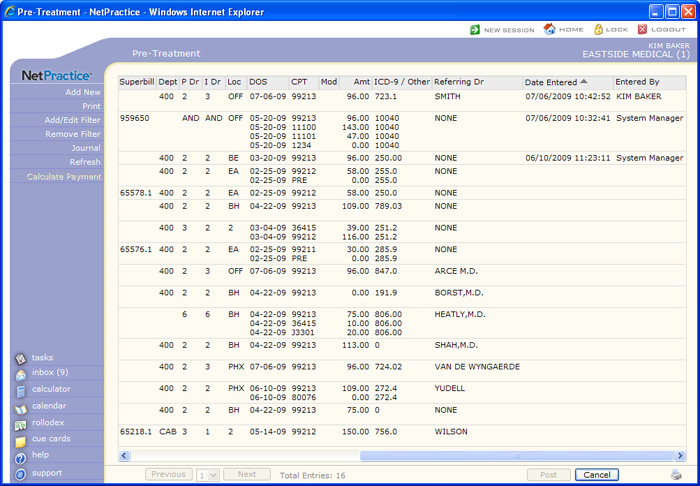
| Prompt | Response | Req | Len |
|---|---|---|---|
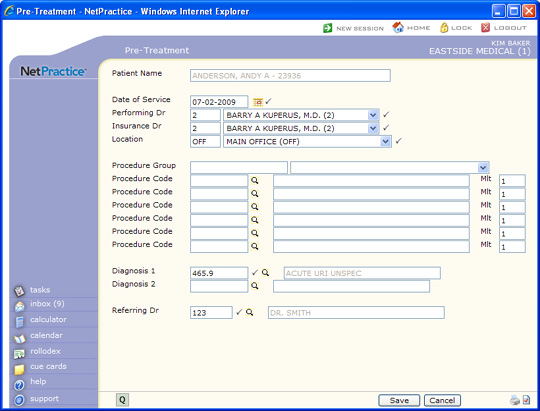
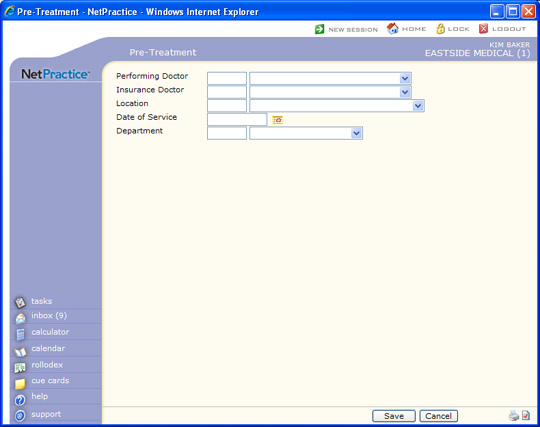
| Date of Service | Type the date you want or click the calendar icon to select a date. This field defaults with the current system date. If you do not know what the date of service will be, you can edit it when posting the procedures. | Y | 10 |
| Performing Dr | Type the code you want or select from the list to indicate the doctor who will be performing the procedures. This field defaults with the Responsible Doctor code stored in the Patient Name and Address Information screen. | Y | 3 |
| Insurance Dr | Type the code you want or select from the list to indicate the Insurance Doctor for the claim. If you selected the Default Per Dr for Ins Dr check box in CGM webPRACTICE Default Values, the field defaults with the Responsible Doctor code stored in the Patient Name and Address Information screen, unless there is a different doctor stored in the Default Ins Doctor field in the Doctor Code Table. | Y | 3 |
| Location | Type the code you want or select from the list to indicate the location where the procedures will take place. This field defaults with the Default Location code stored in the Patient Name and Address Information screen. | Y | 3 |
| Case | Type the code or select from the Case list. | 3 | |
| Procedure Group | Type the code you want or select from the Procedure Group list. If you select a Procedure Group, the procedure codes in that group do not display, but they are stored along with any other Procedure Codes that you select to include in the Pre-Treatment record. This field defaults with the code stored in the Procedure Grouping field in the patient's CPTDX DMS record. | 20 | |
| Procedure Code | Type the code you want or click the magnifying glass to search the table. This field defaults with the Default CPT code stored in the patient's CPTDX DMS record. Up to six Procedure Codes can be entered. | 10 | |
| Mlt | Type the multiplier/number of units to indicate the number of times this procedure is performed. This field defaults with '1'. If you enter another number, the Chg Amt in the Procedure Entry Function is multiplied by the number entered. | 3 | |
| Diagnosis 1 | Type the code you want or click the magnifying glass to search the table. This field defaults with the code stored in the Default DX field in the CPTDX DMS record. If nothing is stored there, it defaults with the primary diagnosis posted on the most recent accounting date. | Y | 10 |
| Diagnosis 2 | Type the code you want or click the magnifying glass to search the table. | 10 | |
| Referring Dr | Type the code you want or click the magnifying glass to search the table to indicate which doctor referred the patient for the procedure(s). The field defaults with the Referral Source stored in the Patient Name and Address Information screen. | Y | 6 |
| Prompt | Response | Req | Len |
|---|---|---|---|
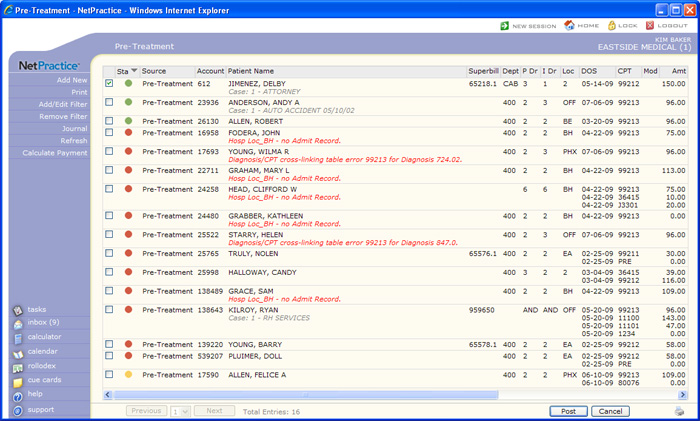
| Performing Doctor | Type the code you want, select from the list to filter the summary screen for a specific Performing Doctor, or leave the field blank to include all doctors. | 5 | |
| Insurance Doctor | Type the code you want, select from the list to filter the summary screen for a specific Insurance Doctor, or leave the field blank to include all doctors. | 5 | |
| Location | Type the code you want, select from the list to filter the summary screen for a specific Location, or leave the field blank to include all locations. | 5 | |
| Department | Select one or more departments from the list to filter the summary screen, or leave the selection blank to include all departments. | ||
| Billing Group | Type the code you want or click the magnifying glass to filter the summary screen for a specific Billing Group, or leave the field blank to include all billing groups. | 5 | |
| Primary Ins Carrier | Type the code you want or click the magnifying glass to filter the summary screen for a specific primary insurance carrier, or leave the field blank to include all carriers. | 10 | |
| Eligibility Status | Select the CGM webVERIFY eligibility status you want to filter by, or leave the field blank to include all statuses. | ||
| From Date of Service | Type the date you want to filter from or click the calendar icon to select a date. | 10 | |
| Through Date of Service | Type the date you want to filter through or click the calendar icon to select a date. Leave both date fields blank to include all dates of service. | 10 | |
| From Superbill Number | Type the superbill number you want to filter from. | 10 | |
| Through Superbill Number | Type the superbill number you want to filter through. Leave both superbill fields blank to include all superbill numbers. | 10 | |
| Date Entered | Type the date you want or click the calendar icon to select the date the records were entered. | 10 | |
| Source | Select the source you want to filter by, or leave the field blank to include all sources. | 30 | |
| Amount $ | Type the amount you want to filter by, or leave the field blank to include all amounts. | 10 | |
| CPT | Type the code you want or click the magnifying glass to filter the summary screen for a specific procedure code, or leave the field blank to include all procedure codes. | 10 | |
| ICD-10 | Type the code you want or click the magnifying glass to filter the summary screen for a specific diagnosis code, or leave the field blank to include all diagnosis codes. | 10 | |
| Referring Dr | Type the code you want or click the magnifying glass to filter the summary screen for a specific Referring Doctor, or leave the field blank to include all doctors. | 6 | |
| Entered By | Select the user who entered the records to filter by, or leave the field blank to include all users. | ||
| Fee Schedule | Type the code you want or select from the list to filter the summary screen for a specific Fee Schedule, or leave the field blank to include all fee schedules. | 10 | |
| Case Type | Type the code you want or select from the list to filter the summary screen for a specific Case Type, or leave the field blank to include all case types. | 10 | |
| Maximum # of Encounters to Display | Type the maximum number of encounters you want to display on the summary screen. | 4 |
| Prompt | Response | Req | Len |
|---|---|---|---|
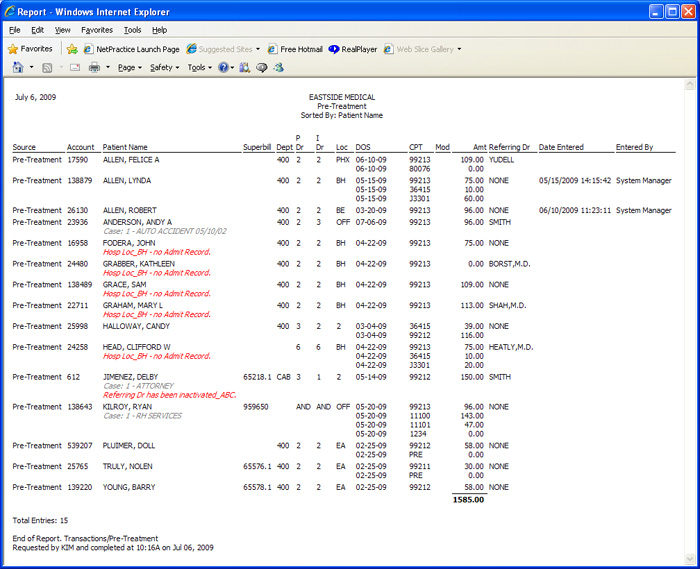
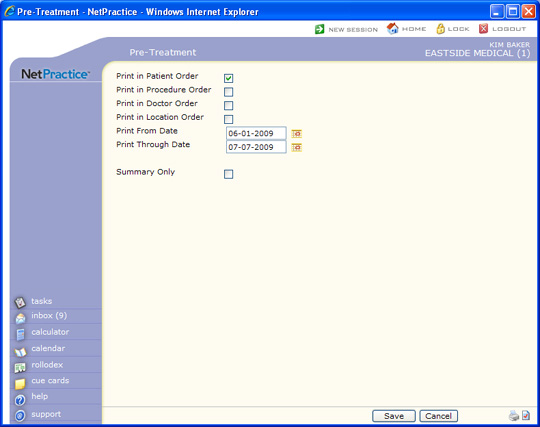
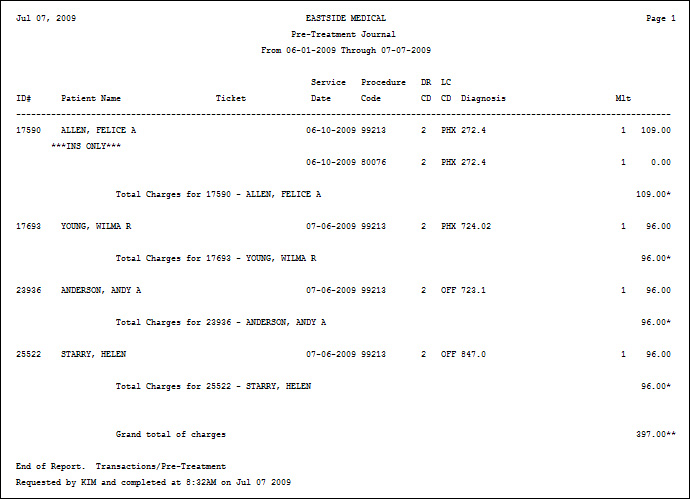
| Print in Patient Order | If you want to print the report in patient order, select this check box. If you select multiple sorting options, a separate report generates for each option. | 1 | |
| Print in Procedure Order | If you want to print the report in procedure code order, select this check box. If you select multiple sorting options, a separate report generates for each option. | 1 | |
| Print in Doctor Order | If you want to print the report in performing doctor order, select this check box. If you select multiple sorting options, a separate report generates for each option. | 1 | |
| Print in Location Order | If you want to print the report in location order, select this check box. If you select multiple sorting options, a separate report generates for each option. | 1 | |
| Print From Date | Type the date you want the report to start with or click the calendar icon to select a date. | 10 | |
| Print Through Date | Type the date you want the report to end with or click the calendar icon to select a date. | 10 | |
| Summary Only | If you only want to print a summary, select this check box. | 1 |
Copyright and Trademark Notice. Copyright © 2019 CompuGroup Medical, Inc. CGM®, CompuGroup Medical® and the CGM logo are registered trademarks and CGM webPRACTICE™ and CGM webTOOLS™ are trademarks of CompuGroup Medical AG in the United States and/or other countries. Any rights not expressly granted herein are reserved.