With the Reverse a Transaction function, you can remove entries
from the patient records, the insurance records, and the statistical
files. Although an audit trail is still maintained, reversals do not
print on the patient statements or on the insurance forms. Any charge,
payment, or adjustment may be reversed using this function unless the
billing period close date falls after the accounting date of the transaction(s)
you want to reverse (see Close
the Billing Period, located in the Billing Menu). If the
billing period has been closed, there are alternative ways to correct
accounts other than the reversal. For example, if the transaction you
need to correct or remove is a procedure, you can also enter a negative
charge (see Entering Negative
Charges located in Transactions, Procedure Entry).
Upon accessing this function, you must first select the patient account
that contains the transaction(s) you want to reverse. If you try to access
a patient's account and it is already in use, CGM webPRACTICE displays
the message Patient file in use...Try again later. This prevents
workstations from locking up while they wait for the patient's account
to become available.
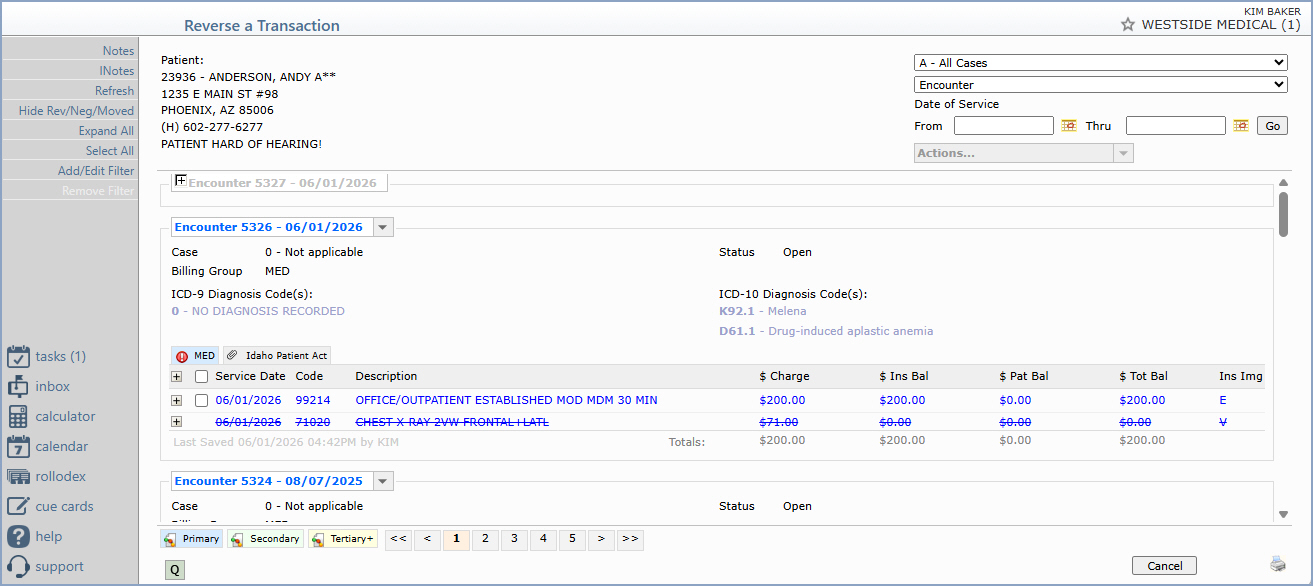
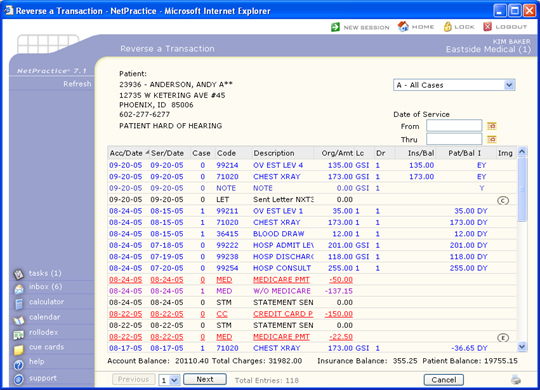
After selecting the patient account, the patient's transaction history
displays. If you only want to reverse transactions for a particular case,
select the case you want from the Case list and the screen refreshes
to show only the transactions for that case. To limit the quantity of
transactions displayed to a specific date-of-service range, type the
From and Thru dates and click Go.
You can reverse a single line item by clicking the encounter to open the
Encounter Edit screen and selecting the charge there, or you can
use the multi-select check boxes on the encounter list to act on multiple
encounters or charges at once. Check boxes to the left of the Service
Date column header and to the left of each charge line item let
you select an individual line item, multiple line items, all line items,
or whole encounters. To select items that span multiple pages of the
patient's transaction history, select the items on the current page
and then paginate to the next page to select additional items. The Actions
drop-down (located under the Date of Service From and Thru
boxes) becomes active when at least one box is selected.
Action Column Buttons
Notes — Opens the patient notes window.
INotes — Opens the internal notes window.
Refresh — Refreshes the encounter list to reflect any
changes.
Hide Rev/Neg/Moved — Hides any reversed, negated, or
moved transactions from the display.
Expand All — Expands every encounter to show all line
items.
Select All — Toggle button. Selects all encounters or
line items currently displayed; click again to Clear All.
Add/Edit Filter — Opens the filter screen so you can
narrow the list to specific transactions.
Remove Filter — Clears the active filter and returns
the screen to the full transaction list.
To reverse a specific charge, payment, or adjustment, click the encounter
that contains the line item. The Encounter Edit screen opens,
showing the encounter header information and all line items for that
encounter. Select the check box to the left of the line item(s) you
want to reverse, click the Encounter Actions drop-down, and select
Reverse.
Encounter Actions
Reverse — Opens the Reverse dialog so you can
type a Reversal Reason and reverse the selected line item(s).
Negate — Posts an offsetting negative entry for the
selected line item(s).
Deny — Marks the selected line item(s) as denied.
Refile — Refiles the encounter or selected items to
an insurance carrier.
Demand — Sends a demand for payment on the selected
items.
File — Files the encounter or selected items to an
insurance carrier.
Pend — Marks the selected payment line item(s) as pending
so they remain in the patient's open balance.
Unpend — Removes the Pend status from a previously pended
payment line item.
Move — Moves the selected charge to a different encounter.
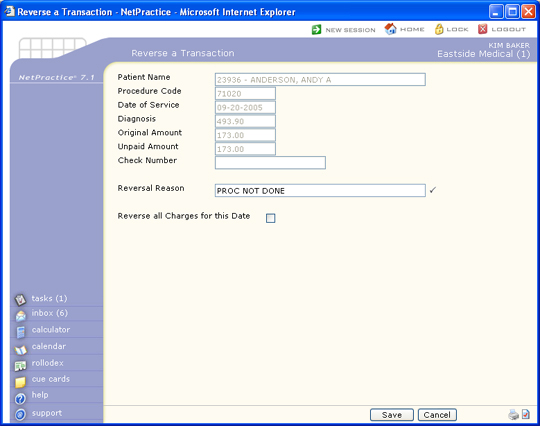
When you select Reverse from the Encounter Actions drop-down, the
Reverse dialog opens. Type a Reversal Reason describing why the
transaction is being reversed and click Save. The reversal reason
displays when the patient's transaction history is reviewed in detail,
along with the date the transaction was reversed.
Data Field Information
Prompt
Response
Req
Len
Reversal Reason
Type the reason for the reversal. The reversal reason and the date
the transaction was reversed display when the patient's transaction
history is reviewed in detail.
40
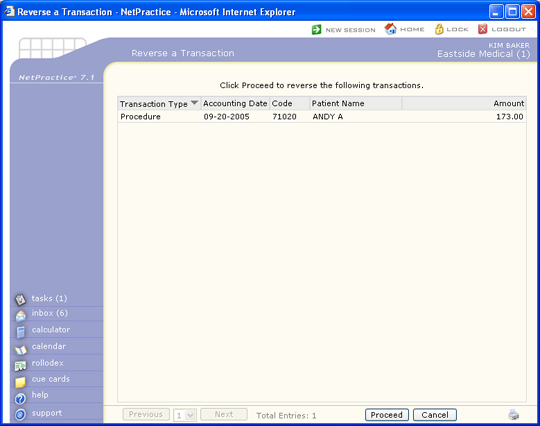
If any procedure that was selected had payments and/or adjustments applied
against it, those payments and adjustments will also be reversed, even
if they were posted with a different accounting date. CGM webPRACTICE
automatically determines those transactions that will be affected by
the reversal. IT IS VERY IMPORTANT TO MAKE SURE THAT YOU ARE AWARE
OF EVERY TRANSACTION ABOUT TO BE REVERSED.
Notes:
A reversal can be performed on a line item as long as its status is
Denied, Co-Pay, or Filed and the claim has not been
sent.
You can reverse a payment or adjustment even when it was previously
applied toward a transaction that was reversed, as long as the open amount
remaining on the payment or adjustment equals the original amount posted.
You cannot reverse a transaction whose accounting date falls within
a closed billing period. Use a negative charge or other correction method
in that case.
Once the transactions are reversed, the original line items are marked
with a V in the insurance image (Ins Img) column and shown
with a strike-through on the patient's transaction history. The V
indicates the transaction has been voided. When viewing transaction history,
reversed items are not displayed unless you select the All format
(or clear the Hide Rev/Neg/Moved Action Column option). A new
encounter is created to capture the reversal entry.