
| Prompt | Response | Req | Len |
|---|---|---|---|
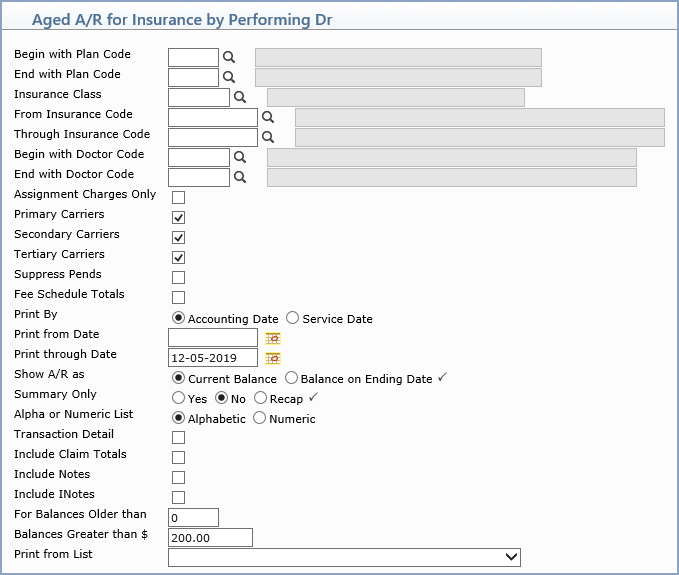
| Begin with Plan Code | Type the code you want to begin with, click the magnifying glass to search the table or leave the field blank to start with the first code in the table. | 3 | |
| End with Plan Code | Type the code you want to end with, click the magnifying glass to search the table or leave the field blank to end with the last code in the table. | 3 | |
| Insurance Class | Type the code you want, click the magnifying glass to search the table or leave the field blank to include all codes in the table. | 5 | |
| From Insurance Code | Type the code you want to begin with, click the magnifying glass to search the table or leave the field blank to start with the first code in the table. | 10 | |
| Through Insurance Code | Type the code you want to end with, click the magnifying glass to search the table or leave the field blank to end with the last code in the table. | 10 | |
| Begin with Performing Dr | Type the code you want to begin with, click the magnifying glass to search the table or leave the field blank to start with the first code in the table. | 5 | |
| End with Performing Dr | Type the code you want to end with, click the magnifying glass to search the table or leave the field blank to end with the last code in the table. | 5 | |
| Assignment Charges Only | If you only want to include charges that Assignment was accepted for, select this check box. | 1 | |
| Primary Carriers | If you want to include claims filed for Primary Carriers, select this check box. | 1 | |
| Secondary Carriers | If you want to include claims filed for Secondary Carriers, select this check box. | 1 | |
| Tertiary Carriers | If you want to include claims filed for Tertiary Carriers, select this check box. | 1 | |
| Suppress Pends | If you want to suppress claims that have been pended and not include them on the report, select this check box. | 1 | |
| Fee Schedule Totals | If you want to run the report based on your Fee Schedules, select this check box. This provides amounts that your office will likely receive based on the fee schedules, rather than what is actually owing. If there is any activity on the transaction or if there is not a fee schedule attached to the transaction, the A/R defaults to what is left owing on the transaction. | 1 | |
| Print By | Select the type of date you want to use when printing the report. |  |
1 |
| Print from Date | Type the date you want the report to start with or click the calendar icon to select a date or leave the field blank to print every open item up through the selected 'Through Date'. |  |
10 |
| Print through Date | Type the date you want the report to
end with or click the calendar icon to select a date. If you select a date prior to the current date, you should not select to include the insurance or patient balances on the report because those figures cannot be accurately calculated for past dates. If you select a date prior to the current date, the program automatically scans for any deleted patient accounts to ensure the totals provided for that time period are accurate. |
 |
10 |
| Show A/R as | If you want the A/R to print the current
open item balances, select Current Balance. If you want the A/R
to print the open item balances up through the Ending date, select
Balance on Ending Date.
Note: If you select Balance on Ending Date, the balances will not include any payments or adjustments applied after the selected ending date. |
 |
1 |
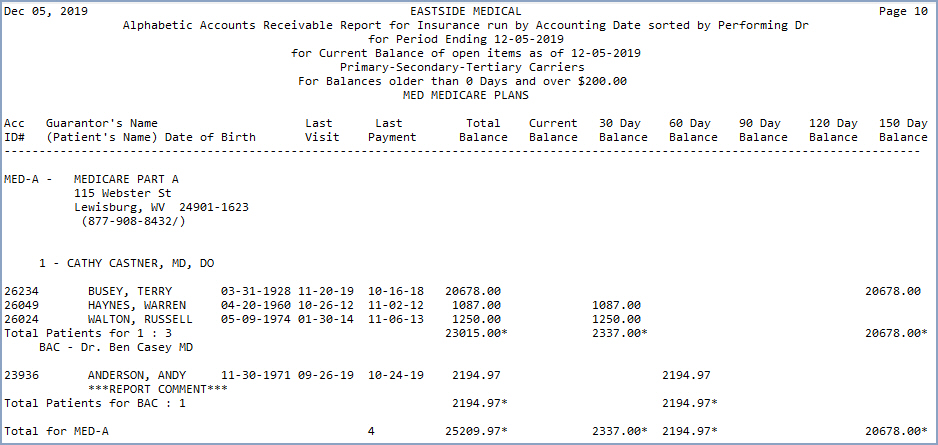
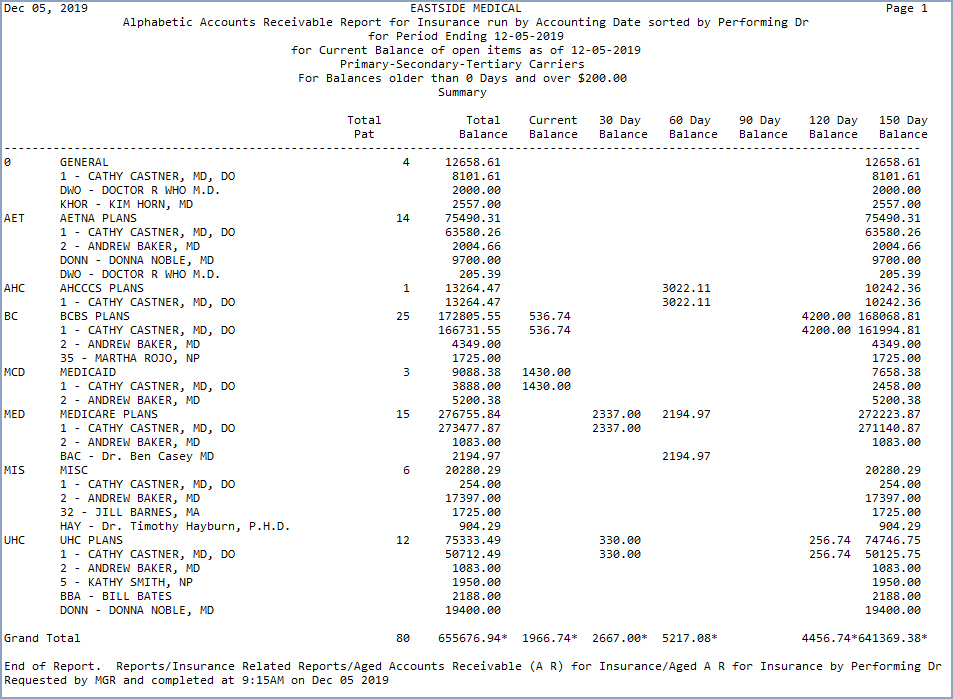
| Summary Only | Select the printing option you want. Yes - The total number of outstanding claims, the total balance and the aging of that balance in 30-day increments will print for the selected sorting option. No - The detailed patient information will be included on the report: the patient number, guarantor name (and patient name if different from the guarantor's) date of birth, date of last visit and payment, total balance, aged balance per patient, group number and policy number. Recap - Only the final Summary page will print. |
 |
1 |
| Alpha or Numeric List | Select the printing option you want. | 1 | |
| Transaction Detail | If you want the transaction detail for the outstanding balance to print, select this check box. Detailed information on the outstanding charges will print for each patient, including: the date of service, the patient's name, the procedure code or its equivalent procedure code (if one has been entered), procedure amount, date of insurance activity, type of insurance activity (for example, co-pay, filed, payment, refiled), the amount filed or refiled to insurance, performing and insurance doctor codes including their provider ID or tax ID number, and the diagnosis code(s). |  |
1 |
| Include Claim Totals | If you want the DMS Notes entered on
the accounts to print on the report, select this check box. **Family Billing Only** - If your CGM webPRACTICE software is set to Family billing, then the NOTES entered for all family members will print on this report. |
1 | |
| Include Notes | If you want the DMS Notes entered on
the accounts to print on the report, select this check box. **Family Billing Only** - If your CGM webPRACTICE software is set to Family billing, then the NOTES entered for all family members will print on this report. |
 |
1 |
| Include INotes | If you want the DMS Insurance Notes
(INotes) entered on the accounts to print on the report, select
this check box. **Family Billing Only** - If your system is set to Family billing, then the INOTES entered for all family members will print on this report. |
1 | |
| For Balances Older than | Type the number of aging days to include all balances over that given number of days, or leave at zero. | 4 | |
| Balances Greater than $ | Type the minimum insurance balance you want for the sorting options selected above or leave the field blank to include all insurance balances. |
9 | |
| Print from List | If you want to print this report based only on the patients contained in a previously defined DMS List, select the list you want to use. | 20 |

