Electronic Claim Attachments Setup Process
If your practice has contracted with eMEDIX (for
the Attachments feature of the eMEDIX Claims Management option)
to send claim attachments electronically, you will need to perform the
following steps:
Step 1 - Enter the Claim Filing Indicator and the Electronic ID# for
each applicable insurance carrier.
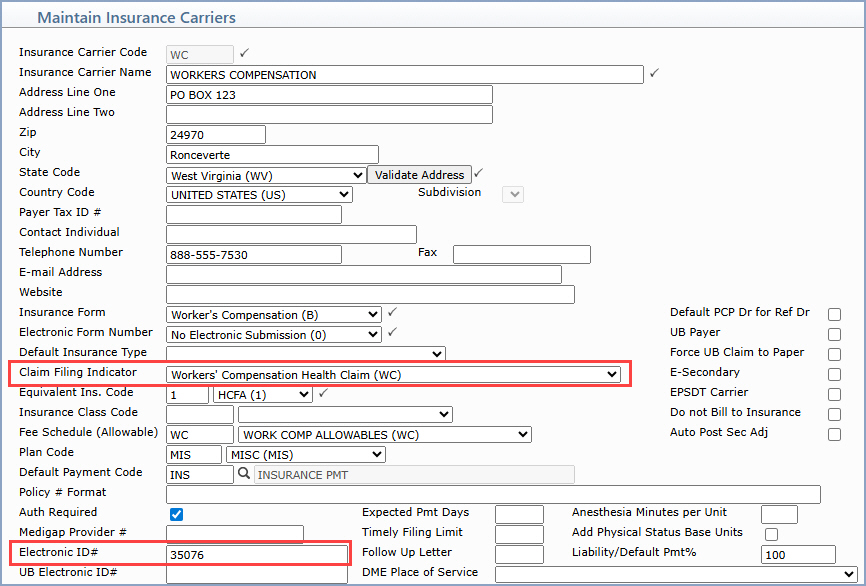
In Maintain Insurance
Carriers, add the Claim Filing Indicator
and the Electronic ID# (Payer
Code from the eMEDIX Payer List). This data populates in the electronic
claim Loop 2300 SBR segment - 9th piece. If there is a Claim
Filing Indicator selected for the insurance carrier, that will
be populated. Otherwise if that field is blank, the value stored in the Insurance Form field will be checked
and if it is set to B-Worker's Compensation,
then WC will be populated for
the Loop & Segment.
Warning:
For auto claims, if you do not select Automobile
Medical (AM) for the Claim Filing
Indicator, the Loop and Segment will NOT populate for the claim.
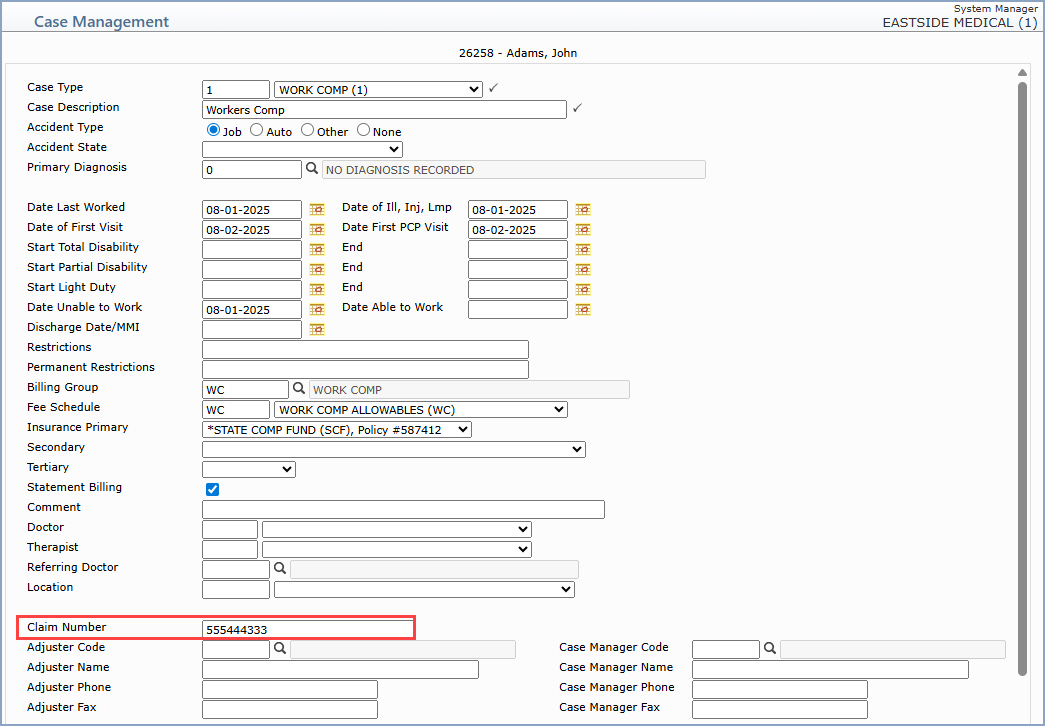
Step 2 - Add
a Case to the patient’s account and add the Property and Casualty Claim
Number to the Case Claim Number field.
Access Change Patient Data,
select the patient's account and then add a Case
and enter the Property and Casualty Claim
Number in the Claim
Number field.
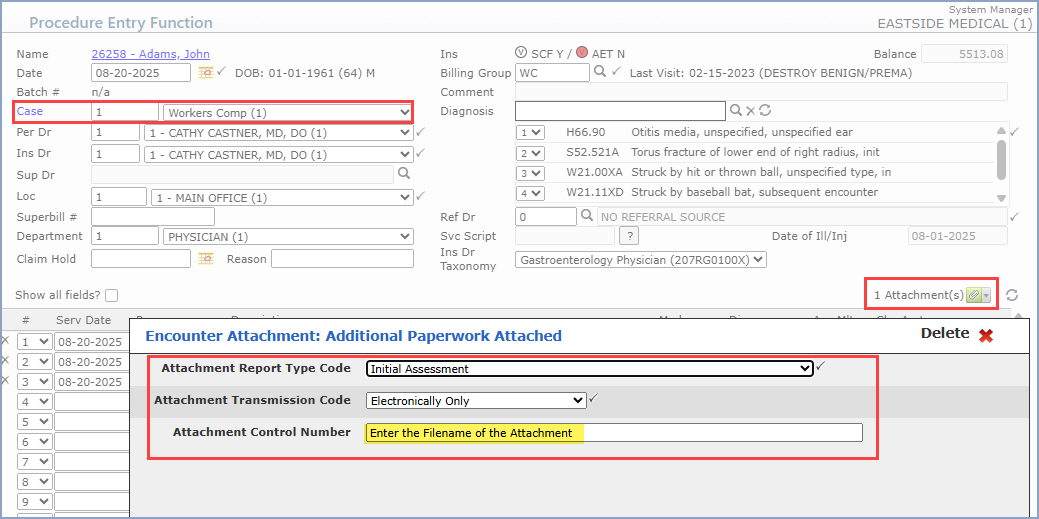
Step 3 - Post the charges in Procedure Entry and select
the Case and complete the Additional Paperwork Attached Attachment.
When you enter the charges in Procedure
Entry, make sure the Case
is selected correctly and complete the Additional
Paperwork Attached Attachment at the encounter level, which populates
the electronic claim Loop 2300 PWK segment. When completing the fields
in the Attachment, you must enter the Filename of the Attachment in the
Attachment Control Number field.
Step 3 - Process and send electronic claims to eMEDIX
and then upload your attachments to eMEDIX using the instructions they
provide.
