Transcription Setup Steps
Transcription files can be automatically linked to patient accounts for
easy access within CGM webPRACTICE by performing the following setup steps:
Self-Hosted
Clients
1. Confirm the Transcription folder exists on your CGM webPRACTICE server.
For example, 'C:\Transcription' or 'D:\Transcription' - replace the C:\
or D:\ with your drive letter. This folder is automatically created
during system installation.
2. Complete the Transcription Directory field in Image
Management Integration under System, Database Maintenance Menu.
3. Save your transcription files in the C:\Transcription\9999_1\
directory on your CGM webPRACTICE server. Replace C:\ with your
drive letter, 9999 with your CGM webPRACTICE client number and
replace the number 1 with your database number. Note: Files
must be named as 'AccountNumber_CCYYMMDD_Sequence number' with any given
extension (Sequence number is optional).
Hosted Clients
1. Create a Transcription folder on your workstation. For example, 'C:\Transcription'
or 'D:\Transcription' - replace the C:\ or D:\ with your
drive letter.
2. Save your transcription files in the Transcription folder on your workstation.
Replace C:\ with your drive letter, 9999 with your CGM webPRACTICE
client number and replace the number 1 with your database number.
Note: Files must be named as 'AccountNumber_CCYYMMDD_Sequence number'
with any given extension (Sequence number is optional).
3. Use the Upload
Transcription Files function to copy the files to the hosted CGM webPRACTICE
server.
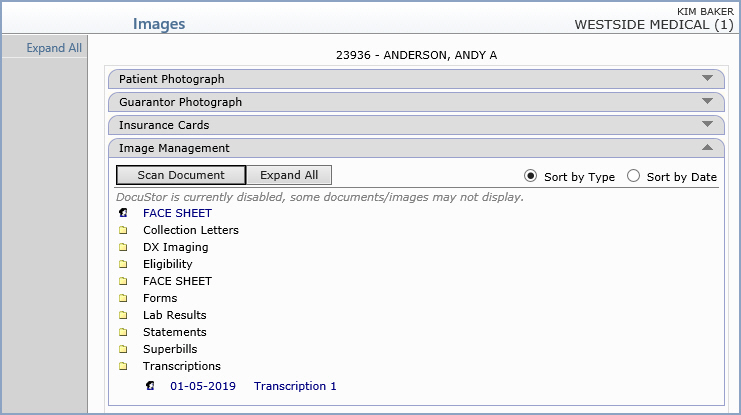
The files will be automatically linked to the corresponding
patient account number listed in the file name and stored in the Transcription
folder under Image Management on the patient's account.