The Upload Transcription Files function is designed for Hosted Clients to upload transcription files from their workstation to the CGM webPRACTICE Hosted server.
Prior to using this function, you should review the Transcription
Setup steps listed in the Introduction, System Processes section.
After you have saved the files to your workstation, you can upload them
so they will be linked to patient accounts.
Note: Files must be named as 'AccountNumber_CCYYMMDD_Sequence number' with any of the acceptable extensions (Sequence number is optional). The acceptable file extensions are: .jpg, .doc, .docx, .png, .pdf, or .gif.
Upon accessing this function, any files uploaded in the last seven days will display.

Upload Files
1. On
the Patient menu, click Upload Transcription Files.
2. In the Action Column, click Upload
Files.

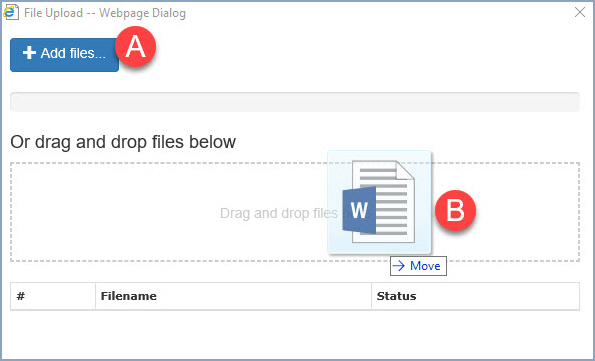
3. When the File Upload dialog box displays, you have two options:
Click Add Files, navigate to the folder where the transcription file(s) is stored, select the file(s) you want and click Open.
Open Windows Explorer, navigate to the folder where the transcription file(s) is stored, select the file(s) you want, drag and drop the selected file(s) onto the File Upload dialog box.
Note: The file size is limited to 30MB.

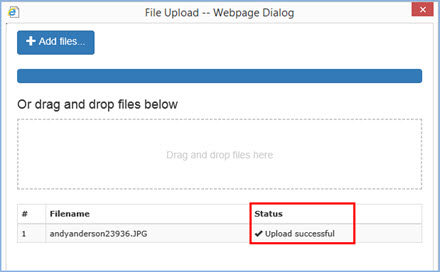
4. Check the file upload Status in the bottom portion of the File Upload dialog box to confirm the files successfully uploaded.

5. Click Close to return to the Upload Transcription Files screen.
The files will be automatically linked to the corresponding patient account number listed in the file name and stored in the Transcription folder under Image Management on the patient's account.