Maintain Labels
By using DMS Labels, you can create standard labels for the various types
of labels printed in your practice. You can create one-up, two-up, three-up,
or basically any type of laser or dot-matrix label. These labels can be
used for any label printing function based on a DMS user defined list.
When you first access this function, the DMS Label Summary Screen will
display every label that has been previously created.
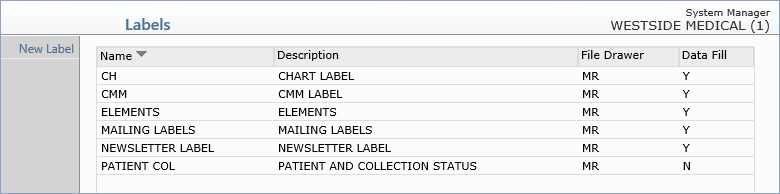
You can edit a label by clicking anywhere in the row containing the label
information to select it. To create a new label, click New Label
in the Action Column.
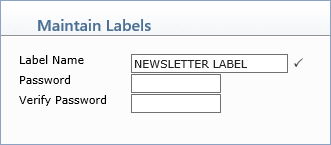
After you click New Label in the Action Column, the DMS Label Password
screen will immediately display containing blank data fields for entering
a password for the new label.
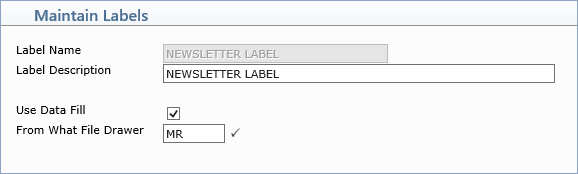
Next, the DMS Label Description screen will display containing blank data
fields for the new label.
When the DMS Label Content screen displays, you will need to insert the
DMS data-fill fields you want to print on the label. For detailed instructions
on working with DMS documents, see Add
or Change a Letter.
Label text can be converted into barcodes if a tilde character ~ is placed
on either side of the text (Ex: ~12345~)

Note: If you print labels to DOT Matrix printers and/or use Zebra
label printers, these printers will not support Rich Text Editor (RTE)
documents. If you have changed the DMS Integration from Plain Text
to Rich Text, you should name your labels as 'Lnnnn' (the letter
'L' followed by four numbers, such as L0708). This will prevent you from
being able to select them for editing and inadvertantly converting them
to Rich Text documents. If you want to edit one of these labels, you must
go to the DMS Integration
and select the Plain Text option before editing. Make sure you
set the integration back to Rich Text when the editing is complete.
