![]()
Maintain Letters Summary Screen
Upon accessing this function, the Maintain Letters summary screen displays listing all existing letters and documents. The list contains the letter name and description, the file drawer name, if it is set up to use data-fill, and whether it's marked as a Patient Collection Letter or an Insurance Collection Letter. If you use CGM ECOLLECTIONS and have created electronic letters, those letters will be indicated with an 'E' in the Pt Col column.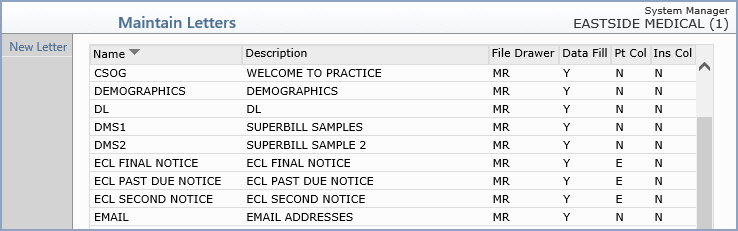
| Prompt | Response | Req | Len |
|---|---|---|---|
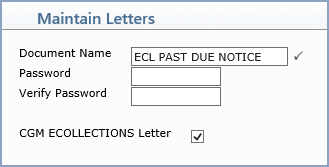
| Document Name | Type a name for the letter/document that you are creating. It cannot match any existing letter/document name. |  |
20 |
| Password | Type a password for this letter/document. A password is not required, but if you do enter a password any time the letter/document is accessed in the future, you will be required to enter this password. Passwords are case sensitive. | 10 | |
| Verify Password | Type the password again to verify it. Passwords are case sensitive. | 10 | |
| CGM ECOLLECTIONS Letter | This field will only be enabled if CGM ECOLLECTIONS has been activated. If this letter is to be used for CGM ECOLLECTIONS, select this check box. When selected, the 'Plain Text' letter editor will be enabled to create the CGM ECOLLECTIONS Letter. |
| Prompt | Response | Req | Len |
|---|---|---|---|
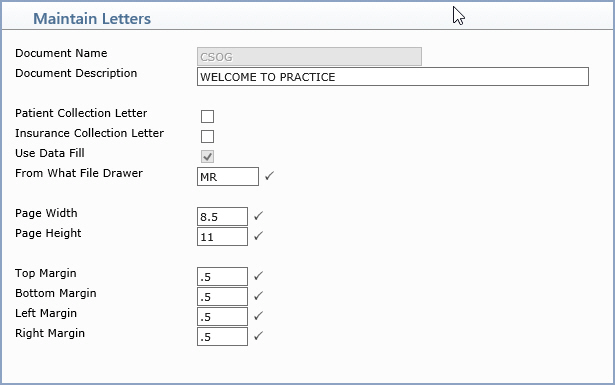
| Document Name | This field is informational only and reflects the name of the document. | 30 | |
| Document Description | Type a description of the document. | 55 | |
| Patient Collection Letter | If this is a Patient Collection Letter, select this check box. | 1 | |
| Insurance Collection Letter | If this is an Insurance Collection Letter, select this check box. | 1 | |
| Use Data Fill | If this letter will be used in conjunction with a list, select this check box. | |
1 |
| From What File Drawer | Type the file drawer name to indicate where the patients' information will pull from. | |
6 |
| Page Width | Type the width of the page in inches. | |
4 |
| Page Height | Type the height of the page in inches. | |
4 |
| Top Margin | Type the size of the top margin in inches. | |
4 |
| Bottom Margin | Type the size of the bottom margin in inches. | |
4 |
| Left Margin | Type the size of the left margin in inches. | |
4 |
| Right Margin | Type the size of the right margin in inches. | |
4 |
| Prompt | Response | Req | Len |
|---|---|---|---|
| Document Name | This field is informational only and reflects the name of the document you selected. | |
30 |
| Document Description | Type a description of the document. |
|
50 |
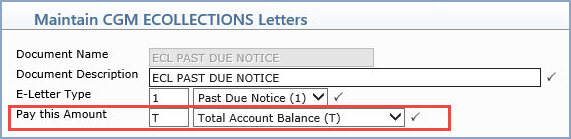
| E-Letter Type | Select the applicable E-Letter Type for this letter. There are three E-Letter Types available to choose from; Past Due Notice (1), Second Notice (2) and Final Notice (3). You can create multiple letters using the same E-Letter Type to accommodate multiple collection statuses if needed. For examples of the three E-Letter Types, see the CGM ECOLLECTIONS Client Setup Packet. |
|
1 |
| Pay this Amount | This field controls which balance amount
prints in the Pay
This Amount and Amount
Due fields on the letter. The Total Account
Balance automatically defaults for this field but you can select
to print a different balance for situations when you do not want
the Total Account Balance to print.
Note: When you send collections letters using the Print/Send Collection Letters function, letters will be suppressed and not sent electronically when the Total Account Balance equals zero or is a credit balance or if the balance amount selected for this field equals zero or a credit balance. |
|
1 |
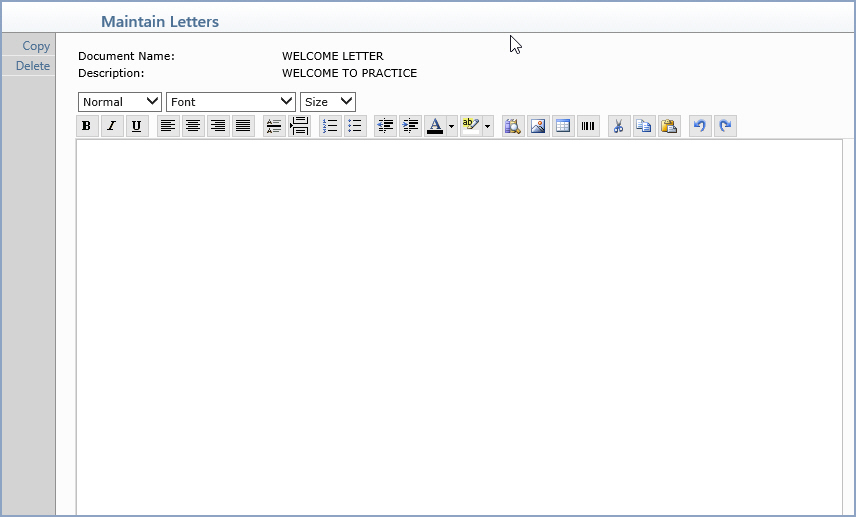
If you selected to use Plain Text letters/documents or are creating
or editing an electronic collection letter, after you complete the formatting
screen, a blank document displays so you can type the text or insert data-fill
fields or special formatting commands.
Disregard the margin alignments as they appear; the document will be automatically formatted to fit within the margins you specified in the new document definition screen.
Inserting Data
You can type, delete, copy and paste the text you want in the body of
the letter/document. In addition to regular text, you can insert data
from patient accounts (data-fill) using the fields listed in the Data
Library and also insert special commands. Every data-fill field and special
command must be inserted within double LESS-THAN and GREATER-THAN signs.
For example,<<2:3>>.
Action Column Functions
Note: If you are working on an electronic collection letter, the number of data elements listed in the Data Library will be limited to only the ones relevant to patient collection letters.
| Command | Description |
|---|---|
| FILENUMBER | Inserts the Patient Account Number. |
| Claim Information | Inserts the Details of the transaction selected. |
| CENTER | Centers the text following the command, on the same line between the margins. |
| NEWPAGE | Inserts a form/page feed at the point in the document the command is entered. |
| TAB | Will advance to a specified position on the current line. Example: <<T20>> |
| LS | Changes the line spacing on the document. Examples: <<LS=1>> for single spacing, <<LS=2>> for double space, etc. |
| DATE | Today's date will print. Details are given below on formatting dates. |
| DATE=FU | Full date in all upper case (Example: AUGUST 23, 2015) |
| DATE=FL | Full word date in upper and lower case (Example: August 23, 2015) |
| DATE=AU | Abbreviated date in upper case (Example: AUG 23, 2015) |
| DATE=AL | Abbreviated date in upper and lower case (Example: Aug 23, 2015) |
| DATE=N- | Numeric date separated by hyphens (Example: 08-23-15) |
| DATE=N/ | Numeric date separated by slashes (Example: 08/23/15) |
| <<1:13:AGE>> | Inserts the patient's age. |
| <<1:17>>
<<1:17:C>> <<1:17:##>> replace ## with field number |
Using data-fill for a table entry, such as <<1:17>> for Referral Source, will insert the code Description from the Table. Typing the data-fill command as <<1:17:C>> will print the actual Code from the Table. Typing a number in the third position will insert other information from the Table. Such as <<1:17:12>> will insert the Referral Source's Business Phone number. |
| <<5:1:D:P>>
<<5:1:D:S>> |
The Insurance Carrier Table works the same as other data-fill Table commands, but you can also specify if you want to insert data from the Primary Carrier or the Secondary Carrier. Example: <<5:1:D:P>> or <<5:1:D:S>> |
|
<<8:1>> <<8:1:P>> <<8:1:I>> <<8:AGE:B>> or <<8:AGE>> <<8:AGE:P>> <<8:AGE:I>> <<8:AGE:A>> <<8:AGE:P:60>> <<8:AGE:I:60>> <<8:AGE:I:90+>> <<8:AGE:B:60+>> |
There are three variations for using data-fill to insert the account balance.
<<8:1>> Inserts the total account balance (patient plus insurance). <<8:1:P>> Inserts the patient balance only <<8:1:I>> Inserts the insurance balance only.
You can also include the account aging in four variations, as well as insert the dollar amount from one column of the aging.
<<8:AGE:B>> or <<8:AGE>> Inserts the total account aging (patient and insurance added together). <<8:AGE:P>> Inserts the patient balance aging only. <<8:AGE:I>> Inserts the insurance balance aging only. <<8:AGE:A>> Inserts the patient aging, then the insurance aging and will total the two and print the account aging. This adds four lines to the document. Regardless of which aging you chose, a heading will print above the columns of numbers. This will add extra lines to your document.
You can also insert the dollar amount from the aging. Use I for Insurance Aging, P for Patient Aging or B for Both Insurance and Patient Aging. You can also insert a total of Aging amounts by typing a + in the command.
<<8:AGE:P:60>> Inserts the patient's total for charges in the 60 day column. <<8:AGE:I:60>> Inserts the insurance total for charges in the 60 day column. <<8:AGE:I:90+>> Inserts the total of all insurance balances 90 days or older
Inserts the total of the patient and insurance balances |
Copyright and Trademark Notice. Copyright © 2019 CompuGroup Medical, Inc. CGM®, CompuGroup Medical® and the CGM logo are registered trademarks and CGM webPRACTICE™ and CGM webTOOLS™ are trademarks of CompuGroup Medical AG in the United States and/or other countries. Any rights not expressly granted herein are reserved.
