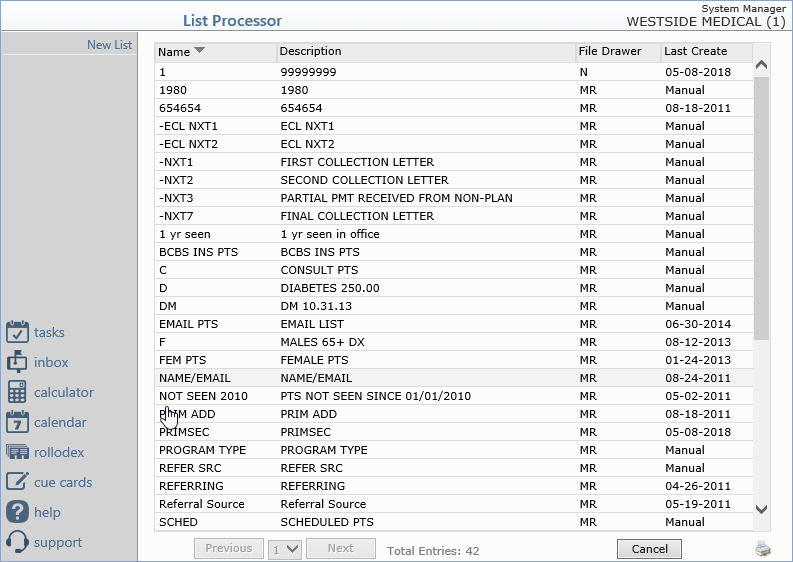
![]()
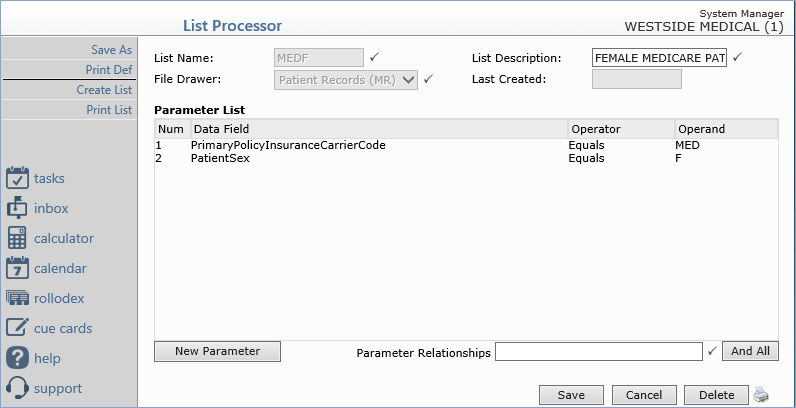
| Prompt | Response | Req | Len |
|---|---|---|---|
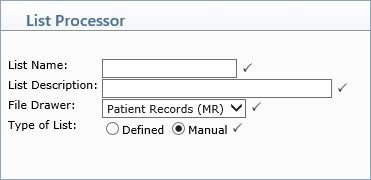
| List Name |  |
20 | |
| List Description | You need to enter a mandatory description of the list | |
31 |
| File Drawer | Select the name of the desired File Drawer | |
6 |
| Type of List | Select type of list by clicking on manual or defined buttons | |
1 |
| Prompt | Response | Req | Len |
|---|---|---|---|
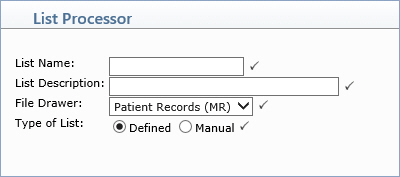
| List Name | |
20 | |
| List Description | You need to enter a mandatory description of the list | |
31 |
| File Drawer | Select the name of the desired File Drawer | |
6 |
| Type of List | Select type of list by clicking on manual or defined buttons | |
1 |
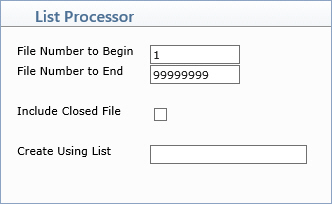
| Prompt | Response | Req | Len |
|---|---|---|---|
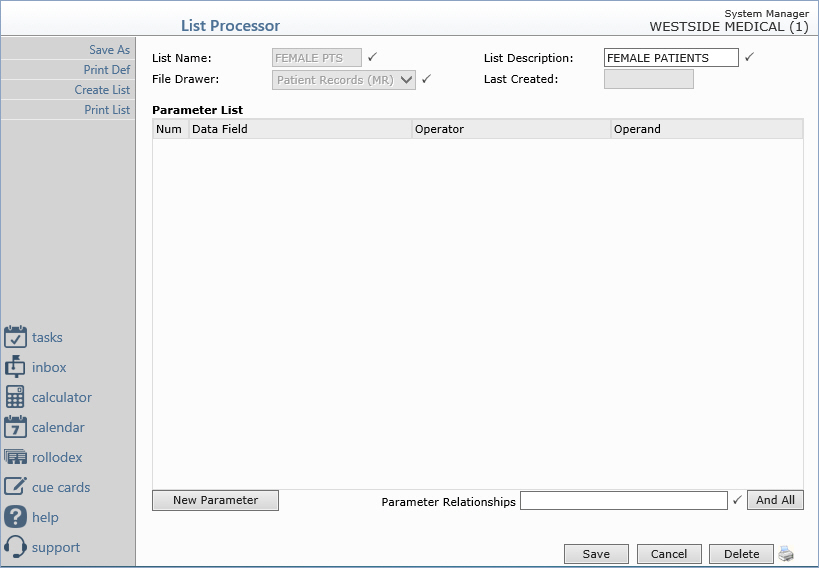
| File Number to Begin | Enter the file number at which to begin creating the list. | 10 | |
| File Number to End | The file number at which to end list compilation, or press ENTER for the last. | 10 | |
| Include Closed File | Check this box if you wish to include closed files in this list. | 1 | |
| Create Using List | Enter a valid List Name if you want to create a list from a list. | 20 |
Copyright and Trademark Notice. Copyright © 2019 CompuGroup Medical, Inc. CGM®, CompuGroup Medical® and the CGM logo are registered trademarks and CGM webPRACTICE™ and CGM webTOOLS™ are trademarks of CompuGroup Medical AG in the United States and/or other countries. Any rights not expressly granted herein are reserved.
