![]()

| Prompt | Response | Req | Len |
|---|---|---|---|
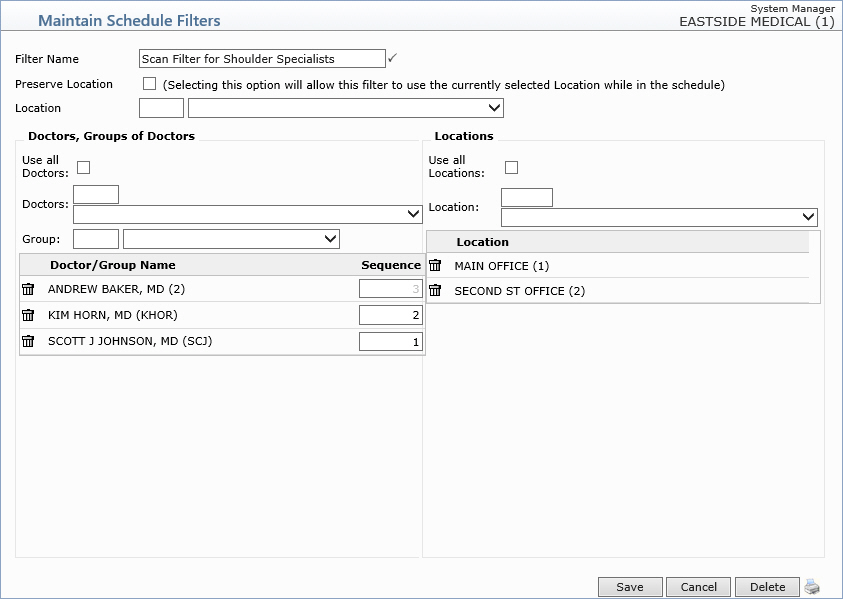
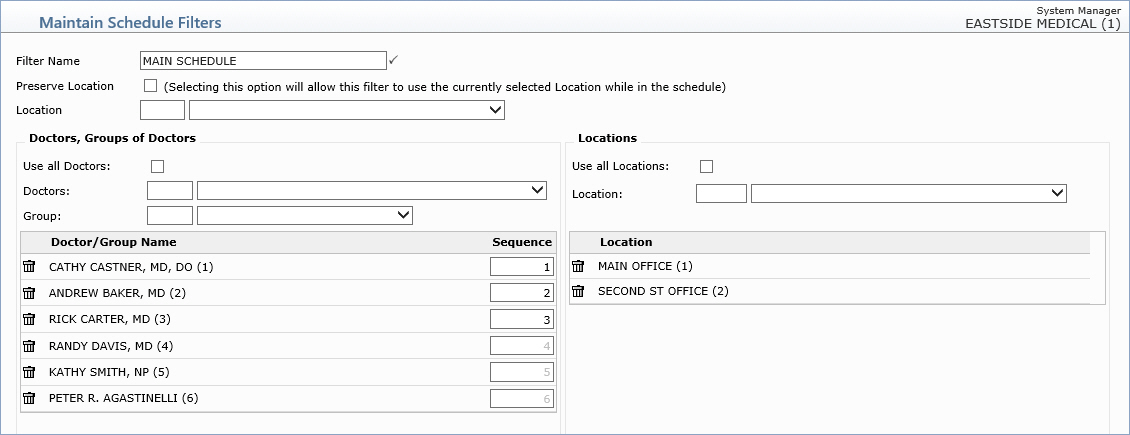
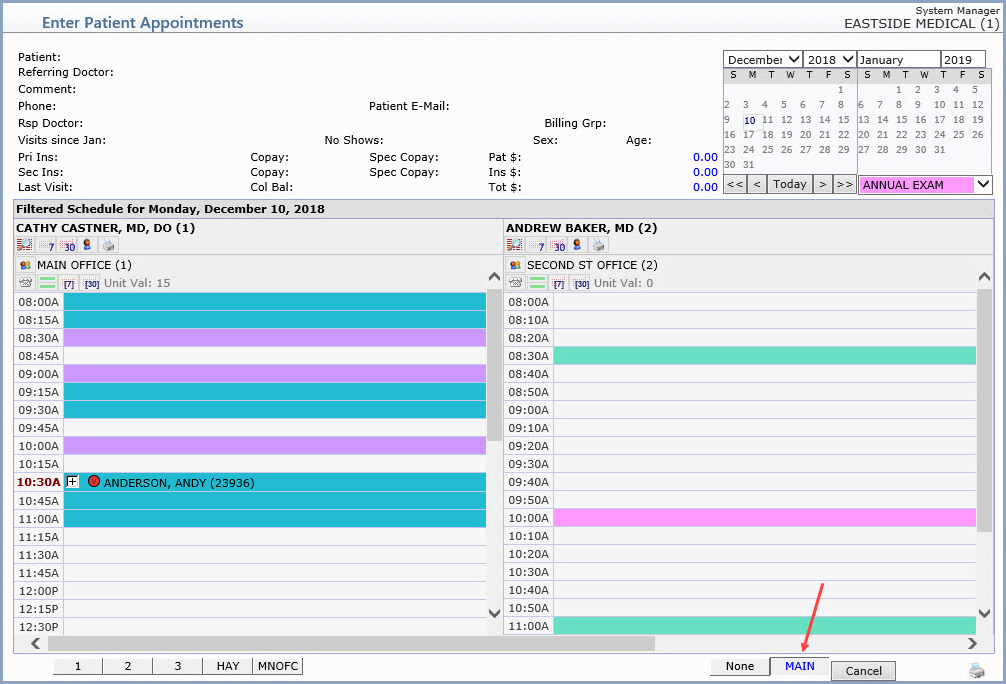
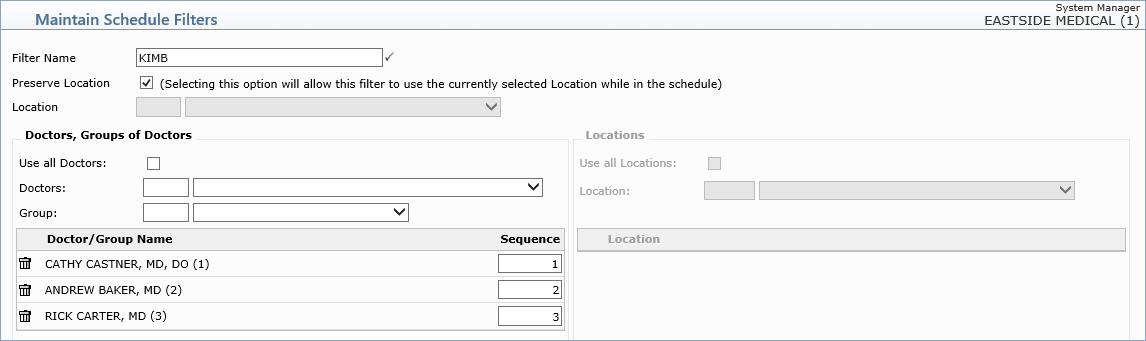
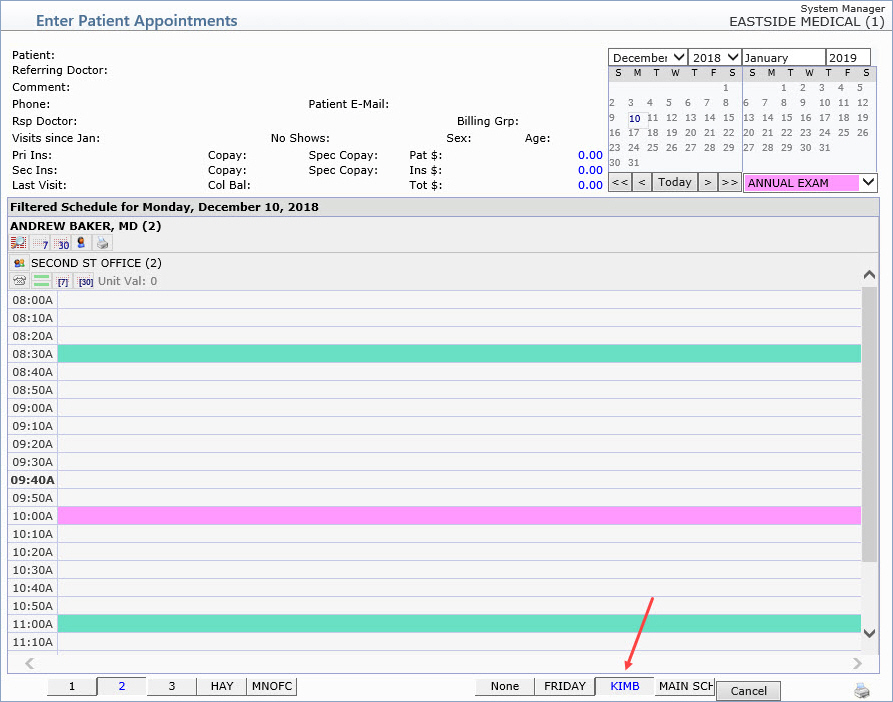
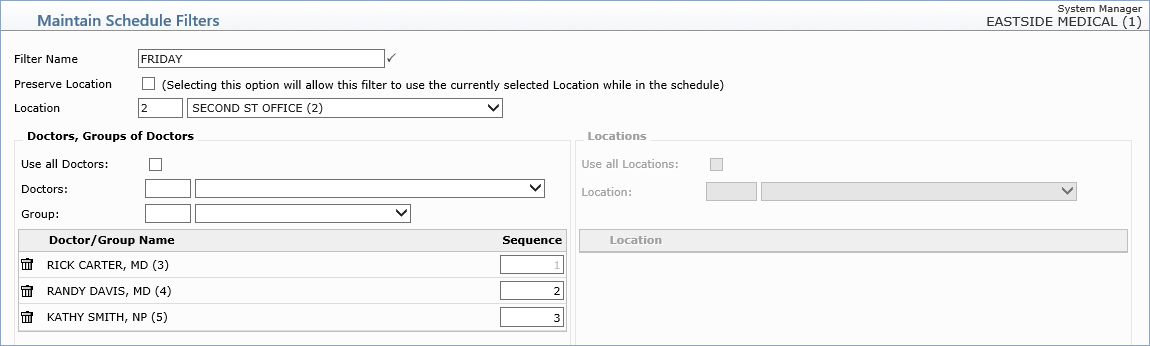
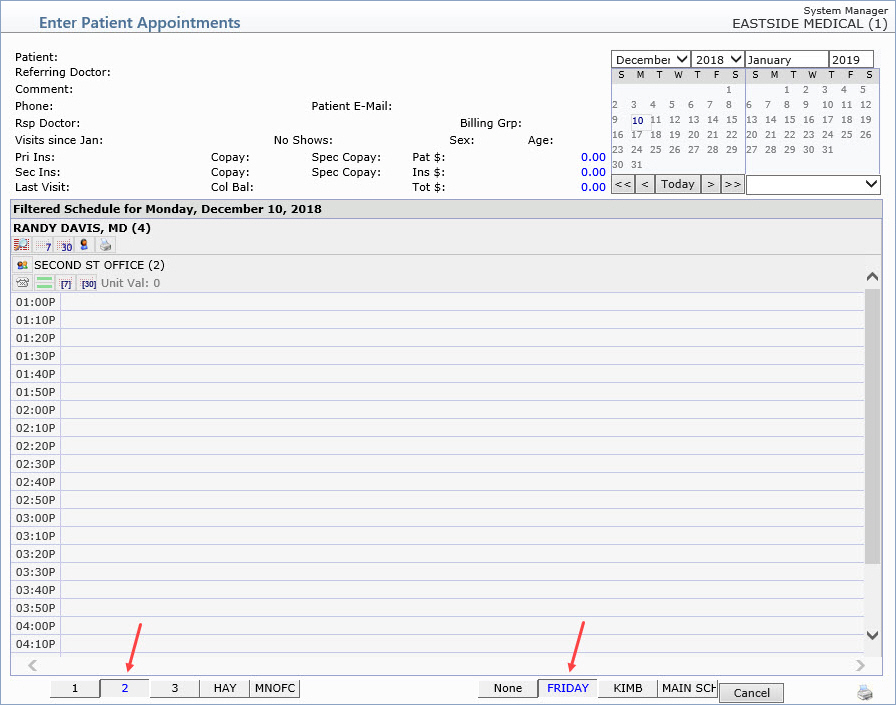
Filter Name |
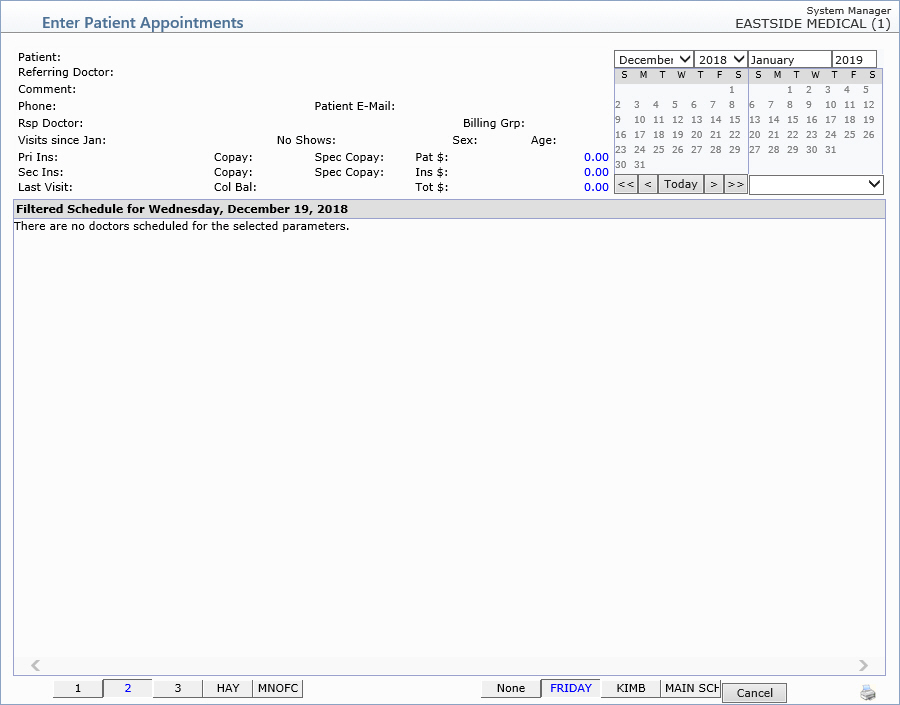
Type a name for the filter. This name displays in a tab or drop-down list on the lower-right corner of the schedule in Enter Patient Appointments and Review Patient Appointments. Filters can also be used in the Scan function in Enter Patient Appointments. |  |
40 |
Preserve Location |
If you want to be able to select and
view this filter in whichever location is currently selected on
the schedule, select this check box.
For example, if you select three doctors for this filter, when you have this filter selected in the schedule, only those three doctors' schedules will display regardless of the location you select to view on the schedule. If you select this check box, the Location fields below are inactivated since this filter displays regardless of location. |
1 | |
| Location | If you want this filter to be set for one specific location, type the location code or select from the list. This filter tab displays on the schedule only when this location is selected on the schedule. | 3 | |
Use all Doctors |
If you want this filter to include all doctors, select this check box. If you select this check box, the Doctors and Group drop-down lists are inactivated since you are choosing to include all doctors. | 1 | |
Doctors |
To include one or more doctors in the filter, type the doctor code and press Tab or select from the list. After you have selected the doctor, the doctor's name and code immediately populate in the Doctor/Group Name section below. You can select as many doctors as you want with this method. | 3 | |
Group |
To include a Doctor Group, as stored in the Group Code Table, type the code you want and press Tab or select from the list. After you have selected the doctor group, that group and code immediately populate in bold font in the Doctor/Group Name section below. All doctors (name and code) included in that group, display below the group name. You can select as many groups as you want with this method. | 3 | |
Doctor/Group Name |
This section displays the doctors and/or doctor groups and codes that you have selected above. You can remove a selected doctor from the filter by clicking the trash can icon. | 3 | |
Sequence |
This field reflects the sequence that the doctor is set to display in the schedule as stored in the Doctor Integration Code Table. You can override the sequence for this filter only, by clicking in the Sequence field and changing the sequence number as needed. This does not change the Sequence # in the Doctor Integration Code Table. | 1 | |
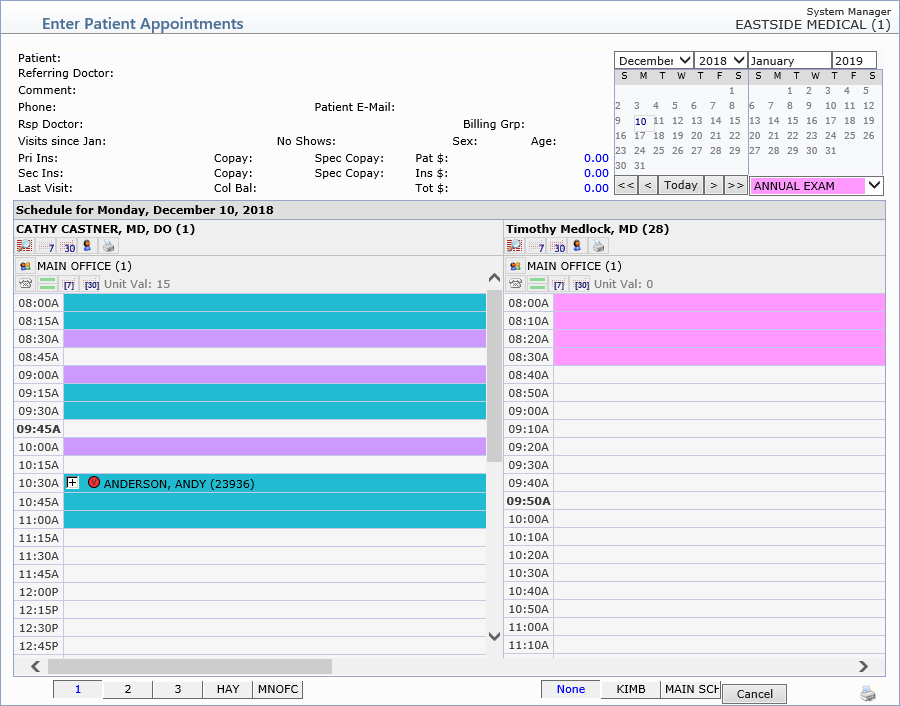
Use all Locations |
If you want this filter to include all locations, select this check box. If you select this check box, the Location drop-down list is inactivated since you are choosing to include all locations. This filter tab displays regardless of the location selected on the schedule, and when you select this filter it will show the schedule for all locations for whichever doctors you selected in this filter. | 1 | |
Location |
To include one or more locations in the filter, type the location code and press Tab or select from the list. After you have selected the location, the location name and code immediately populate in the Location section below. You can select as many doctors as you want with this method. This filter tab displays regardless of the location selected on the schedule, and when you select this filter it will show the schedule for only the locations selected in the filter for whichever doctors you selected in this filter. | 3 | |
Location |
This section displays the locations and codes that you have selected above. You can remove a selected location from the filter by clicking the trash can icon. |
Copyright and Trademark Notice. Copyright © 2019 CompuGroup Medical, Inc. CGM®, CompuGroup Medical® and the CGM logo are registered trademarks and CGM webPRACTICE™ and CGM webTOOLS™ are trademarks of CompuGroup Medical AG in the United States and/or other countries. Any rights not expressly granted herein are reserved.
