![]()
| Prompt | Response | Req | Len |
|---|---|---|---|
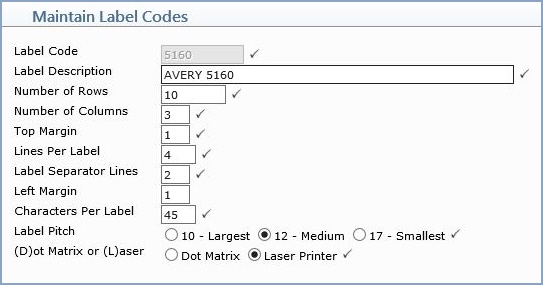
| Label Code | Type the code you want or click the magnifying glass to search the table. This code cannot begin with a zero. | 8 | |
| Label Description | Type a description of the label code. For example, 'Avery mailing labels - 5160'. |  |
46 |
| Number of Rows | Type the number of rows to print per sheet for this label type. For example, if you are using laser labels and there are ten rows of labels per sheet, type 10. | |
6 |
| Number of Columns | Type the number of columns (between one and nine) to be printed across the sheet of labels. For example: if you are using laser labels and there are three columns of labels across the sheet, type 3. | |
1 |
| Top Margin | Type the number of line feeds required from the top of the page to the first line of text that you want to print on a label. | |
1 |
| Lines Per Label | Type the total number of lines to be printed for each label. | |
2 |
| Label Separator Lines | Type the number of lines between the bottom edge of one label and the top edge of the next label. | |
1 |
| Left Margin | Type the number of spaces required for the left margin. For example, type 5 if the first character should be printed five spaces from the left edge of the sheet. | 1 | |
| Characters Per Label | Type the maximum number of characters that can print on one line of the label. | |
2 |
| Label Pitch | Type the label pitch (font size) that you would like to print. 10 is the largest size available, 12 is the next size smaller, and 17 is the smallest. | |
2 |
| (D)ot Matrix or (L)aser | Select whether these labels will be printed on a dot matrix (tractor-feed) or laser printer. | |
1 |
Copyright and Trademark Notice. Copyright © 2019 CompuGroup Medical, Inc. CGM®, CompuGroup Medical® and the CGM logo are registered trademarks and CGM webPRACTICE™ and CGM webTOOLS™ are trademarks of CompuGroup Medical AG in the United States and/or other countries. Any rights not expressly granted herein are reserved.
