![]()

| Prompt | Response | Req | Len |
|---|---|---|---|
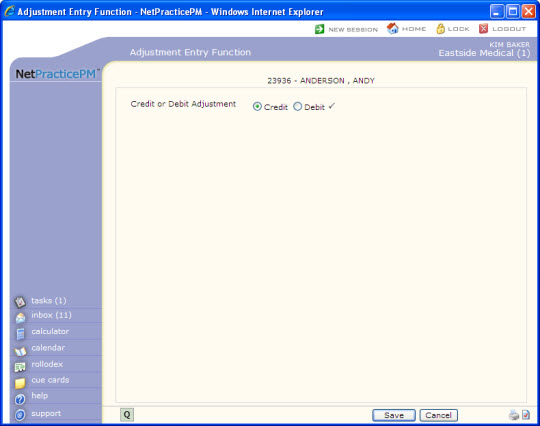
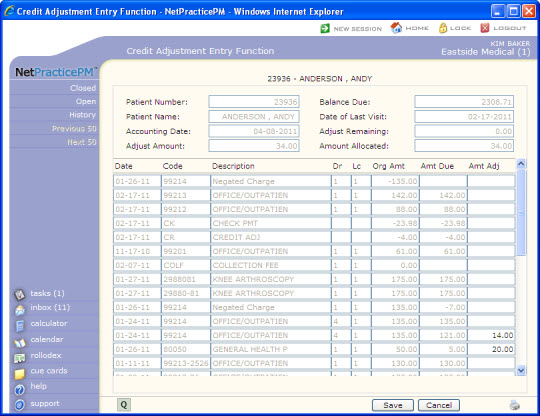
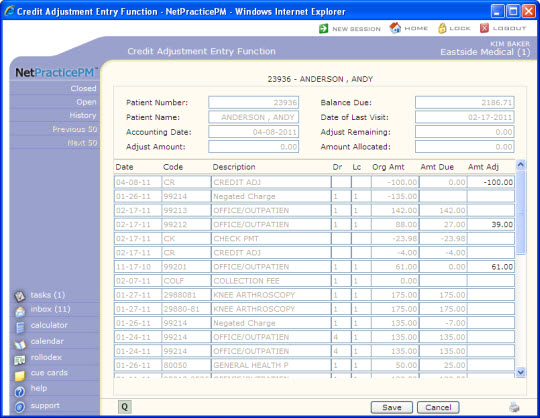
| Credit or Debit Adjustment | Select the option to indicate if you want to post a Credit or Debit adjustment. A credit adjustment will reduce the patient account balance and a debit adjustment will increase the patient account balance. |  |
1 |
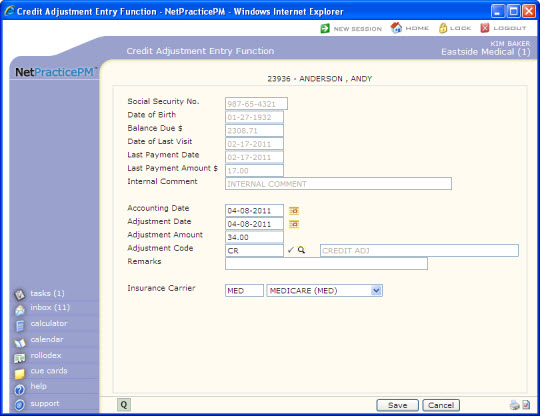
| Prompt | Response | Req | Len |
|---|---|---|---|
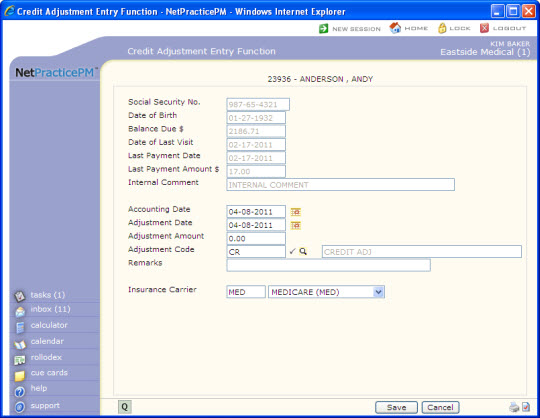
| Social Security No. | This field is informational only and reflects the patient's social security number. | 11 | |
| Date of Birth | This field is informational only and reflects the patient's date of birth. | 10 | |
| Balance Due $ | This field is informational only and reflects the account balance. | 10 | |
| Date of Last Visit | This field is informational only and reflects the date of the last posted procedure. | 10 | |
| Last Payment Date | This field is informational only and reflects the date of the last posted payment. | 10 | |
| Last Payment Amount $ | This field is informational only and reflects the amount of the last posted payment. | 10 | |
| Internal Comment | This field is informational only and reflects any internal comment stored on the patient's account. | 45 | |
| Accounting Date | Type the accounting date you want or click the calendar icon to select a date. | 10 | |
| Adjustment Date | Type the adjustment date you want or click the calendar icon to select a date. | 10 | |
| Adjustment Amount | Type the adjustment amount or type an 'A' to post an accumulative adjustment. | 10 | |
| Adjustment Code | Type the adjustment code you want or click the magnifying glass to search the table. | |
10 |
| Remarks | Type any remarks you want. | 40 | |
| Insurance Carrier | Type the insurance carrier code you want or select from the Insurance Carrier list. | 5 |
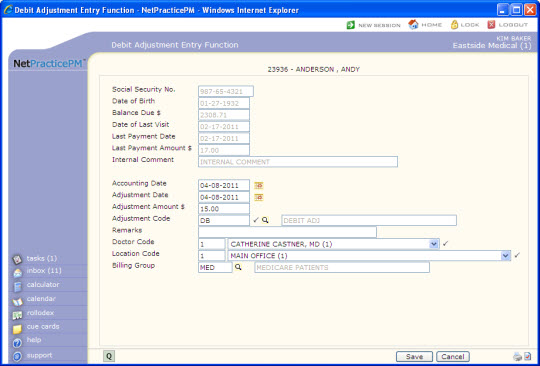
| Prompt | Response | Req | Len |
|---|---|---|---|
| Social Security No. | This field is informational only and reflects the patient's social security number. | 11 | |
| Date of Birth | This field is informational only and reflects the patient's date of birth. | 10 | |
| Balance Due $ | This field is informational only and reflects the account balance. | 10 | |
| Date of Last Visit | This field is informational only and reflects the date of the last posted procedure. | 10 | |
| Last Payment Date | This field is informational only and reflects the date of the last posted payment. | 10 | |
| Last Payment Amount $ | This field is informational only and reflects the amount of the last posted payment. | 10 | |
| Internal Comment | This field is informational only and reflects any internal comment stored on the patient's account. | 45 | |
| Accounting Date | Type the accounting date you want or click the calendar icon to select a date. | 10 | |
| Adjustment Date | Type the adjustment date you want or click the calendar icon to select a date. | 10 | |
| Adjustment Amount $ | Type the adjustment amount. | 10 | |
| Adjustment Code | Type the adjustment code you want or click the magnifying glass to search the table. | |
10 |
| Remarks | Type any remarks you want. | 40 | |
| Doctor Code | Type the doctor code you want or select from the Doctor Code list. | |
3 |
| Location Code | Type the location code you want or select from the Location Code list. | |
3 |
| Billing Group | Type the billing group code you want or click the magnifying glass to search the table. | 5 |
Copyright and Trademark Notice. Copyright © 2019 CompuGroup Medical, Inc. CGM®, CompuGroup Medical® and the CGM logo are registered trademarks and CGM webPRACTICE™ and CGM webTOOLS™ are trademarks of CompuGroup Medical AG in the United States and/or other countries. Any rights not expressly granted herein are reserved.
