![]()

| Prompt | Response | Req | Len |
|---|---|---|---|
| Billing Group (A/S) | Select the Billing Group option to indicate
which statements you want to print. If you select to print statements for All billing groups, you have the option to suppress certain billing groups from printing statements by selecting the Suppress Statements check box for that billing group in the Maintain Billing Group Codes function. |
 |
1 |
| Billing Group | If you selected to print statements for a Select billing group, type the code you want or click the magnifying glass to search the table. | 3 | |
| Statement Type | Select the statement type you want to
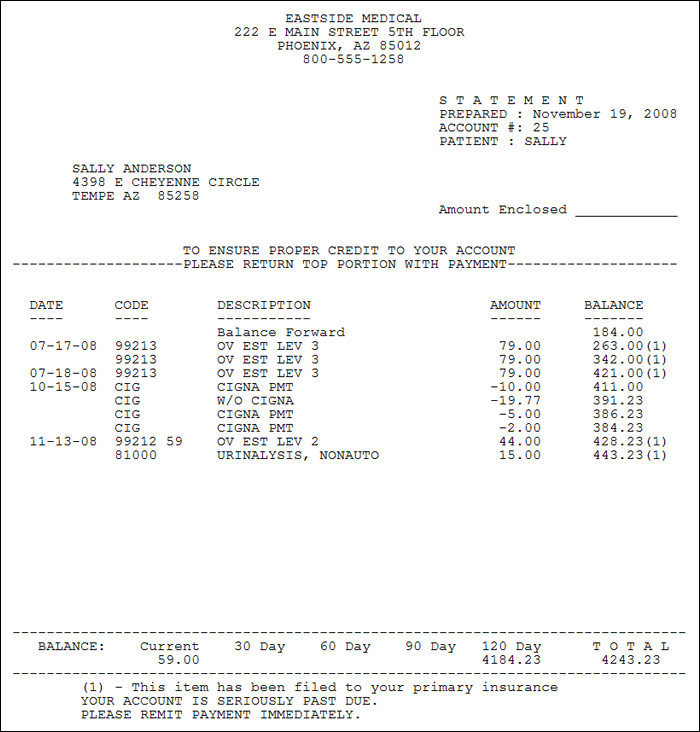
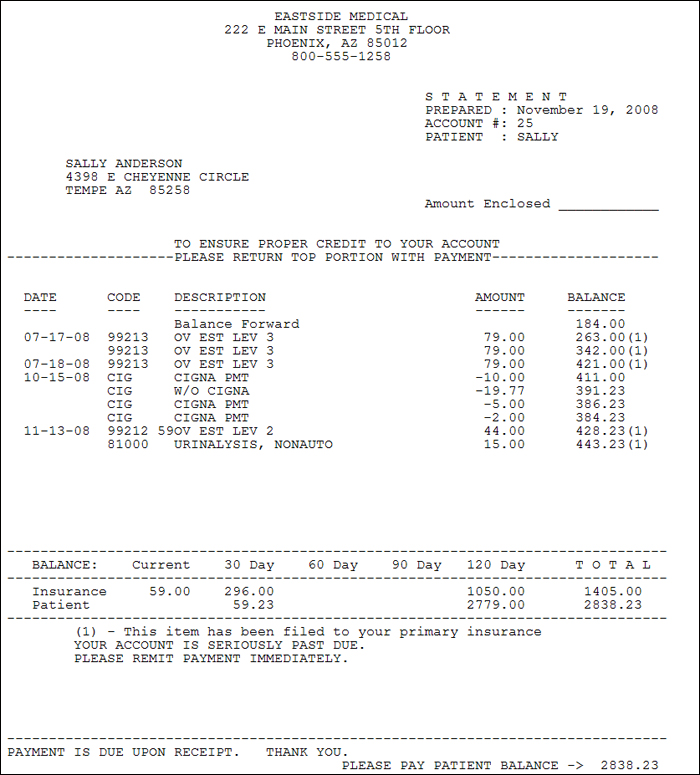
print from the Statement Type list. If you select to print statements for All billing groups, the statement type will default to what is entered in the CGM webPRACTICE Integration Options. Only those billing groups that have a statement type matching the statement type selected will have statements printed. If you select to print statements for a Select billing group, the statement type will default to the statement type entered for that billing group in the Billing Group Table and you should not change it. |
|
3 |

| Prompt | Response | Req | Len |
|---|---|---|---|
| Billing Group | This field is informational only and reflects the selected billing group code. | 5 | |
| Alpha or Numeric | Select the sorting option you want. The sorting option you select must match what you type in the From Patient and Thru Patient fields. For example, if you are printing statements for an individual account number or range of account numbers, then select the Numeric option. | 1 | |
| From Patient | If you selected to print statements in Alphabetic order, type the name of the patient you want to begin with. If you selected to print statements in Numeric order, type the account number of the patient you want to begin with. Leave the field blank to start with the first account in the patient file. | 20 | |
| Thru Patient | If you selected to print statements in Alphabetic order, type the name of the patient you want to end with. If you selected to print statements in Numeric order, type the account number of the patient you want to end with. Leave the field blank to end with the last account in the patient file. | 20 | |
| Minimum Balance $ | Type the minimum balance that must exist on an account in order for a statement to print. | |
20 |
| Sort by Zip Code | If you want to sort the statements by zip code, select this check box. This field only applies if you are printing patient statements directly to a printer. | 1 | |
| From Accounting Date | Type the date you want the transactions to start with or click the calendar icon to select a date. | 10 | |
| Thru Accounting Date | Type the date you want the transactions
to end with or click the calendar icon to select a date. NOTE: If you select a date other than the current date, the statement aging will not print. |
10 |
Copyright and Trademark Notice. Copyright © 2019 CompuGroup Medical, Inc. CGM®, CompuGroup Medical® and the CGM logo are registered trademarks and CGM webPRACTICE™ and CGM webTOOLS™ are trademarks of CompuGroup Medical AG in the United States and/or other countries. Any rights not expressly granted herein are reserved.
