![]()
|
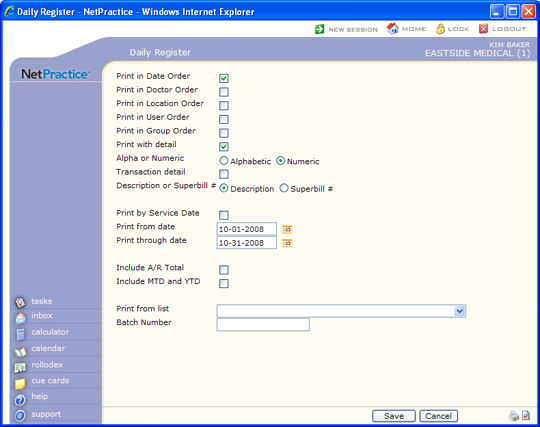
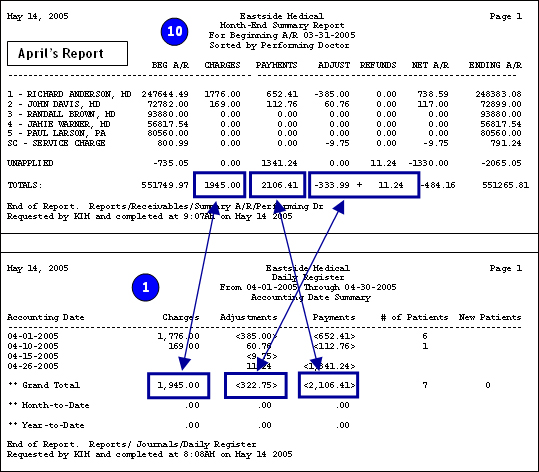
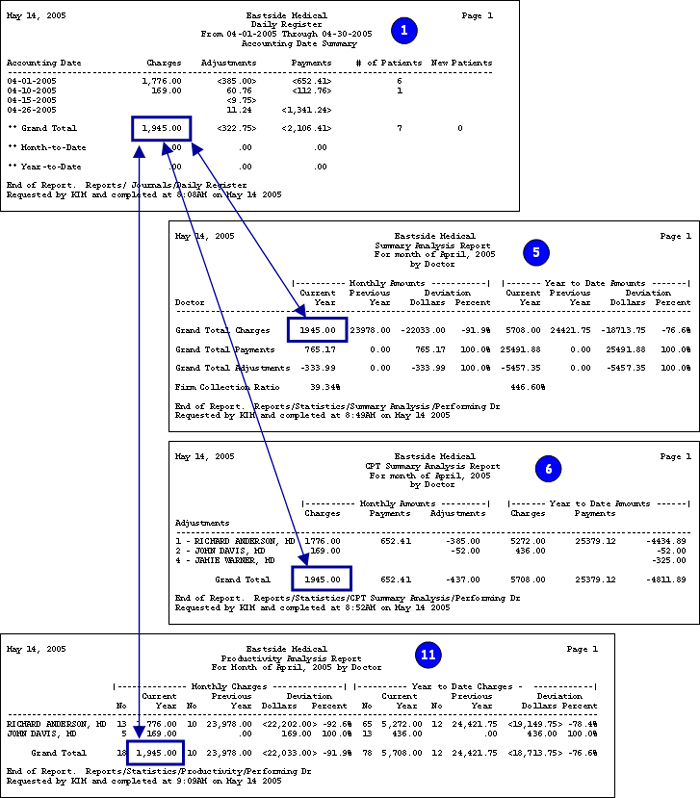
Daily Register - Reports, Transaction Journals - Print in Date Order, do not print with Detail or by Date of Service. |
|
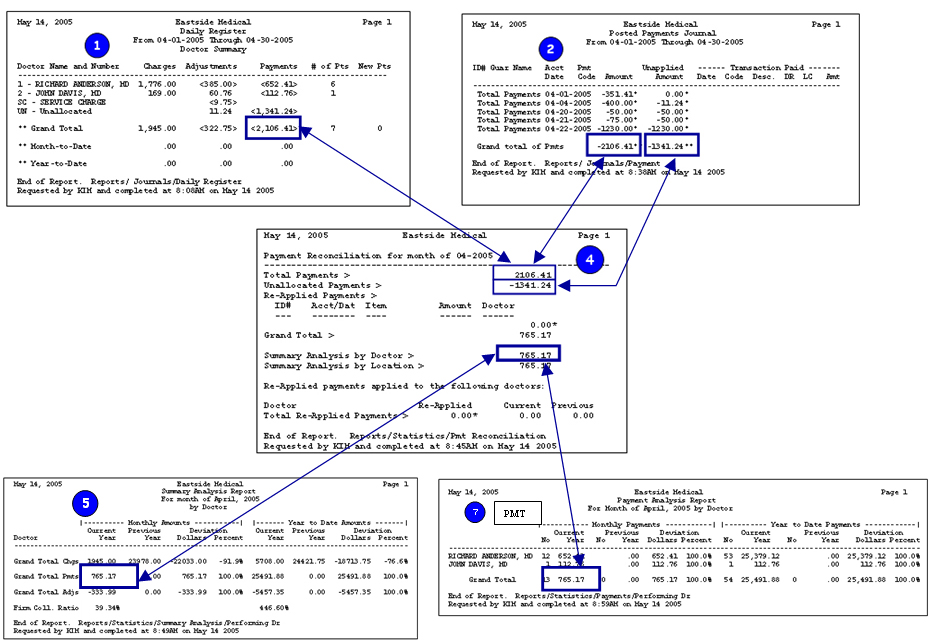
Payment Journal - Reports, Transaction Journals |

|
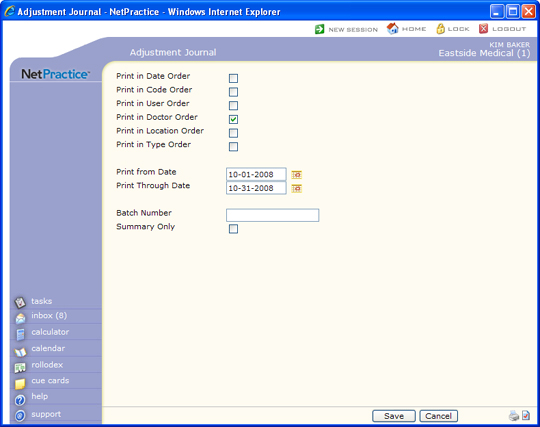
Adjustment Journal - Reports, Transaction Journals |
|
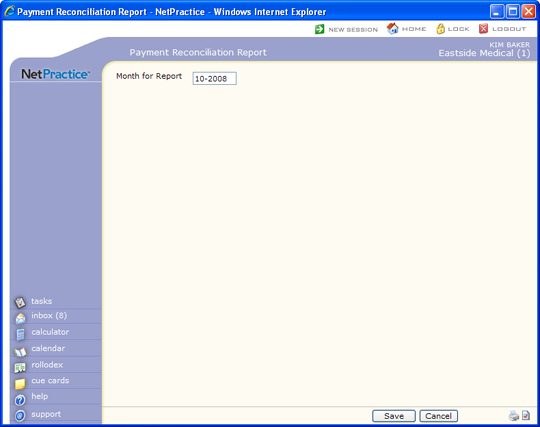
Payment Reconciliation - Reports, Statistical Reports |
|
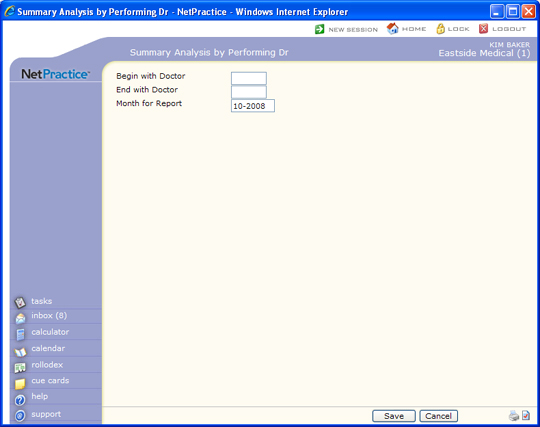
Summary Analysis by Performing Dr - Reports, Statistical Reports, Summary Analysis Reports |
|
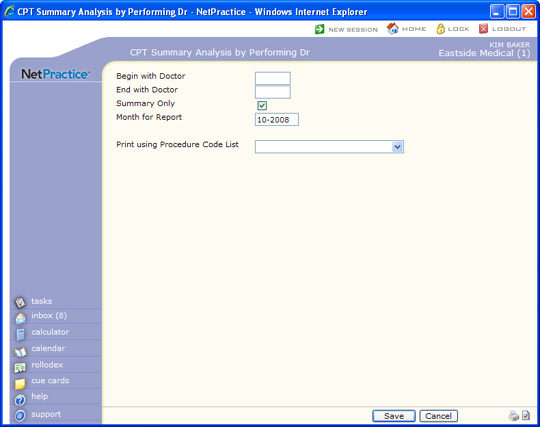
CPT Summary Analysis by Performing Dr - Reports, Statistical Reports, CPT Summary Analysis Reports - Select the Summary Only check box. |
|
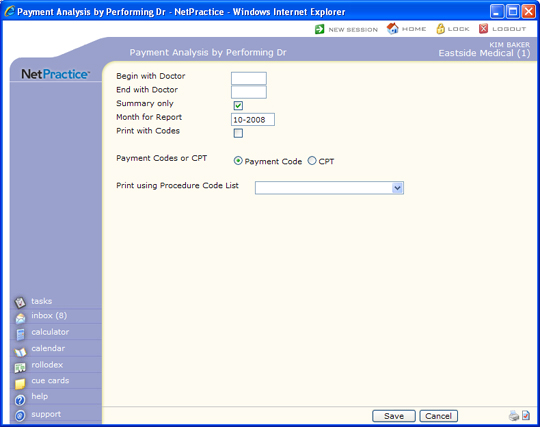
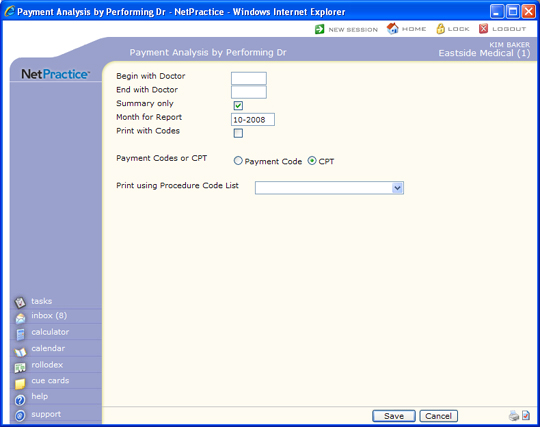
Payment Analysis by Performing Dr - Reports, Statistical Reports, Payment Analysis Reports - Print two reports, one by Payment Code and one by CPT. |
|
Payment Analysis - Payment Code - Select the Summary only check box. |
|
Payment Analysis - CPT Code - Select the Summary only check box. |
|
Adjustment Reconciliation - Reports, Statistical Reports |

|
Adjustment Analysis by Performing Dr Reports, Statistical Reports, Adjustment Analysis Reports - Print two reports, one by Adjustment Code and one by CPT. |
|
Adjustment Analysis - Adjustment Code - Select the Summary only check box. |

|
Adjustment Analysis - CPT Code - Select the Summary only check box. |

|
Summary Aged A/R by Performing Dr - Reports, Aged Accounts Receivable Reports, Summary Aged A/R |

|
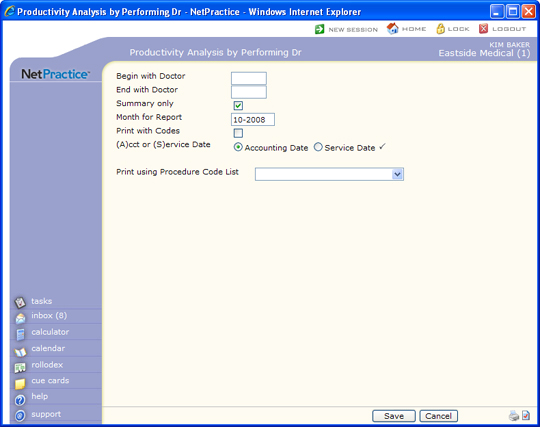
Productivity Analysis by Performing Dr - Reports, Statistical Reports, Productivity Analysis Reports - Select the Summary only check box. |
|
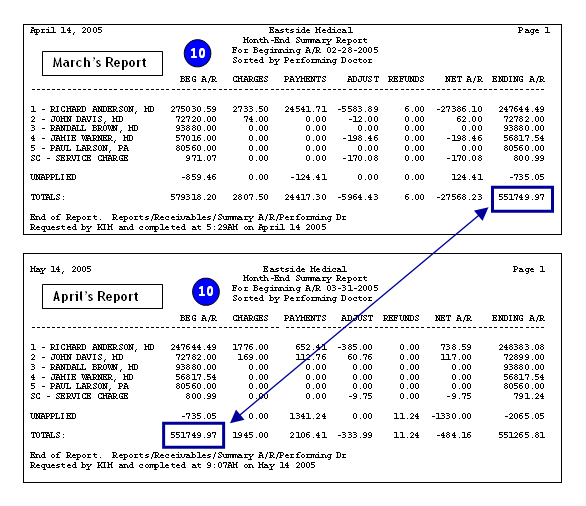
Summary Aged A/R by Performing Dr - This report is also referred to as the Month End Summary Report |
|
Daily Register |
|
Daily Register |
|
Summary Analysis by Performing Dr |
|
CPT Summary Analysis by Performing Dr |
|
Productivity Analysis by Performing Dr |
|
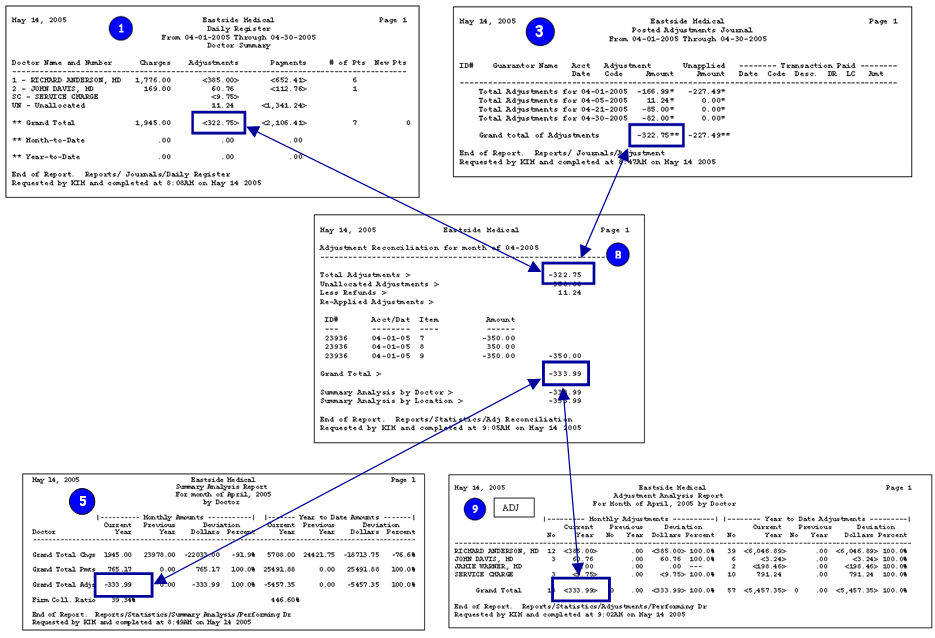
Daily Register |
|
Posted Payment Journal |
|
Payment Reconciliation - Note: If the Unallocated Payment amount does not match the Unapplied Amount on the Posted Payment Journal, this could be because a payment that was originally left unallocated was voided. Voided 'unallocated' payments are ignored when calculating the Unallocated Payments figure. To balance the two figures, you can print the Voided Transactions Journal for the month and locate any voided unallocated payments and then subtract the total voided unallocated payments from the 'Unallocted Payments' on the Payment Reconciliation report. |
|
Summary Analysis by Performing Dr |
|
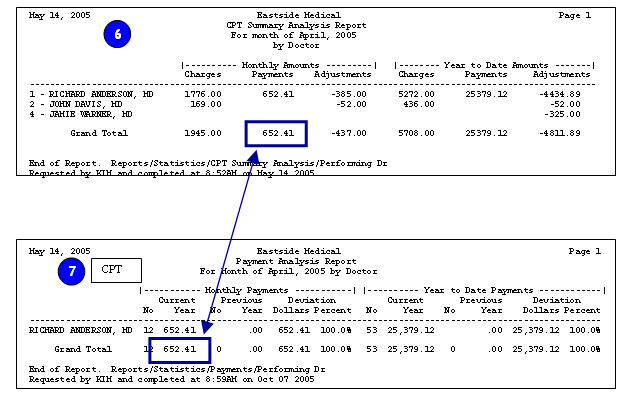
CPT Summary Analysis by Performing Dr |
|
Payment Analysis by Performing Dr (both pmt and cpt reports) |
|
Daily Register |
|
Adjustment Journal |
|
Summary Analysis by Performing Dr |
|
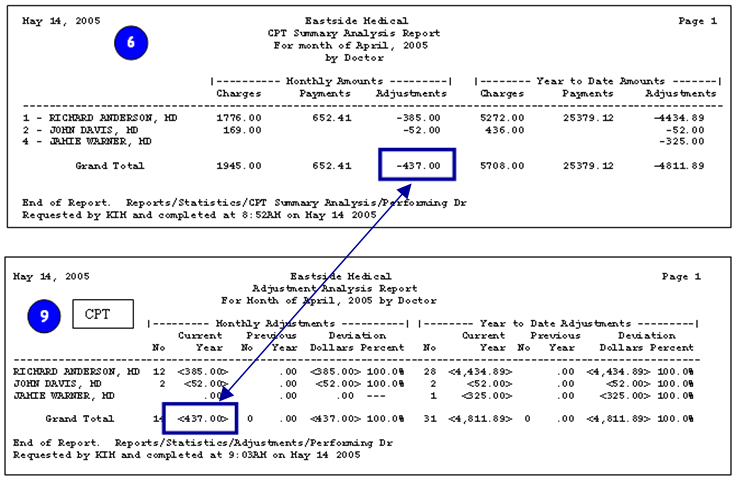
CPT Summary Analysis by Performing Dr |
|
Adjustment Reconciliation |
|
Adjustment Analysis by Performing Dr (both adj and cpt reports) |

Copyright and Trademark Notice. Copyright © 2019 CompuGroup Medical, Inc. CGM®, CompuGroup Medical® and the CGM logo are registered trademarks and CGM webPRACTICE™ and CGM webTOOLS™ are trademarks of CompuGroup Medical AG in the United States and/or other countries. Any rights not expressly granted herein are reserved.


