Rich Text Editor (RTE) Instructions
You can use the Rich Text Editor (RTE) to create letters and superbills.
With the RTE you can insert elements (data-fill fields), insert tables
to align text, insert images, and format text. Since
the RTE was originally designed for use in Internet Explorer, we suggest
you temporarily use Microsoft
Edge in IE Mode while working in the RTE, to ensure the functionality
works as explained below.
Prior to using this function you need to know if your system is set up
to create letters with Plain Text or with the Rich Text Editor
(RTE). All new-client systems are automatically set up with the Rich
Text Editor. You can check the format that your system is set up with
in the DMS Integration
under System, Database Maintenance Menu.
NOTE: If the integration is set to Plain Text and you switch
from Plain Text to Rich Text for the first time, the first
time you access any existing Plain Text DMS document using the DMS Letter
Processor, it will automatically be converted to Rich Text. After a document
has been converted, all future editing for the document can only be performed
using the RTE.
NOTE: If you have existing Plain Text documents and switch to RTE,
you may have to reformat the Plain Text documents.
NOTE: You cannot switch back and forth between Plain Text and Rich
Text because the formatting and integrity of your documents will be compromised.
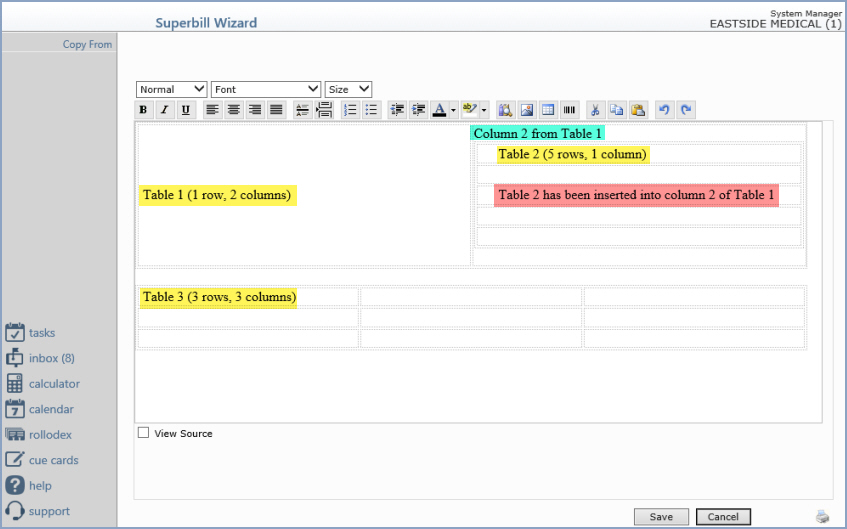
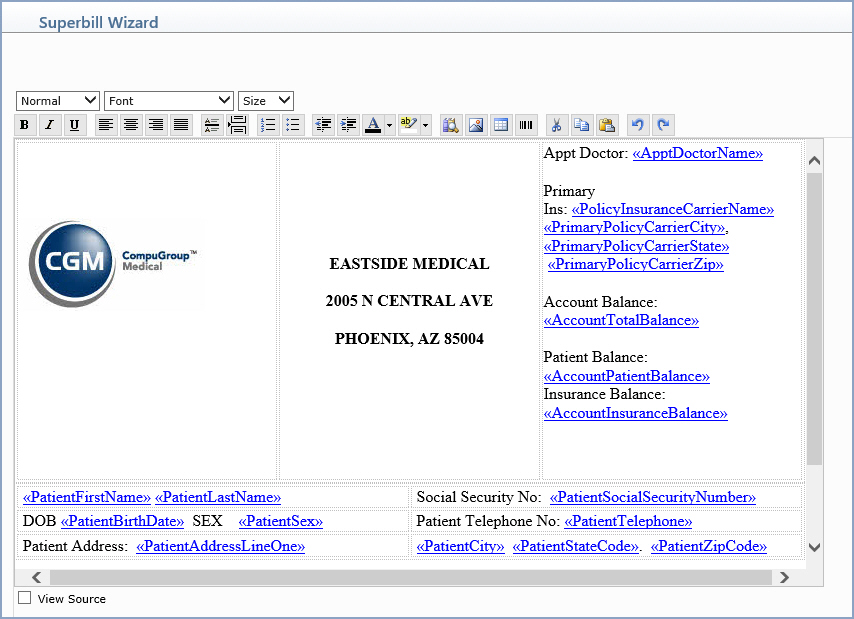
In the Superbill Wizard,
under System, Form Wizards, you use the RTE to create the Header
and Footer sections of the superbill.
You also use the RTE in Add
or Change a Letter, under Reports, Data Management System, DMS
Letter Processor.
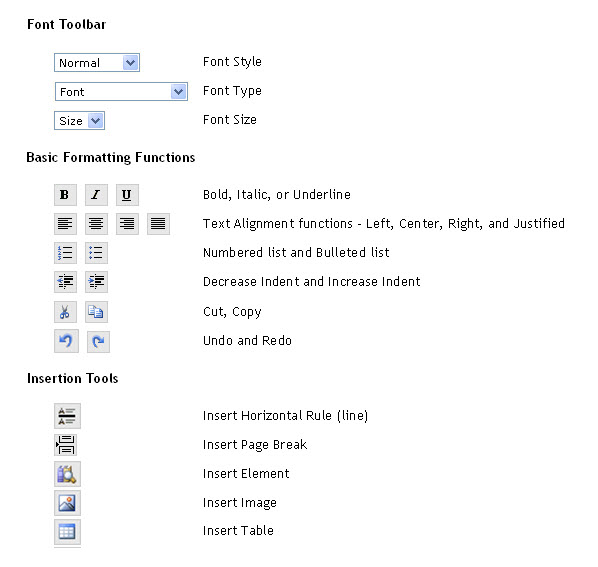
The RTE Toolbars contain all the necessary functions. You can select the
Font Style, Font Type, and Font Size of the text on the Font toolbar.
The Formatting and Insertion toolbars contain basic text formatting functions
and the insertion tools. To apply formatting to text, select the text
you want to format and click on the appropriate toolbar button. Prior
to using the Insertion Tools in the RTE, click in the body of the form
and place the mouse pointer where you want to insert.
You should perform the following steps in the order provided.
- Analyze Section Layout
- Insert Tables
- Insert Image(s)
- Type in Text
- Insert Elements
NOTE: You should save your work frequently while creating superbills
or letters. The sample below demonstrates using the RTE in the Superbill Wizard.
Step 1. Analyze Section Layout
Determine how many tables will need to be inserted and how many rows and
columns each table should contain.
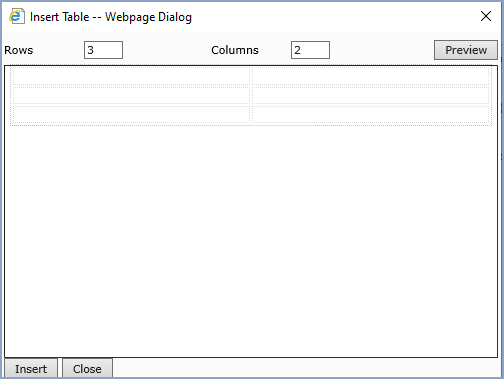
Step 2. Insert Tables
Tables are optional, but extremely helpful in aligning the data, images,
and elements that are entered in the Header and Footer. Click in the body
of the form to place the mouse pointer and click the Insert Table
icon. Type the number of Rows and Columns. You can click
Preview to see what the table looks like before inserting it. Click
Insert and the table will be inserted in the body of the form.
Multiple tables can be stacked or nested to provide a variety of alignment
options. Individual table rows and columns cannot be re-sized,
deleted or added
after the table has been inserted. It is best to spend a few extra minutes
determining your needs during the analyze section layout out step; otherwise
you may have to delete an entire table and start over.
If you have to delete a table, select it by positioning the mouse pointer
over one of the table's borders. When the pointer changes into a double
arrow crosshairs icon, click on the table. The sizing handles display
around the table's border confirming it has been selected. Press Delete
to delete the table and all of its contents.
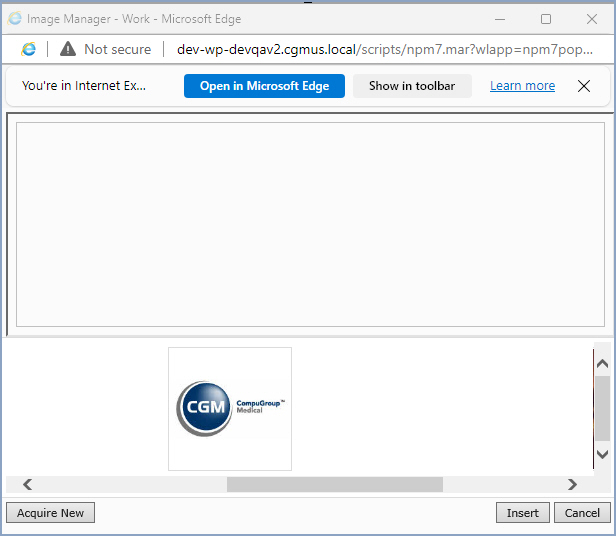
Step 3. Insert Image(s)
You can insert any image(s) into a table cell(s). Click within the table
cell you want to insert the image to place the mouse pointer and click
Insert. The Image Manager window displays all previously used images
in the bottom portion of the screen. Click on the image you want and click
Insert. Or, click Acquire New to scan a new image or Attach
a previously saved image from your hard drive. For detailed instructions
on scanning or attaching images, see Image
Scanning or Acquire
and Attach Images under the Introduction, System Processes
Help section. You should only insert one image per table cell.
If an image needs to be re-sized after it has been inserted, click the
image to select it. Place the mouse pointer over one of the sizing handles
and drag the sizing handle until the image is the size you want. To maintain
the image's proportions, drag one of the corner sizing-handles.
Step 4. Type in Text
Type any required text and format it as you want. NOTE: Although
the formatting functions in the RTE are similar to Microsoft Word, there
are some significant differences. You should type the text first, using
the default style, font, and font size, and then any formatting should
be applied. You are only able to format existing text that has been selected.
For example, if you want text in bold type, type the data first, select
the text and click the Bold font icon in the formatting toolbar.
If you are typing multiple lines of text and press Enter to proceed
to a new line, the line spacing is defaulted to double-spaced. If you
want the text to be single-spaced, hold down the Shift key at the
same time you press the Enter key (Shift+Enter).
Step 5. Insert Elements
Insert any Data Element(s) or Special Element(s) into a table cell(s).
Click in the table cell where you want to insert the element, then click
the Insert Element icon. The Elements window will display all available
categories of data elements. Click on a category name to expand the list.
Scroll through the list to locate the element you want and then click
on it to insert it into the table cell. If you are not sure which category
the data element resides in, you can click Alpha List to display
the elements alphabetically. You can also click Special Elements
to select and insert 'special elements' data.
NOTE: If your superbill was created as a Rich Text document, it
cannot be printed directly to a legacy printer (a printer that was manually
set up in Cache). You would need to select Print Here in the Printers
dialog box to print them to the screen first before selecting the printer.
To bypass this, you can set up the printer as an Enhanced Printer.
