Scanned Image Management Setup Steps
With Image Management you can scan important patient information directly
into a patient's account.
You can scan in many types of data. The various types are broken down into
four categories and consist of:
- Patient Identification (Driver's License or photos)
- Insurance Cards
- Patient Documents - face sheets, medical history forms, referral
letters, transcription, letters to patients, and so on.
- Explanations of Benefits
Images scanned within CGM webPRACTICE using Acquire
and Scan can be saved as .jpg, or .gif. image types.
Images scanned outside of CGM webPRACTICE using Acquire
and Attach can only be saved as .jpg or .gif image types.
NOTE: * .tiff, .pdf and .bmp image types can only
be used for Explanations of Benefits and only when you use the Link
Images function located on the System,
Image Management menu.
The image management setup steps must be performed prior to using any Image
Management function.
Image Management Setup Steps
1. Purchase the Appropriate
Scanner(s)
2. Set
Up the Image Management Integrations in CGM webPRACTICE
3. Set Up the TempImages Folder
4. Disable Script Blocking
5. Install the Scanner
6. Confirm Workstation Setup
7. Install the Scan Control
8. Calibrate the Scanner
Purchase
the Appropriate Scanner(s)
Contact your Hardware or IT Specialist to discuss your practice's needs
and determine which scanner would be the most appropriate to purchase
for your system.
CGM webPRACTICE supports TWAIN compliant devices. Due to the number of
scanners available, it is not possible to provide a list of compatible
scanners, however, some recommendations are:
- Full-size Scanning - Light to Medium Quantities
- HP ScanJets
- Epson Perfection Scanners
- Full-size Scanning - Heavy Quantities
- Fujitsu Scanners
- XEROX DocuMate Scanners
- Card Scanning (Insurance Cards, Drivers' Licenses)
- ScanOCR, provided by Inuvio - NOTE: The CGM webSCAN software
plug-in for CGM webPRACTICE cannot be ordered directly from Inuvio.
If you want to use this product, please contact your CGM webPRACTICE
Account Manager.
There are simplex and duplex scanners. Simplex scanners scan only one side
of the page at a time. Duplex scanners can scan both sides of a page at
the same time. The CGM webPRACTICE Acquire Image function can only
perform a simplex scan. The CGM webSCAN software scans only one side of
a driver's license, but it can scan both sides of an insurance card at
one time.
Set Up the Image Management Integrations in CGM webPRACTICE
For detailed instructions on completing the Image Management Integration
screen, see Image
Management Integration.
Set
Up the TempImages Folder
***For Self-Hosted Clients Only***
- Only perform the TempImages setup if you will be using a Network
scanner for Scanning
images outside of CGM webPRACTICE using Acquire and Attach.
Have the C:\TempImages folder setup on the server as Shared
or have that folder Mapped on each workstation. If there are multiple
databases, each user will need to have access to the individual image
folders for the database they usually work in (9999_1, 9999_2, etc.).
Replace C:\ with your drive letter, 9999 with your client
number and replace the number 1 with your database number. By saving
the images into the C:\TempImages\9999_1 folder, you can use Link
or Acquire and Attach functions to store images on patient accounts.
Install the scanner on a workstation that has access
to the C:\TempImages\ folder. Images should be scanned and saved into
the C:\TempImages\9999_1 folder.
Disable
Script Blocking
Antivirus programs, which have script blocking enabled, must be
disabled before the scanning procedures can be started. This needs
to be done for each workstation setup to scan from within CGM webPRACTICE.
Script blocking has become a popular feature of many virus scanners. It
allows a user to block scripts, macros and other potentially harmful programs
that one would usually be unaware of. However, the script blocking technology
cannot distinguish between a 'good script' and a 'bad script'. This falls
heavily into play with CGM webPRACTICE, especially scanning. While our
scripts may be entirely benign, cautious users will be quick to block
all scripts, thus blocking out essential features of CGM webPRACTICE.
Install the
Scanner
Mass Scanning - Scanning Outside of CGM webPRACTICE - If multiple
staff members will be scanning, you can use a network scanner. Otherwise,
if only one staff member will be scanning, it should be installed on their
workstation. Regardless of the number of staff scanning, each must have
access to the C:\TempImages\ folder on the CGM webPRACTICE server. For
details, see Step 3, 'Setup the TempImages Folder'.
Scanning within CGM webPRACTICE - Scanners must be installed on
each workstation that will be scanning patient identification, insurance
cards, and other images from within CGM webPRACTICE.
Contact your Hardware or IT Specialist to obtain train for staff members
on scanning and saving images.
Confirm
Workstation Setup
Each workstation must meet the current Client Computer System Requirements
and have the Windows update for Microsoft's .NET Framework 2.0 and 3.5
with current Service Packs installed. You must also Configure
Internet Explorer.
Install
the Scan Control
1. Log on to CGM webPRACTICE.
2. Click on the Patient menu, and then click Change Patient Data.
3. Select a patient account and then click on the Patient Name and Address
quadrant.
4. Click Acquire Image in the Action Column.
The first time you access Acquire Image, the following window will
appear.
When the Security Warning window appears, click Run to install the
Scan Control, otherwise scanning will not work.

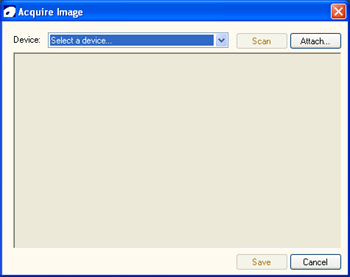
After it has been installed, the warning will no longer appear. The Acquire
Image dialog box should be displayed.
Calibrate
the Scanner
Make sure that you calibrate the scanner. See the manufacturer's instructions
or your Hardware or IT Specialist if necessary.
