CGM eDOCS

CGM eDOCS is an easy-to-use electronic document storage system for retrieval and management of EOBs, authorizations, appeals, patient information or any other important documents in your office. The typical office invests significant time each work week pulling and filing paper charts and documents and searching for missing records. The solution is to go paperless and convert all of your paper charts into electronic documents that can be retrieved in seconds.

CGM eDOCS is designed specifically to help the CGM webPRACTICE office go paperless. It has a powerful set of features that lets you scan documents, search and quickly find documents, view, print, forward and add comments and attachments. It is an essential component for medical practices that want to become more organized, efficiently manage paperwork, and reduce the cost of office supplies. Because CGM eDOCS is a complete browser enabled document management solution, all departments and all offices in your practice can use and benefit from its powerful features.

  1. Features
  1. Benefits

CGM eDOCS Application

CGM eDOCS Setup Process
The following steps should be performed to set up CGM eDOCS for use with CGM webPRACTICE.
  1. Your server and workstations must meet the system requirements for the CGM eDOCS application.
  2. You must have scanners installed on the workstations that will be scanning documents into CGM eDOCS.
  3. Set up a test patient in CGM webPRACTICE to test the CGM eDOCS application for the first time.
  4. In Maintain Image Types, create the Image Type Codes that you want to use with CGM eDOCS. These codes correspond to the Document Type within the CGM eDOCS application. For example, you may want to create image types for Authorizations, Appeal Letters, Lab work, Medicare EOBs, Aetna EOBs, etc.
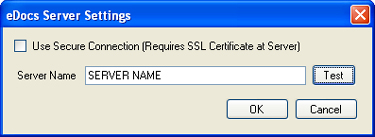
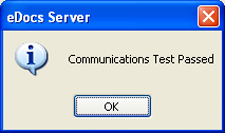
  5. Test the server communication.


Login to CGM eDOCS
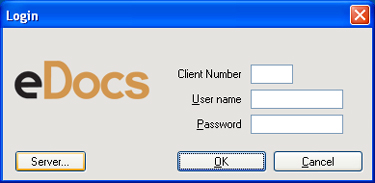
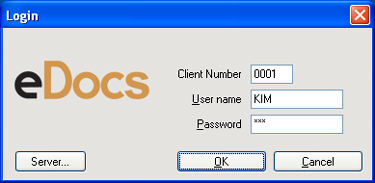
To login to the CGM eDOCS application, type the CGM webPRACTICE Client Number assigned to your practice and your User Name and Password assigned to you in CGM webPRACTICE.

CGM eDOCS Preferences
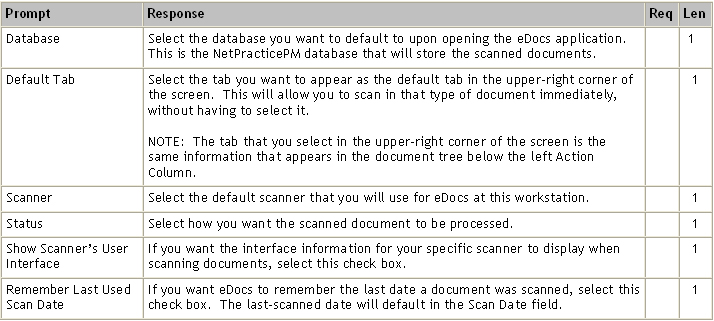
Upon signing in to CGM eDOCS, the CGM eDOCS For CGM webPRACTICE screen displays. You perform everything in CGM eDOCS from this one screen. Click Preferences in the Action Column on the left side of the screen to set up the CGM eDOCS Preferences.

NOTE: These preferences are workstation-specific.

Data Field Information


Action Column Functions

The functions in the upper-left corner of the screen are the Action Column functions.

New Document: With this function, you can add new documents. When you click New Document, the screen clears, allowing you to open or scan a new document. Any existing documents that you have opened but have not saved are stored and organized in the document tree below the Action Column.

Open...: With this function, you can bring a document into CGM eDOCS that is already saved elsewhere on your workstation. When you click Open..., the CGM eDOCS for CGM webPRACTICE Open Dialog box opens allowing you to browse and open a document into CGM eDOCS. Use CTRL+Click or CTRL+Shift to select multiple documents.

Scan: With this function, you can scan a document into CGM eDOCS. Insert the document(s) into your scanner. When you click Scan, your scanner software's setting screen opens, allowing you to scan the document into CGM eDOCS.

Discard: With this function you can delete a document from CGM eDOCS. When you click Discard, a message displays so you can confirm or cancel the deletion of the document. A document cannot be retrieved after it is discarded/deleted.

Save As: With this function you can save a document to your workstation. This is different from the Save button in the lower-right corner of the CGM eDOCS screen. When you click Save As, the CGM eDOCS for CGM webPRACTICE Save Dialog box opens allowing you to save the document to your computer.

Preferences: With this function you can edit the CGM eDOCS preferences that you chose in the CGM eDOCS Preferences set up step.

The document tree below the Action Column organizes the documents you add to CGM eDOCS, allowing you to access multiple documents before saving them.


Document Management
You can select the details of the document using the fields on the right side of the screen either before or after you open or scan a document into CGM eDOCS.

Patient Tab:
Patient: Type part or all of the patient's name or the patient's account number, or click the magnifying glass to search for the patient. For additional information on searching for accounts, see Patient Look-up.

After you select the patient, the patient's name and account number populates into the Patient field and in the document tree.

EOB Tab:
Check Number: Type the check number or other EOB identifier.

Other Tab:
Folder Type: Select the Folder Type you want to use for this document. The Folder Type corresponds to the Drawers in the CGM eDOCS File Cabinet.

Folder: Select the Folder you want to use for this document. The Folder corresponds to the Folders in the CGM eDOCS File Cabinet.

Common Fields for each Tab:
Document Type: Select the Document Type you want to use for this document. The Document Type corresponds to the image types you set up in Maintain Image Types.

Scan Date: This defaults to the current date, unless you chose to have it default to the last-scanned date in Preferences. You can type the date you want or click the field and select a date from the calendar.

Document Title: Type a title/description for the image/document.

Additional Information: Type any necessary additional information about the image/document.

Attachments: If you want to attach a file to this document, right-click within the field, select Add File and choose the file you want to attach.

Status: Select which processing status you want to use.

After you have selected the document details, insert the document into your scanner and click Scan in the Action Column. Use your scanner's software to scan the document. The document will appear in the middle of the CGM eDOCS screen.

Manipulate a Document
You can use the toolbar icons at the top of the image screen to manipulate or edit the document.

- Click to zoom in.

- Click to zoom out.

- Click to rotate the page counterclockwise.

- Click to rotate the page clockwise.

- Click to remove the selected page from a multi-page document.


Annotations
You can use the icons on the toolbar directly above the document to add items to the document.

- Click and drag the pointer around any existing annotation. Right-click in the area you selected to choose a command from the shortcut menu.


- Click and drag the pointer across the portion of the document you want to highlight.


- Click and drag the pointer to draw a freehand object.


- Click and drag the pointer across the portion of the document you want to black-out.


- Click and drag the pointer across the document to draw a text object.


- Click and drag the pointer across the document to draw a text pointer object.


When you select to add a text box or a text pointer annotation to the document, the 'text Properties' dialog box opens so you can add and format the text and text box.

- Click the down arrow to select a stamp object and then drag the pointer on the document where you want the stamp to appear.


NOTE: You must click Apply Annotations to save the annotations to the document.


Saving a Document
When you are ready to save the document, click Save in the lower-right corner of the screen.

NOTE: After you save the document, you will no longer be able to retrieve or access it from the CGM eDOCS application.

All documents are stored in the CGM eDOCS File Cabinet.