Populate Collection Roster
With the Populate Collection Roster function you can automatically move accounts through the collections process. This is the key function for Patient Collections. It determines which accounts enter the collections process, the migration path for accounts already in the collections process, and it removes accounts from the collections process that are no longer delinquent. You can perform this function manually or you can have it automatically performed on a nightly basis by CGM webPRACTICE. To do this, select the Automatic Roster Population check box in the Patient Collections Integration.
The Populate Collection Roster function:
- Evaluates all accounts not already in the patient collections process to see if they meet the criteria to enter the collections process.
NOTE: If the whole account balance is a credit balance, the account will not enter the collections process. Even if certain charges are delinquent, they will not be considered for collections since a credit balance exists on the account.
- Evaluates accounts already in the collections process to see if they need to be transferred to another status.
- Evaluates accounts with fixed payment plans to see if they have met the terms agreed upon, and if not, transfers them to the Failed Payment Plan status.
- Generates any letters for accounts with status codes that indicate letters should be created. The letters generate only one time per status code.
- Removes accounts that are no longer past due from the collections process.
Upon accessing this function, the 'populate' process begins immediately. Click OK when the 'Populating Collection Roster in background' message appears. This means the job will perform independently and you do not have to stay in this function until it is complete.
NOTE: Do not perform any functions in Patient Collections and avoid making any changes to accounts that may be affected by the 'populate' function while the roster is populating.
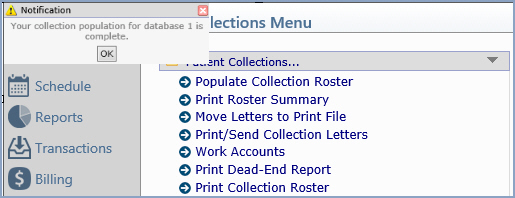
You can continue with other tasks and a message will appear in the upper-left corner of the screen informing you when the function is complete. NOTE: This message will not appear until you refresh the screen by clicking another function or menu.

NOTE: If, after you populate the collections roster, you post a payment to an account which reduces the balance to less than delinquent, the account remains in collections until the next time you populate the collections roster.
If you choose to manually populate the collection roster:
- Before you populate the collection roster, you must Create Insurance File to ensure the balances on the accounts have been processed and moved to the Insurance Balance owing, if applicable. Otherwise, you could have accounts enter the collections process in error.
- Perform the Populate Collection Roster function at the appropriate intervals. Review the Collection Status Table and locate the smallest number of days entered in the Days to Remain in Status field. You must populate less than that number of days apart, otherwise your accounts will not migrate properly. For example, if you have 15 days as the smallest value, then you should populate every 14 days or less. You should always print the collection letters the same day you perform the populate function.
If you choose to have the roster populated automatically:
- Note that this function occurs at approximately 2:00 a.m. every night.
- You must make sure (with your IT person, if necessary) that the server backup is not running at this time. (The backups shut down Cache, and Cache needs to be running for CGM US to perform the function automatically on the server.)
- Create Insurance File every day after all of the procedures have been posted.
- Work Accounts daily.
- Print Collection Letters daily. This ensures that the appropriate letters are generated for each account and that each account receives the proper attention while migrating through the collections process.
This is a common mistake: For example, you have status code 1 set up as:
- Days to Remain in Status: 15
- Transfer to Status Code: 2-Seriously Past Due
- Letter 1 Past Due Reminder to be generated for each account
When the accounts transfer into status 1, you must print and mail the letters right away, because the accounts will only remain in status code 1 for 15 days before transferring on to status code 2. Say you forget to print and mail the letters until day 12 and the accounts transfer over to status code 2, three days later. When you mail the letters for the accounts that are now in status code 2, those patients will have just received their first letter a few days prior.
NOTE:
- The first time you perform this function, it will automatically create the Collection database, if it has not already been created. The collection database number is the current database plus 90. So, for database 1, the collection database is 91.
- If a Billing Group Code is changed to Suppress Collections after patients have previously entered the collections process, the next time the populate function is performed those accounts will be moved out of the collections process.

