![]()

| Prompt | Response | Req | Len |
|---|---|---|---|
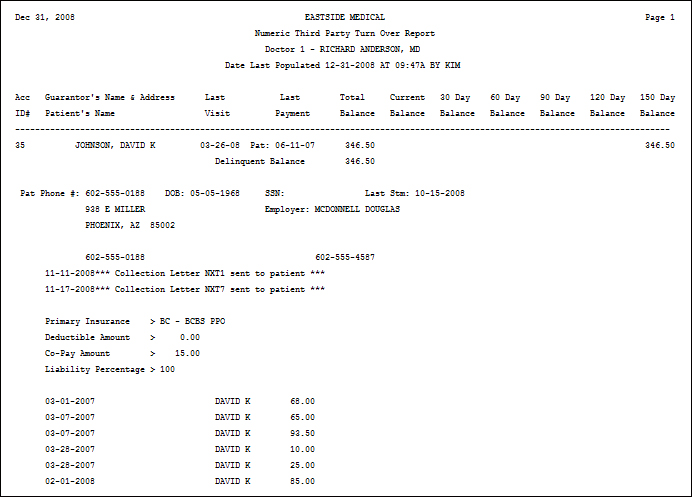
| Alpha or Numeric | Select the option to print the patients alphabetically by last name or numerically by account number. | 1 | |
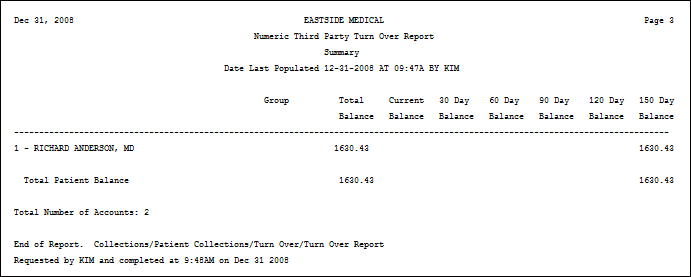
| Print Detail of Patients | If you want to print the individual detail of patients (accounts), select this check box. If you do not select to print the detail of patients, a summary of the total number of patients per collection status code will print. | 1 | |
| Include Address Information | If you selected the Print Detail of Patients check box and want to include the guarantor's address, select this check box. | 1 | |
| Print Transaction Detail | If you selected the Print Detail of Patients check box and you want to include the transaction detail, select this check box. |  |
1 |
| Begin with Responsible Doctor | Type the code you want to begin with or leave the field blank to start with the first code in the table. | 7 | |
| End with Responsible Doctor | Type the code you want to end with or leave the field blank to end with the last code in the table. | 7 | |
| DMS Notes Beginning date | Type the date you want or click the calendar icon to select a date. This will include any DMS NOTES records that have been added to the account since this date. | |
10 |
| Delinquent Balances Only | If you want to print only the delinquent patient balance instead of the whole patient balance, select this check box. | 1 |
Copyright and Trademark Notice. Copyright © 2019 CompuGroup Medical, Inc. CGM®, CompuGroup Medical® and the CGM logo are registered trademarks and CGM webPRACTICE™ and CGM webTOOLS™ are trademarks of CompuGroup Medical AG in the United States and/or other countries. Any rights not expressly granted herein are reserved.
