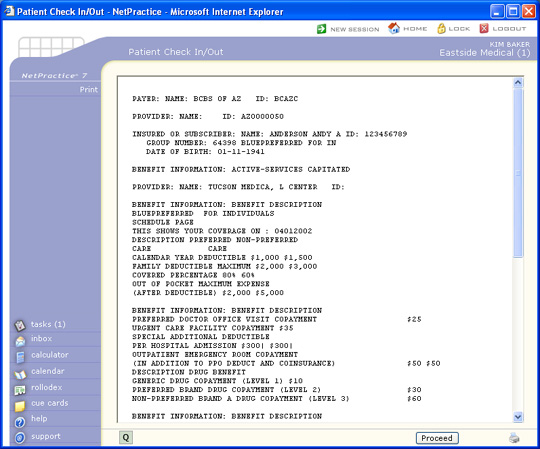
Patient Check In/Out
With the Patient Check In/Out function, you can track patients as they
move through your practice and also enter payments either during the Check
In or Out process, whether they are co-payments or payments received on
account.
The Patient Check In/Out function provides the following functions:
The extent to which this function is used for tracking patient flow is
entirely up to you. You can create as many different status codes as you
want to customize this function to your practice's needs. For example,
'Arrived - Ready to be Seen', 'In Exam Room', and 'In Procedure Room'.
This function can be accessed two different ways from the Schedule menus.
Either through the Schedule, Patient
Check In/Out function or from within the Schedule,
Enter Patient Appointments function using the Check In/Out function
in the Action Column.
Prior to using this function the status codes must be created in the Patient Status/Location
Table located on the Schedule, Scheduling Table Maintenance
menu and the Patient
Check In/Out Integration screen, located on the System, Database
Maintenance Menu must be completed.
Summary
Patient Check In/Out Screen
Upon accessing this function from the Schedule Menu, a list of all the
patients scheduled for the current date and the current Filter
settings displays. Whether you access Patient Check In/Out, from
the Schedule Menu or from the Action Column in Enter Patient Appointments,
the Location, Doctor and Procedures settings reflect
whatever was last selected in the Filter and remain until you manually
change them.
There are some exceptions that prevent patient appointments from displaying
in the Summary screen and they are:
- If the appointment time is 'Blocked.'
- If the appointment has been marked as a No Show using the
No Show function in the Action Column.
- If the Suppress Superbill field is selected for the Type
of Visit code in the Type of
Visit Table.
- If the Suppress Superbills field is selected for the Doctor
code in the Doctor
Integration Code Table.
- If the Show Checked Out Appointments on Summary field is
not selected in the Patient
Check In/Out Integration function.
The location name and date will be displayed across the
top of the screen. This screen can be sorted based on any of the column
headings. For detailed instructions on re-sorting the data, see Sortable
Columns in the Introduction, System Conventions Help section.
The default sort is by Time, listing the earliest times first. The information
provided for each patient appointment is the: Time of appointment, Patient
name and Account number, current Status, Doctor code scheduled for the
appointment, Reason for Visit, the time the status was last Changed, and
a checkmark in the Procedures column if the patient currently has 'Posted
or Unposted Procedures for this date', E-Superbill link if one has been
entered for the patient and CGM webVERIFY Eligibility Status icons.
NOTE: For clients with interfaces between CGM
webPRACTICE and other software: After the appointment details are sent
from CGM webPRACTICE to the other software, depending on the interface,
the information to generate the checkmark in the Procedures column
may not come back across the interface into CGM webPRACTICE from the other
software company.

To access the Detailed Patient Check In/Out screen to change the status
of a patient or enter a payment, you must first select a patient. To select
a patient, click anywhere in the row containing the patient information,
otherwise click Select Patient in the Action Column.
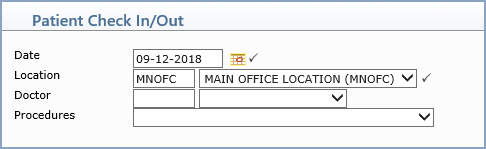
Filter
With the Filter function you can apply a filter to specify which
patients you want on your Check In/Out list based on Location,
Doctor and posted Procedures. The heading on the Summary
screen indicates the filter settings. Whether you access Patient Check
In/Out, from the Schedule Menu or from the Action Colum in Enter
Patient Appointments, the Location, Doctor and Procedures
settings reflect whatever was last selected in the Filter and remain
until you manually change them.
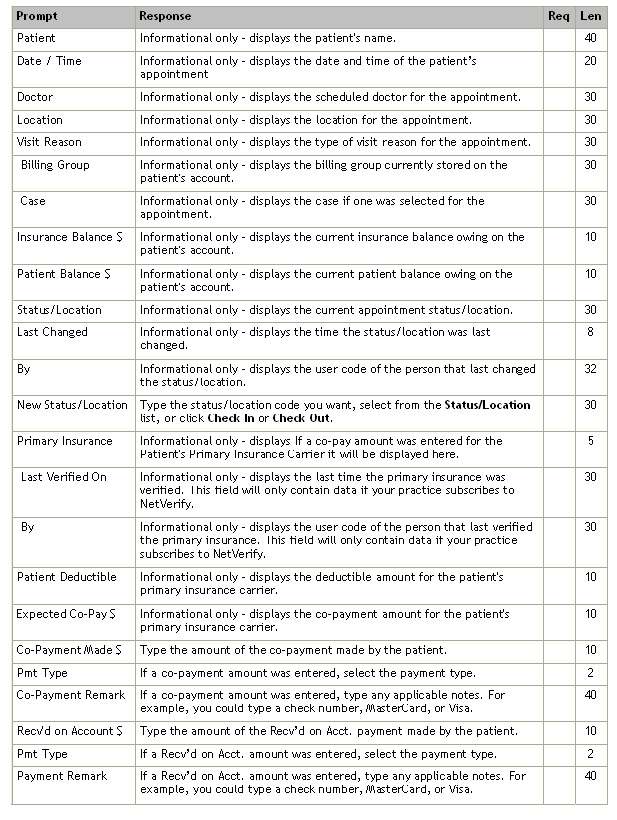
Data Field Information
| Prompt |
Response |
Req |
Len |
| Date |
Type the date you want or click the
calendar icon to select a date. This field defaults with the current
date. |
 |
10 |
| Location |
Type the code you want or select from
the Location list. This field defaults with the location that
was selected the last time the Filter was set. |
|
5 |
| Doctor |
Type the code you want, select from
the Doctor list, or leave the field blank to include all doctors
with schedules for the selected date and location. This field
defaults with the doctor that was selected the last time the Filter
was set. |
|
5 |
| Procedures |
Select the option whether or not to
include patients that have Posted/Unposted Procedures for the
selected date. Leave the field blank to include all patients under
the current filter settings. |
|
2 |
Select Patient
With the Select Patient function you can select a patient account that
is not listed on the Summary Patient Check In/Out screen because they
do not have an appointment scheduled. You can use this function when a
patient walks-in to the practice to make a payment on their account. Click
Select Patient in the Action Column and select the patient you
want using the standard Patient
Lookup function.
Refresh
In larger offices, you may have several staff members checking patients
in and out. If you have set up statuses that follow the patient through
your office, the statuses will be changing constantly. You can click Refresh
in the Action Column to redisplay the screen with the most current and
updated information.
Select Status
With the Select Status function you can limit the Summary screen view to
display every patient currently set to a specific status. Click Select
Status in the Action Column and type the status code you want or select
from the Status list. The Summary screen will refresh and display
only the patients that match the selected status code.
Detailed
Patient Check In/Out Screen
The Detailed Patient Check In/Out Screen will be displayed after you select
a patient on the Summary screen. If your practice currently subscribes
to CGM webVERIFY, an Alert message
will appear if the last insurance verification for the selected patient
failed.
If you have selected Pre-Register in the Scheduling
System Integration and you are working with a pre-registered patient,
the only Action Column functions that are available are Print Superbill,
Add a Task and Recalls.
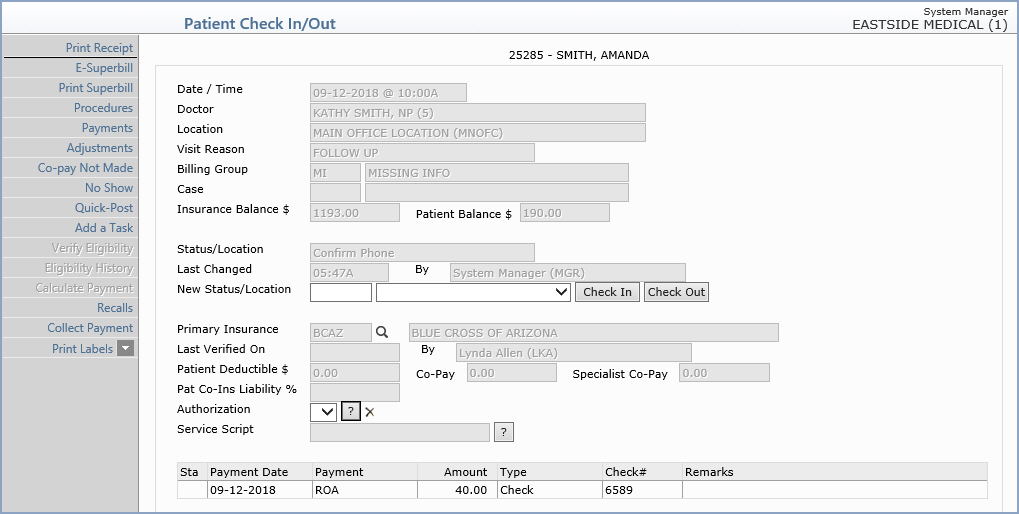
If you selected the patient from the Summary screen, the Patient's Name,
Account Number, and limited appointment information will be displayed,
along with the Status fields and Co-payment and Recv'd on Account payment
sections. You can also Verify Eligibility and view the patient's
Eligibility History if your practice currently subscribes to CGM webVERIFY.
If you used the Select Patient function to choose a patient, an
abbreviated version of the Detailed Patient Check In/Out Screen will be
displayed. Only the Patient Name and Payment Date will be displayed along
with the Co-payment and Recv'd on Account payment sections. This function
was only designed for entering payments from patients that do not show
up in the Summary Patient Check In/Out screen because they do not have
appointments scheduled.
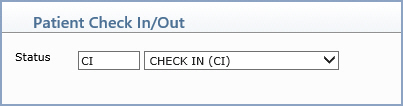
You can assign a New Status/Location to a patient, by clicking Check
In if the patient is checking in, or by clicking Check Out,
if the patient is checking out. These two statuses have their own buttons
since the most common usage to assign a New Status/Location is to either
check the patient in or check the patient out. Using either of these functions
will automatically default the New Status/Location field to the
status code selected in the Patient
Check In/Out Integration screen. You can also select a Status code
from the Status list. After you click Save, the Status/Location,
Last Changed and By fields will be updated.
The Patient Check In/Out function also has the ability to track payments.
Payments can be entered at the same time a New Status/Location is entered.
To enter a payment, enter the payment amount in the Co-Payment Made
or Recv'd on Account field as appropriate, select the Pmt Type,
then enter a Remark if needed. For example, the check number or
type of credit card used. The corresponding payment codes for each of
the Payment Types are stored in the Patient
Check In/Out Integration. If a patient is scheduled with more than
one doctor or at more than one location on the same date, separate payments
can be stored for each appointment.
As each payment is saved, the detailed information is stored in three separate
journals; the Unposted Payment
Journal, the Check In/Out
Payment Journal, and the Check
In/Out Tracking Journal. The payments are stored as Unposted Payments
and should be posted to the patient accounts using the standard Payment
Entry Function in CGM webPRACTICE.
After a patient has been 'Checked Out', you can elect to have them no longer
display in the Summary Patient Check In/Out screen by clearing the Show
Checked Out Appointments on Summary check box in the Patient
Check In/Out Integration function. This allows you to remain focused
only on the patients that have not been processed yet.
Data Field Information
Collect a Payment
Click the Collect Payment
Action Column button to enter the payment information.
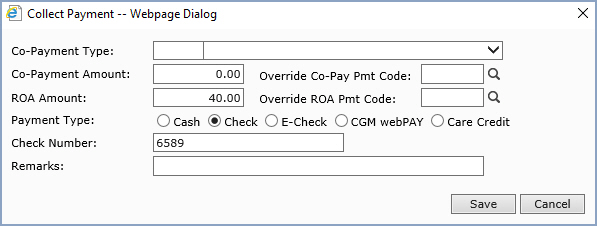
After a payment has been 'Saved', the Detailed Patient
Check In/Out screen will refresh and display the payment information at
the bottom of the screen. If a mistake was made and the wrong Payment
Amount was entered, an incorrect Payment Type was selected, or a typo
was made in the Remark field, you can edit any of the payment information
if needed. Click the payment row at the bottom of the screen.

When the Collect Payment dialog displays, edit the applicable
fields and click Save.
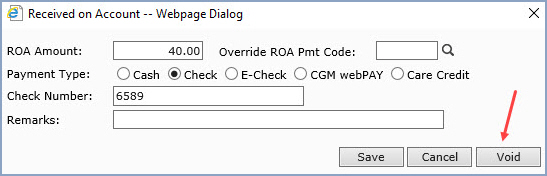
Void
a Payment
If for any reason you need to void the payment, click
the Collect Payment Action Column
button then click Void when the
Collect Payment dialog displays.
A dialog box will display requiring you to enter a Reason for a Void.
Type in a brief reason and click Save.
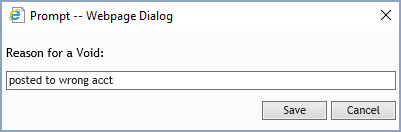
After a payment has been voided, an entry is recorded
in the Check In/Out Payment Journal noting the void and the user that
voided the payment. The Detailed Patient Check In/Out screen will refresh
and display.
Print Receipt
You can also print the patient a receipt directly from the Detailed Patient
Check In/Out screen. You should perform this step last as the Print
Receipt function automatically saves any information entered
in the Detailed Patient Check In/Out screen and returns you to the Summary
Patient Check In/Out screen. Click Print Receipt in the Action
Column.

If you elect not to use the Print Receipt
function, click Save to proceed.
E-Superbill
With the E-Superbill function you can capture charge and coding data. Prior
to using this function you need to create your E-Superbill using the Superbill Wizard function
location on the System, Form Wizards menu. Patients have to be
Registered or you must use Quick Registration to enter E-Superbills.
The procedures for each E-Superbill are saved and can be posted to the
patient's account using the Unposted
Procedures function located on the Transactions menu.
To access the E-Superbill function, click E-Superbill in the Action
Column of the Detailed Patient Check In/Out screen. For security purposes,
if a User has not been given access to the Procedure Entry function within
the Model User Menus function,
they will only be authorized to use the Note function within E-Superbill.
The E-Superbill screen will display and automatically datafill it
with the information for the selected patient, based on the fields you
selected when creating the superbill.
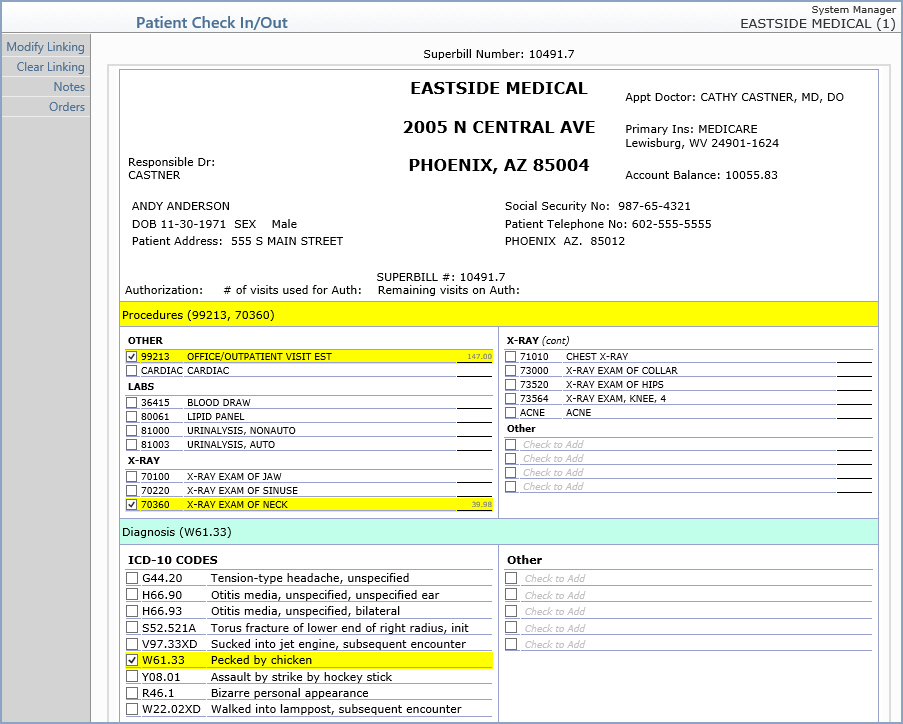
From the main E-Superbill screen, you have the following
functions available:
Select Procedure Codes - To select a procedure code within any
category on the superbill, select the check box next to the code. The
selected codes will be listed in the Procedures Header section in the
order that you select them and they will be highlighted within the superbill
so you can quickly see every code selected.
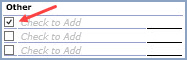
If the code you need is not listed on the superbill, select one of the
check boxes under the Other category.
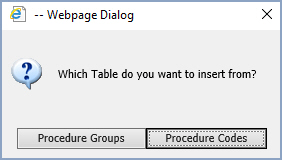
Select which Table you want select the procedure code from.
Depending on which table you selected, type the procedure or procedure
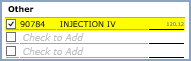
group code you want or click the magnifying glass to search the table.
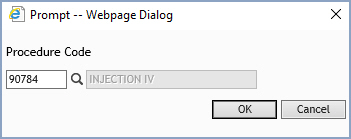
The code will be inserted in the Other section.
If you select a Procedure Group code, the individual procedure codes
contained in the group will not immediately display in the E-Superbill
because they are stored internally. To view the individual codes, you
must first Save the E-Superbill and then re-access it from the
Detailed Patient Check In/Out screen. Each of the codes will be listed
under the Other category.
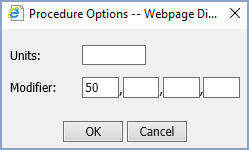
You can add Units and/or Modifiers to a procedure code by
clicking the description of the code. You can type up to seven digits
in the Units field.
If the patient's appointment contains an Authorization, an AUTH
procedure code will automatically be stored as an unposted procedure along
with the other procedures selected.
If the superbill contains a Fee Column, it displays the price for
each selected procedure. The prices will always be based on the current
effective date for the date of service and procedure code entered. If
a date of service does not fall within an applicable procedure code effective
date, the price for the current effective date will be used. If additional
units are entered for any procedure, the new price is calculated and displayed
in the Fee Column. To use the Fee Column, access the Superbill Wizard, select
the superbill, click Procedures in the Action Column, select Options
in the Action Column and select the Show Fee Column check box.
Select Diagnosis Codes - To select a diagnosis code within any
category on the superbill, select the check box next to the code. The
selected codes will be listed in the Diagnosis Header section in the order
that you select them and they will be highlighted within the superbill
so you can quickly see every code selected. The diagnosis codes will be
linked to the procedure codes based on the order you select them.
If the code you need is not listed on the superbill, select one of the
check boxes under the Other category.
Type the diagnosis code you need or click the magnifying glass to search
the table.
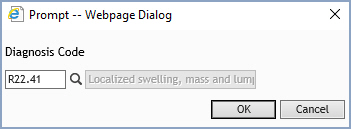
The code will be inserted in the Other section.

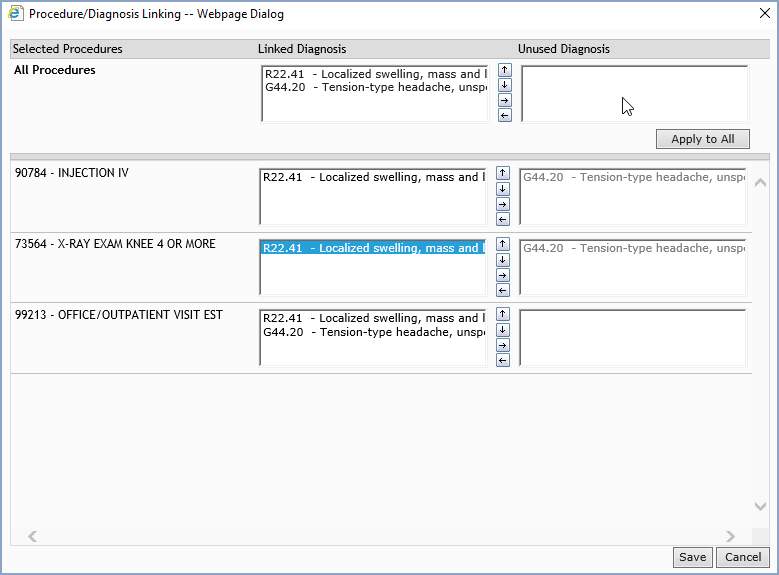
Modify Linking - You can change the order the diagnosis codes
are linked to the procedure codes using this function. After you have
selected all the procedure and diagnosis codes for the superbill, you
can click Modify Linking in the Action Column if you need to change
the linking order. The Procedure/Diagnosis Linking window is separated
into two sections; All Procedures and individual procedures.
You can make changes to the linking and apply them to all the procedure
codes at one time or you can make changes to each individual code as needed.
Every diagnosis code you selected in the E-Superbill will be listed in
the Linked Diagnosis box. The diagnosis at the top of the list
represents the primary diagnosis. To move a diagnosis code you must first
select it by clicking it. Then you can use the directional arrows provided
to make the necessary linking changes.

|
- Click to move the diagnosis
code up one line in the list. |

|
- Click to move the diagnosis
code down one line in the list. |

|
- Click to move a diagnosis
code from the Linked Diagnosis list to the Unused Diagnosis
list. |

|
- Click to move a diagnosis
code from the Unused Diagnosis list to the Linked Diagnosis
list. |
If you make changes in the All Procedures section, you will need
to click Apply to All first and then click Save. After the
changes have been saved, the Modify Linking function will be inactive
in the Action Column. If you need to make any additional changes you must
use the Clear Linking function first, which will re-set the linking
back to the original order when you selected the diagnosis codes in the
E-Superbill.
Clear Linking - You can delete any previous changes made through
the Modify Linking function and re-set the linking back to the
original order you selected the diagnosis codes in the E-Superbill.
Notes - You can add notes for this E-Superbill to provide information
or follow-up instructions to your front office or billing staff.
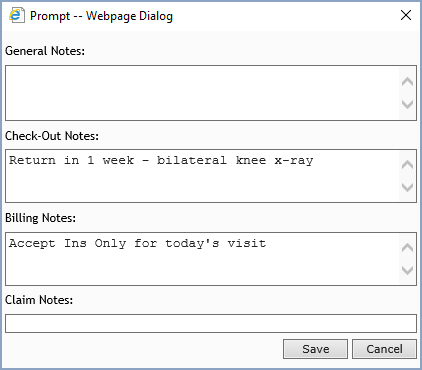
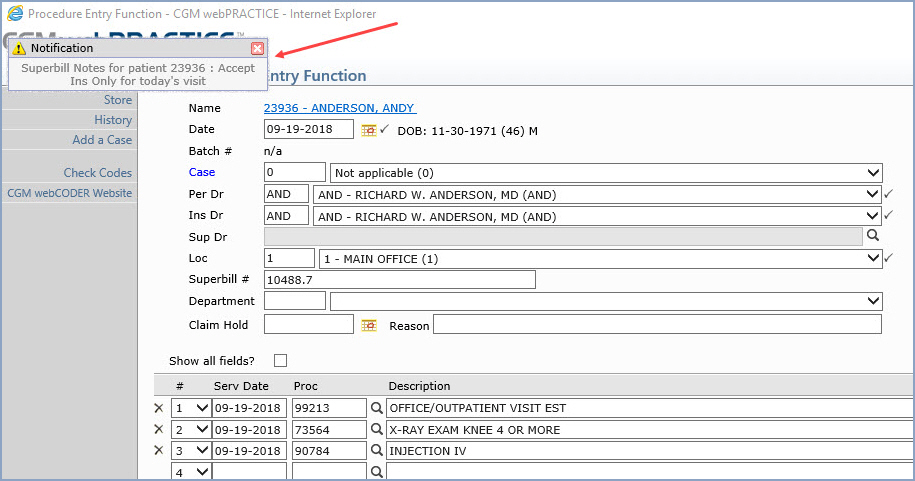
- General Notes display whenever this appointment is accessed in
Patient Check In/Out, Unposted Procedures
and the Procedure Entry Function
- Check Out Notes display in the Patient
Check In/Out function
- Billing Notes display when the E-Superbill charges are accessed
through Unposted Procedures
and the Procedure Entry Function
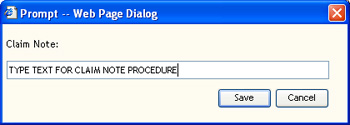
- Claim Notes will automatically store a NOTE procedure in Unposted Procedures along with
the other procedures entered in the E-Superbill and can be up to 70
characters long
The notes also appear when you view the E-Superbill image from
the Patient's Transaction History.
***CGM webCODER Clients only***
If you select the Code
Checks on E-Superbill in Background check box in the CGM
webCODER Integration function, code checks process in the background
for E-Superbills, which eliminates long delays when saving E-Superbills.
There may be some delay between the time the E-Superbill saves and the
CGM webCODER dot appears on the Unposted
Procedures screen, but in most cases this delay is unnoticeable.
Print Superbill
You can print a hard copy of the superbill for the selected patient.
Procedures
You can access Procedure
Entry to post charges for the selected patient.
Payments
You can access Payment Entry
to post payments for the selected patient.
Adjustments
You can access Adjustment
Entry to post adjustments for the selected patient.
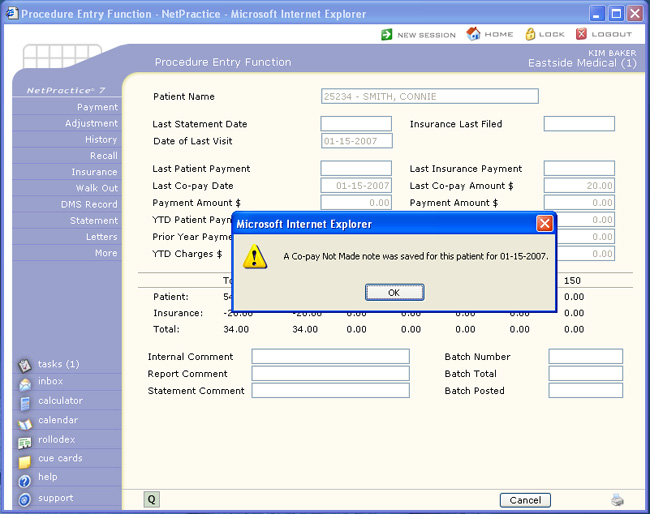
Co-pay Not Made
This function will create an Alert message that a co-payment was not made
by this patient.
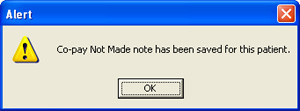
When you post the charges for this date of service to the patient's
account in Procedure Entry,
after you click Save, an alert message will display to inform you
this patient did not make their co-payment for this date of service.
No Show
You can mark a patient as a No Show if they do not show up for their appointment.
For security purposes, a CGM webPRACTICE User will only be allowed to
access this function if they have been given access to the Post No Show
Appointments function within the Model
User Menus function. Prior to using this function you must select
a procedure code for the No Shows field in the Scheduling
System Integration. With this function a No Show transaction will
automatically be posted to the patient's account using the superbill number
assigned to the appointment, if applicable. The patient's appointment
inquiry screen will also be updated, indicating this appointment was a
No Show. After a patient's appointment has been marked as a No Show, it
will no longer appear on the Check In/Out Summary screen. The only way
to un-do this action is to delete the appointment and re-enter it.
Quick-Post
You can quickly access the Quick-Post
function available on the Transactions menus. With this function
you can quickly post a single charge to the patient's account. Quick-Post
will use the performing doctor, insurance doctor, and location code selected
for the appointment. If you exit Patient Check In/Out and re-access it
later, you will have to re-enter the batch number, if applicable. For
more information on Quick-Post, see Quick-Post
located on the Transactions menu.
For security purposes, a CGM webPRACTICE User will only be allowed to access
this function if they have been given access to the Quick-Post function
within the Model User Menus
function.
Add a Task
You can add a task for the currently selected patient. The Patient
field will automatically default with the patient's account number.

Verify
Eligibility
If your practice has a current CGM webVERIFY subscription this function
will be available in the Action Column. With this function you can verify
the patient's insurance coverage for the primary insurance policy listed
on the Detailed Patient Check In/Out screen.
Eligibility
History
If your practice has a current CGM webVERIFY subscription this function
will be available in the Action Column. With this function you can view
the history of the verify eligibility requests performed for the selected
patient's primary insurance policy listed on the Detailed Patient Check
In/Out screen.
