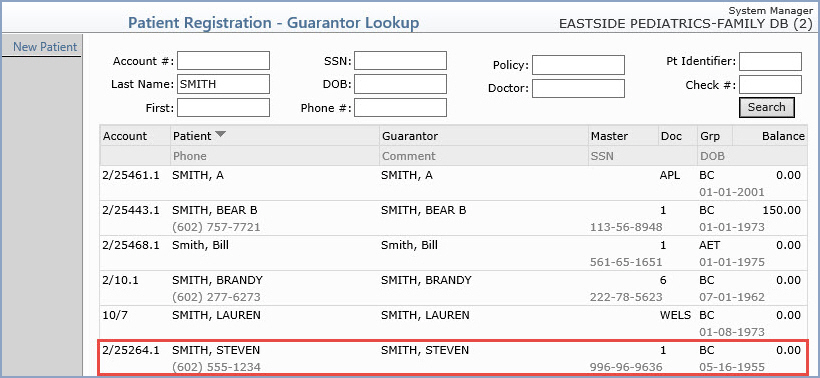
![]()
| Prompt | Response | Req | Len |
|---|---|---|---|
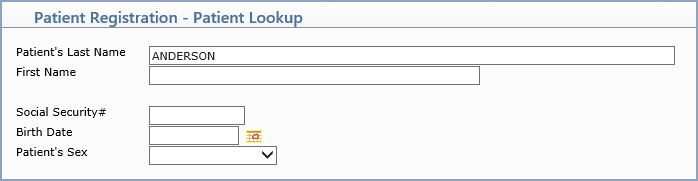
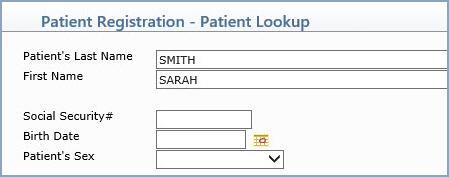
| Patient's Last Name | Type at least the first letter of the patients last name. | 60 | |
| First Name | Type at least the first letter of the patients first name to further specify the search criteria, or leave the field blank. | 35 | |
| Social Security# | Type the patients nine digit social security number with or without dashes. | 11 | |
| Birth Date | Type the patients birth date in a MM-DD-CCYY format or click the calendar icon to select a date. | 10 | |
| Patient's Sex | Select the applicable option to indicate the sex of the patient to further specify the search criteria, or leave blank. | 1 |

| Prompt | Response | Req | Len |
|---|---|---|---|
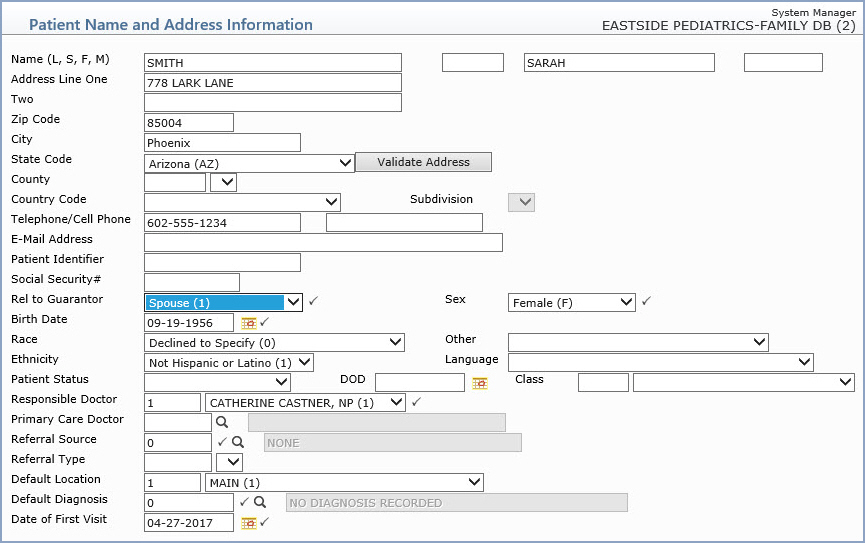
| Last Name | Type the patient's last name. |  |
60 |
| Suffix | Enter the patient's Suffix. | 10 | |
| First Name | Type the patient's first name. | 35 | |
| Middle Name | Type the patient's middle name. | 25 | |
| Address Line One | Type the address for the patient. | 35 | |
| Address Line Two | Type any additional address information. | 35 | |
| Zip Code | Type the five digit zip code or the zip+four. If you type the zip+four, the dash is automatically inserted before the last four digits. | 10 | |
| City | The city automatically populates based on the Zip Code entered, or you can type the name of the city. | 20 | |
| State Code | The state automatically populates based
on the Zip Code entered, or you can type the state code or select
from the drop-down list. Click Validate Address to convert the address entered into the standard United States Postal Service format. The Address Line One will be converted; the information in Address Line Two (if standard) moves up to the end of Address Line One; the Zip Code is converted to Zip+4 and the City and State are converted based on the Zip Code. If a standard match cannot be found, messages display to explain. You can still choose to override what is converted by Validate Address by typing in any address information you choose. |
3 | |
| County | Select the county code from the County list. | 5 | |
| Country Code | Type the country code or select from the Country list. | 2 | |
| Subdivision | 2 | ||
| Telephone | Type the patient's telephone number. | 20 | |
| Cell Phone | Type the patient's cell phone number. | 20 | |
| E-Mail Address | Type the patient's e-mail address. | 50 | |
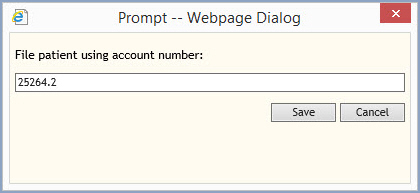
| Patient Identifier | Type an optional practice-defined identification number or alternate name to search for this patient when using Patient Look-up. For example, a patient's official name on his insurance is William, but the patient only goes by 'Bud'. Type 'Bud' in this field so this patient can be located with Patient Look-up. | 20 | |
| Social Security# | Type the patient's nine digit social security number with or without dashes. | 11 | |
| Rel to Guarantor | Select the code for the patient's relationship
to the guarantor from the Relationship list. If you select '0 - Same' for the relationship, the patient's name, address, social security number, and e-mail address will automatically be stored in the Guarantor's information. If you make changes to any of these fields on the Patient Information screen, the Guarantor Information screen will automatically be updated. If you make changes to any of these fields on the Guarantor Information screen the Patient Information screen will automatically be updated. If you select a relationship other than 0 Same and you make changes to any of these fields in the Patient Information screen, CGM webPRACTICE will ask if the Guarantor information should be updated. If you select a relationship other than 0 Same and you make changes to any of these fields in the Guarantor Information screen, CGM webPRACTICE will ask if the Patient information should be updated. |
|
2 |
| Sex | Select the applicable option to indicate the sex of the patient. | |
1 |
| Birth Date | Type the patient's birth date in a MM-DD-CCYY format or click the calendar icon to select a date. The century will automatically be set to '1900' if only two digits are entered for the year and the year is later than the current year. For example, 06-25-58. | |
10 |
| Race | Select the applicable race from the list. This field is currently used for UDS reporting by Community Health Centers. | 1 | |
| Other | Select an additional race for the patient, if applicable. | 1 | |
| Ethnicity | Select the applicable ethnicity from the list. This field is currenlty used for UDS reporting by CHCs. | 1 | |
| Language | Type the code you want or select from
the Language list. The available selections in the drop-down list are maintained in the Language Code Table. |
3 | |
| Patient Status | Select the applicable patient status
code from the Status list. If the patient's Status is changed to Deceased, CGM webPRACTICE automatically deletes all future appointments and recalls. |
2 | |
| DOD | 10 | ||
| Class | Type the code you want or select from the Class list. The selection list includes items from the Patient Class Table. | 3 | |
| Responsible Doctor | Type the code you want or click the magnifying glass to search the table. | |
4 |
| Primary Care Doctor | Type the code you want or click the magnifying glass to search the table. | 6 | |
| Referral Source | Type the code you want or click the magnifying glass to search the table. | |
6 |
| Referral Type | Type the code you want or select from the Referral Type list. The selection list includes the referral source codes that have been marked as a Referral Type in the Referral Source Table. | 6 | |
| Default Location | Type the code you want as the patient's default location or select from the Location list. | 6 | |
| Default Diagnosis | Type the code you want as the patient's
primary, chronic diagnosis code or click the magnifying glass
to search the table. If you do not want to store an ongoing primary diagnosis for this patient, type '0' for 'No Diagnosis Recorded'. The diagnosis code stored in this field is used for reporting purposes and defaults in the 'Diag 1' field in the Procedure Entry Function unless you have the 'Default DX's at Chg Entry' check box selected in CGM webPRACTICE Default Values (System, Database Maintenance Menu). If you have this check box selected, then it overrides this 'Default Diagnosis' field and it places the last posted diagnosis code in the 'Diag 1' field in the Procedure Entry Function. |
|
10 |
| Date of First Visit | Type the date you want or click the
calendar icon to select a date. This field defaults to the date
stored in the Date of First Visit
field in the CGM
webPRACTICE Default Values function. If no date is stored
there, then it defaults the current date (the date the patient
is pre-registered or registered).
In addition, if you schedule any future appointments for the pre-registered patient account (prior to registering the account), the future appointment date overrides any previous default date. The date stored in this field may also be used as the default date for the Ins Effective Date in the patient's Insurance Policy Information screen in Patient Registration - if you selected the Date of First Visit option for the Ins Effective Date field in the Patient's Insurance Information section of the CGM webPRACTICE Default Values function. |
|
10 |
| Prompt | Response | Req | Len |
|---|---|---|---|
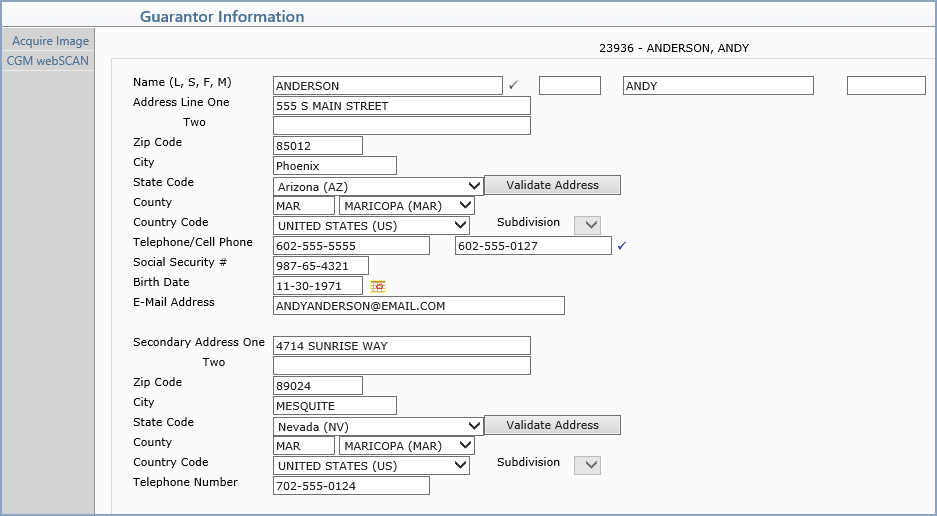
| Last Name | Type the guarantor's last name. | |
60 |
| Suffix | Type the Guarantor's suffix. It may be up to 10 characters. | 10 | |
| First Name | Type the guarantor's first name. | 35 | |
| Middle Name | Type the guarantor's middle name. | 25 | |
| Address Line One | This address is used for the mailing
address for the patient's statement unless the 'Primary Address'
field in the Billing Information screen is cleared. If you selected '0 - Same' in the 'Rel to Guarantor' field in the Patient Name and Address Information screen, the patient's name, address, social security number, and e-mail address will default in the Guarantor Information fields. You can edit the guarantor's address if it is different from the address displayed. If you selected '0 - Same' in the 'Rel to Guarantor' field in the Patient Name and Address Information screen and if you make changes to any of these fields on the Patient Information screen, the Guarantor Information screen will automatically be updated. If you make changes to any of these fields on the Guarantor Information screen the Patient Information screen will automatically be updated. If you select a relationship other than 0 Same and you make changes to any of these fields in the Patient Information screen, CGM webPRACTICE will ask if the Guarantor information should be updated. If you make changes to any of these fields in the Guarantor Information screen, CGM webPRACTICE will ask if the Patient information should be updated. |
35 | |
| Address Line Two | Type any additional secondary address information. | 35 | |
| Zip Code | Type the five digit zip code or the zip+four. If you type the zip+four, the dash is automatically inserted before the last four digits. | 10 | |
| City | The city automatically populates based on the Zip Code entered, or you can type the name of the city. | 15 | |
| State Code | The state automatically populates based
on the Zip Code entered, or you can type the state code or select
from the drop-down list. Click Validate Address to convert the address entered into the standard United States Postal Service format. The Address Line One will be converted; the information in Address Line Two (if standard) moves up to the end of Address Line One; the Zip Code is converted to Zip+4 and the City and State are converted based on the Zip Code. If a standard match cannot be found, messages display to explain. You can still choose to override what is converted by Validate Address by typing in any address information you choose. |
3 | |
| County | Select the county code from the County list. | 5 | |
| Country Code | Type the country code or select from the Country list. | 2 | |
| Subdivision | 3 | ||
| Telephone Number | Type the phone number for the guarantor. | 20 | |
| Social Security # | Type the guarantor's nine digit social security number with or without dashes. | 11 | |
| Birth Date | Type the guarantor's birth date in a MM-DD-CCYY format or click the calendar icon to select a date. The century will automatically be set to '1900' if only two digits are entered for the year and the year is later than the current year. For example, 06-25-58. | 10 | |
| E-Mail Address | Type the guarantor's e-mail address. | 40 | |
| Secondary Address One | Type any secondary address information. For example if the patient spends six months of the year at his primary residence and six months of the year at a vacation residence, you can type the address of the vacation residence. You would then clear the Primary Address check box on the patient's Billing Information screen and the statements would then go to the patient at this vacation residence address. |
35 | |
| Two | Type any additional address information. | 35 | |
| Zip Code | Type the five digit zip code or the zip+four for the secondary address. If you type the zip+four, the dash is automatically inserted before the last four digits. | 10 | |
| City | The city automatically populates based on the Zip Code entered, or you can type the name of the city for the secondary address. | 15 | |
| State Code | The state automatically populates based
on the Zip Code entered, or you can type the state code or select
from the drop-down list for the secondary address. Click Validate Address to convert the address entered into the standard United States Postal Service format. The Address Line One will be converted; the information in Address Line Two (if standard) moves up to the end of Address Line One; the Zip Code is converted to Zip+4 and the City and State are converted based on the Zip Code. If a standard match cannot be found, messages display to explain. You can still choose to override what is converted by Validate Address by typing in any address information you choose. |
3 | |
| County | Select the county code from the County list. | 5 | |
| Country Code | Type the country code or select from the Country list. | 2 | |
| Subdivision | 10 | ||
| Telephone Number | Type the phone number for the secondary address. | 20 |

| Prompt | Response | Req | Len |
|---|---|---|---|
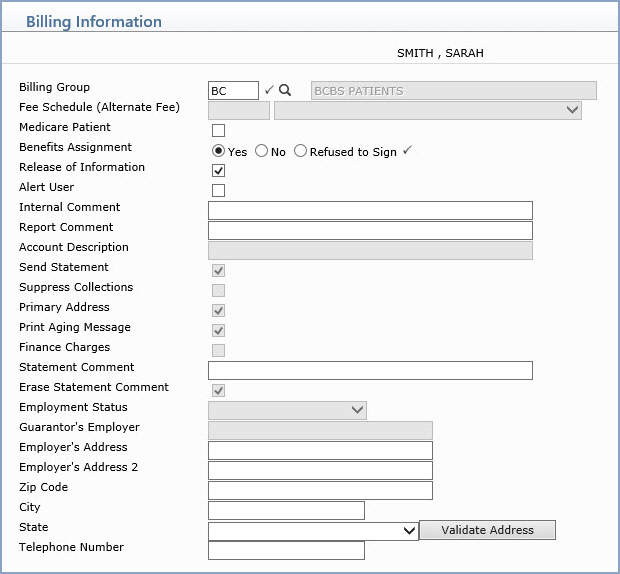
| Billing Group | Type the code you want or click the
magnifying glass to search the table. If the Billing Type for your database is set up as 'Family' or 'Linking' and you change the Billing Group for any of the family members, you will be given the option to update the Billing Group on any or all of the other family members. |
|
3 |
| Fee Schedule (Alternate Fee) | Type the fee schedule code you want
or select from the Fee Schedule list. This is required if you store any Alternate Fees in this Fee Schedule. The only way the Alternate Fees will default in the Chg Amt field in the Procedure Entry Function is if the Fee Schedule is entered here. |
5 | |
| Medicare Patient | If this patient has Medicare, select this check box. This field is used to determine the proper 'accept assignment' setting when posting procedures. For more information, see the Accept Assignment Protocol help section under Introduction, System Processes. | |
1 |
| Benefits Assignment | If you have the patient's signature on file, select this radio button. If this radio button is selected, 'Signature on File' prints in Box 12 and 13 of the CMS-1500 form (and its electronic equivalent). | |
1 |
| Release of Information | If you have the patient's signature on file to authorize the release of medical information to other organizations, select this check box. | 1 | |
| Alert User | If you want the Internal Comment to
appear every time this patient's account is accessed, select this
check box. If a DMS Alert, HIPAA, or Family Income record containing a Review Date exists on the patient account, the Alert User field will be overridden and the Alerts window will automatically appear each time the patient's account is accessed. |
1 | |
| Internal Comment | Type any comment text you want to display whenever this patient's account is accessed using Patient Look-up. | 45 | |
| Report Comment | Type any comment text you want to print whenever this patient's account is printed on a report. | 45 | |
| Account Description | Type an additional account description, if applicable. | 45 | |
| Send Statement | If you want this patient to receive a statement, select this check box. | |
1 |
| Suppress Collections | If you want to suppress this patient account from entering the collection process, select this check box. | |
1 |
| Primary Address | If you want to use the guarantor's primary address for all correspondence, select this check box. | 1 | |
| Print Aging Message | If you want to print aging messages on this patient's statement, select this check box. | |
1 |
| Finance Charges | If you want finance charges to generate
for this account, select this check box. If you select this check box, it can still be overridden by selecting the Suppress Finance Charges check box in the Billing Group Code Table for the patient's Billing Group. The Service Charge Control File (System, Database Maintenance Menu) must also be completed for finance charges to be added to the account. |
|
1 |
| Statement Comment | Type any comment text you want to appear on this patient's statement. | 45 | |
| Erase Statement Comment | If you want to erase the statement comment after it has printed, select this check box. | |
1 |
| Employment Status | Select the patient's employment status from the Employment Status List. | 1 | |
| Guarantor's Employer | Type the guarantor's employer. | 30 | |
| Employer's Address | Type the guarantor's employer's address. | 30 | |
| Employer's Address 2 | Type the guarantor's employer's address 2. | 30 | |
| Zip Code | Type the zip for the guarantor's employer's address. | 30 | |
| City | The guarantor's employer's city automatically populates based on the Zip Code entered, or you can type the name of the city. | 20 | |
| State | The guarantor's employer's state automatically
populates based on the Zip Code entered, or you can type the state
code or select from the drop-down list. Click Validate Address to convert the address entered into the standard United States Postal Service format. The Address Line One will be converted; the information in Address Line Two (if standard) moves up to the end of Address Line One; the Zip Code is converted to Zip+4 and the City and State are converted based on the Zip Code. If a standard match cannot be found, messages display to explain. You can still choose to override what is converted by Validate Address by typing in any address information you choose. |
3 | |
| Telephone Number | Type the telephone number of the guarantor's employer. | 20 |
| Prompt | Response | Req | Len |
|---|---|---|---|
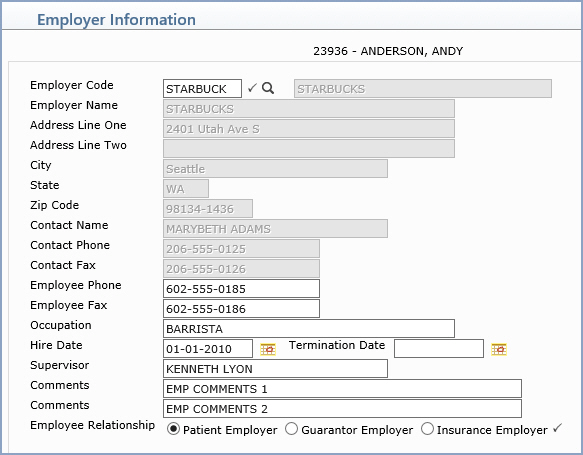
| Employer Code | Type the code you want or click the magnifying glass to search the table. | |
8 |
| Employer Name | This field is informational only and reflects the employer's name as it is stored in the Employer Code Table. | 40 | |
| Address Line One | This field is informational only and reflects the employer's address as it is stored in the Employer Code Table. | 40 | |
| Address Line Two | This field is informational only and reflects any additional address information for the employer as it is stored in the Employer Code Table. | 40 | |
| City | This field is informational only and reflects the employer's city as it is stored in the Employer Code Table. | 30 | |
| State | This field is informational only and reflects the employer's state as it is stored in the Employer Code Table. | 3 | |
| Zip Code | This field is informational only and reflects the employer's zip code as it is stored in the Employer Code Table. | 10 | |
| Contact Name | This field is informational only and reflects the contact name for the employer as it is stored in the Employer Code Table. | 30 | |
| Contact Phone | This field is informational only and reflects the phone number for the contact person for the employer as it is stored in the Employer Code Table. | 20 | |
| Contact Fax | This field is informational only and reflects the fax number for the contact person for the employer as it is stored in the Employer Code Table. | 20 | |
| Employee Phone | Type the employee's work telephone number and extension. | 20 | |
| Employee Fax | Type the employee's work fax number. | 20 | |
| Occupation | Type the employee's occupation. | 40 | |
| Hire Date | Type the date the employee began working for this employer or click the calendar icon to select a date. | 10 | |
| Termination Date | Type the date the employee was terminated from this employer, if applicable, or click the calendar icon to select a date. | 10 | |
| Supervisor | Type the name of the employee's supervisor. | 30 | |
| Comments | Type any applicable comment for this employer record. | 50 | |
| Comments | Type any additional applicable comment for this employer record. | 50 | |
| Employee Relationship | Select the option to indicate if this is the patient's employer, the guarantor's employer or the insured's employer. | |
1 |
| Prompt | Response | Req | Len |
|---|---|---|---|
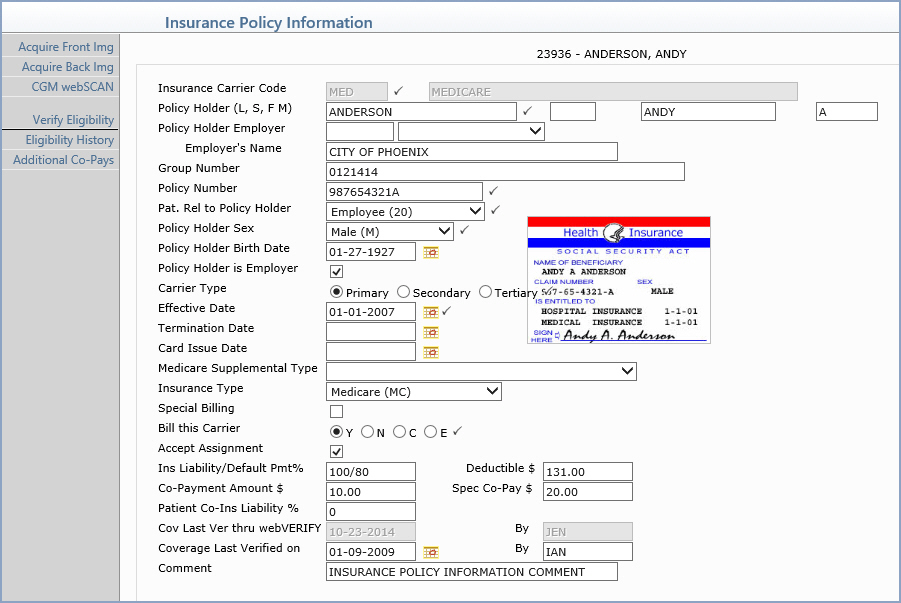
| Insurance Carrier Code | Type the code you want or click the
magnifying glass to search the table. NOTE: You cannot edit or delete this code if claims have been submitted to this carrier. You have to terminate this carrier instead. You cannot edit or delete this code if this carrier is tied to a case. You must remove the carrier from the case and as long as there are no claims submitted for this carrier, you can edit or delete the code. |
|
5 |
| Policy Holder Last Name | Type the policy holder's last name. NOTE: If Same is selected for the Rel to Guarantor field on the Patient Name and Address Information screen, but the policy holder's name differs from the patient name, an alert message displays. |
|
60 |
| PolicyHolder's Suffix | 10 | ||
| PolicyHolder's First Name | Type the policy holder's first name. | 35 | |
| Policy Holder's Middle Name | Type the policy holder's middle name. | 25 | |
| Policy Holder Employer | Type the employer code you want or select from the Employer list. This list pulls from the employer information stored in the patient's Employers DMS record. | 6 | |
| Employer's Name | If you do not have the Employers information completed on this account, you can still type the name of the employer or any additional employer information. | 40 | |
| Group Number | Type the group number for this policy. | 50 | |
| Policy Number | Type the patient's policy number for
this insurance carrier.
If you selected the Default Policy with SSN check box in the Patient's Insurance Information section of the CGM webPRACTICE Default Values function and Rel to Guarantor = Self: the policy number defaults to the patient's SSN, otherwise the policy number defaults to the guarantor's SSN. If the Policy # Format field is completed in the Insurance Carrier table for this carrier, then the policy number entered here must match that format, otherwise an alert message displays. For more information, see Maintain Insurance Carriers. |
|
20 |
| Pat. Rel to Policy Holder | Select the patient's relation to the policy holder. | |
2 |
| Policy Holder Sex | Select the option to indicate the policy holder's sex. | |
1 |
| Policy Holder Birth Date | Type the policy holder's birth date in the format of MM-DD-YYYY or click the calendar icon to select a date. | 10 | |
| Policy Holder is Employer | If the policy holder is the patient's
employer, select this check box. If you select this check box,
the policy holder's employer information will be sent in the electronic
insurance claim file instead of the policy holder's name. For
example, if the claim is for a worker's compensation case, the
employer is actually the policy holder and needs to be reported
on the claim. NOTE: If you select this check box, but Same is selected for the Rel to Guarantor field on the Patient Name and Address Information screen, an alert message displays. |
1 | |
| PolicyPrimaryCarrier | Select the option to indicate the carrier type for this policy. | |
1 |
| Effective Date | Type the effective date of the policy
or click the calendar icon to select a date.
This field will default to the date option selected for the Ins Effective Date field in the Patient's Insurance Information section of the CGM webPRACTICE Default Values function. The date stored in the Date of First Visit field on the Patient Name and Address screen may also be used as the default date for the Ins Effective Date in the patient's Insurance Policy Information screen in Patient Registration or in Quick-Register - if you selected the Date of First Visit option for the Ins Effective Date field in the Patient's Insurance Information section of the CGM webPRACTICE Default Values function. |
|
10 |
| Termination Date | Type the termination date for this policy
or click the calendar icon to select a date. If you enter a termination date for this carrier, CGM webPRACTICE checks to see if any charges were filed to this carrier after the termination date. If there were, a message displays asking if you want to deny those charges. If you select Yes, the charges that were filed to this carrier after the termination date are automatically denied. The patient's insurance ledger is marked and the charges are moved either to the patient balance or remain in the insurance balance to be billed to the appropriate subsequent carrier. If this policy is for a secondary insurance carrier and you want the policy information to still print on the insurance claim for the primary insurance carrier, type the same date in the Termination Date field that exists in the Effective Date field. If you do not want the secondary policy information to print on the insurance claim for the primary insurance carrier, you must make the termination date at least one day later than the effective date. |
10 | |
| Medicare Supplemental Type | This field is required only if this policy is for an Electronic Secondary Medicare carrier. Select the type of policy from the Insurance Type Code list. This field is required by Medicare. If you do not select a type from the list, the claim is automatically sent with 12 - Working Aged Beneficiary or Spouse with Plan. | 2 | |
| Insurance Type | This field is required only if the policy is Medicare, Medicaid, or commerical Medicare | 2 | |
| Special Billing | If this policy should only be billed for certain Cases, select this check box. | 1 | |
| Bill this Carrier | Select the billing option you want to
use for this policy when creating insurance claims. Y - Yes, create an insurance claim for all procedures that have accounting dates falling within the effective and termination dates for this policy and store entries for each procedure in the insurance ledger showing all activity. N - No, do not create an insurance claim for any procedures for this policy. C - Courtesy, create an insurance claim for all procedures that have accounting dates falling within the effective and termination dates for this policy but do not store any activity in the insurance ledger. E - Electronic, this option is for Medigap or Crossover secondary insurance carriers, when the primary carrier automatically forwards the insurance claim electronically to the secondary carrier. This option functions the same as selecting Yes, BUT AN ACTUAL INSURANCE CLAIM IS NOT CREATED IN EITHER THE ELECTRONIC OR PAPER CLAIM FILE. When a Secondary policy is added to a patient account, the Bill this Carrier option is automatically set to E, IF the secondary Insurance Carrier code has a Medigap number entered in the Insurance Carrier Table and ONLY IF the primary carrier on the patient's account is Medicare. Note: The Primary Insurance Default check box must be selected in System, Database Maintenance Menu, CGM webPRACTICE Default Values, otherwise this functionality will not work. |
|
1 |
| Accept Assignment | If you want to accept assignment for this carrier for this patient, select this check box. There are other fields within CGM webPRACTICE that can override this accept assignment setting. For additional information see the Accept Assignment Protocol help section under Introduction, System Processes. | |
2 |
| Ins Liability/Default Pmt% | Type the insurance liability percentage
followed by a forward slash '/' and then the default payment percentage.
This field defaults with the value entered for the Liability/Default
Pmt field in the Insurance Carrier Table. This is a two-part question. The Ins Liability determines what portion of a procedure should go in the insurance balance. If the entire balance is to remain in the insurance balance until the insurance pays, then the response should be 100. If you are collecting a portion at time of service, the entry should be the portion that will remain in insurance balance. For example: if you are collecting 20% up front, the liability will be 80. The Default Pmt% is what percentage the carrier actually pays. These two responses should be separated by a '/'. For example, if this carrier was Medicare, and you do not collect any money at the time of visit, your entry should be 100/80. This is the default response for all Medicare patients, thus maintaining consistency and eliminating errors. |
10 | |
| Deductible $ | Type the deductible amount for this policy. | 10 | |
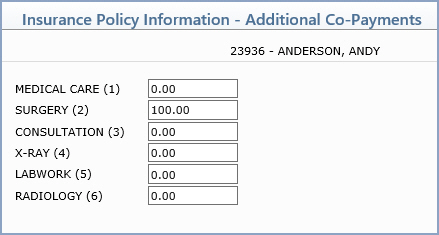
| Co-Payment Amount $ | Type the patient's co-payment amount for this policy, if applicable. This amount displays in the Copay field in the Insurance sections on the Patient Summary screen with the Specialist Co-pay amount in Co-Payment/Specialist Co-payment format. 20.00/35.00, for example. This amount also defaults in Patient Check In/Out, depending on the doctor the patient is scheduled with. Click Additional Co-Pays in the Action Column to add co-pay information for specific types of service. | 10 | |
| Spec Co-Pay $ | Type the patient's co-payment amount for specialists under this policy, if applicable. This amount displays in the Copay field in the Insurance sections on the Patient Summary screen with the standard Co-pay amount in Co-Payment/ Specialist Co-payment format. 20.00/35.00, for example. This amount also defaults in Patient Check In/Out, depending on the doctor the patient is scheduled with. Click Additional Co-Pays in the Action Column to add co-pay information for specific types of service. | 10 | |
| Patient Co-Ins Liability % | Type the patient co-insurance liability percentage. | 10 | |
| Cov Last Ver thru CGM webVERIFY | If your practice subscribes to CGM webVERIFY, the date this policy's coverage was last verified on will display. If not, type the date you last verified coverage or click the calendar icon to select a date. | 10 | |
| Policy Coverage Verified With CGM webVERIFY By | This field is informational only and reflects the user code of the person who last verified this policy - if your practice subscribes to CGM webVERIFY. | 10 | |
| Coverage Last Verified on | Type the date to indicate when coverage was last verified with this carrier for this patient, or click the calendar icon to select a date. | 10 | |
| Policy Coverage Last Verified By | This field is informational only and reflects the user code of the person who was logged in the last time a Coverage Last Verified on date was added or changed. | 10 | |
| Comment | Type any applicable comment for this policy. This field is strictly informational and does not populate into any other function or print anywhere. | 40 |
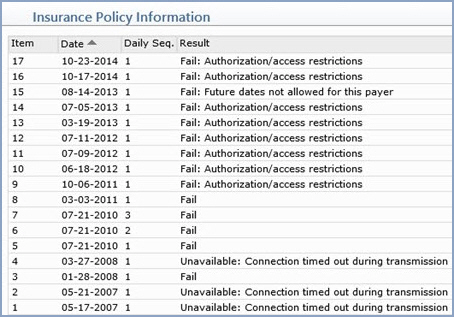
If your practice has a current CGM webVERIFY subscription, click Eligibility
History to view the history of the verify eligibility requests performed
for the selected insurance policy.


Copyright and Trademark Notice. Copyright © 2019 CompuGroup Medical, Inc. CGM®, CompuGroup Medical® and the CGM logo are registered trademarks and CGM webPRACTICE™ and CGM webTOOLS™ are trademarks of CompuGroup Medical AG in the United States and/or other countries. Any rights not expressly granted herein are reserved.
